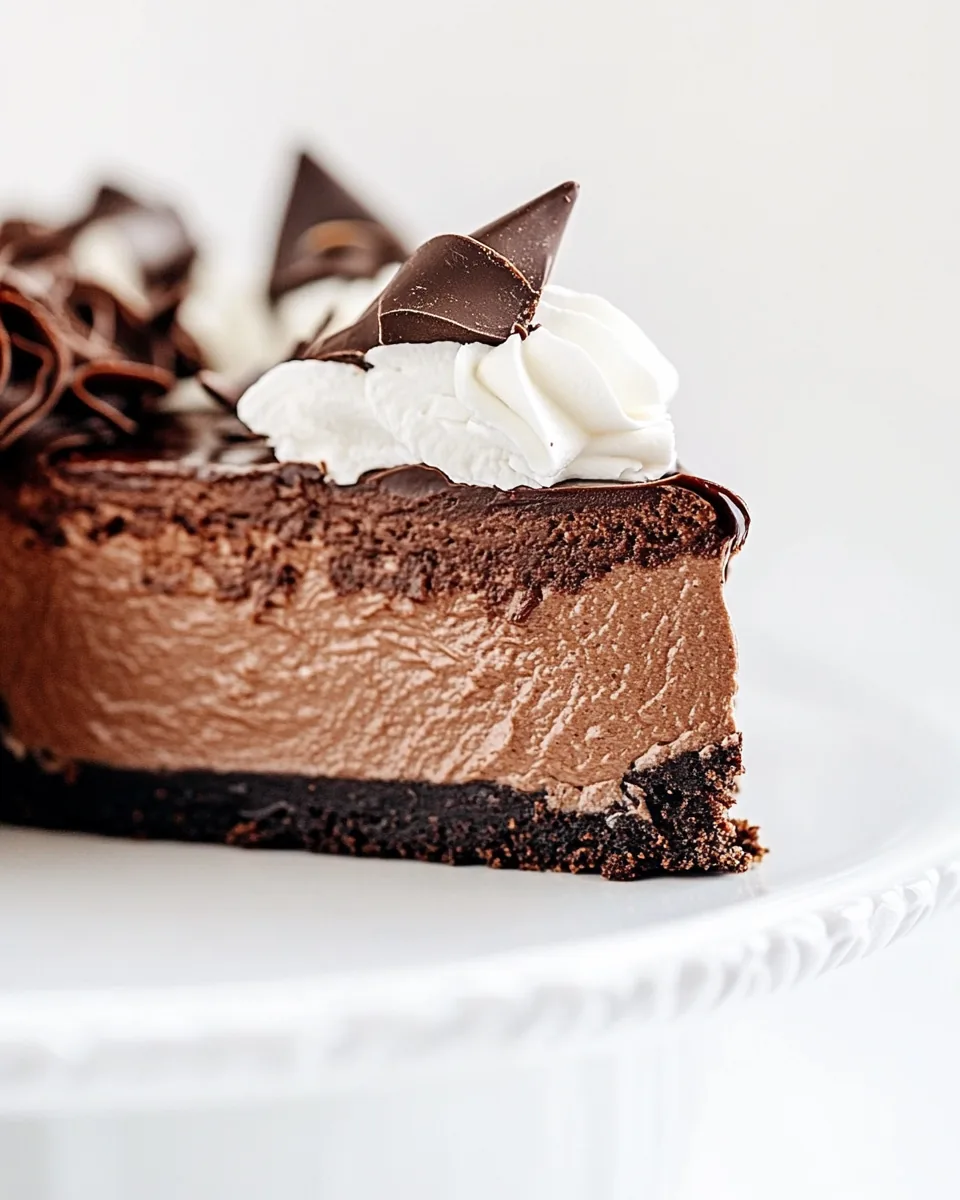
Chocolate Cheesecake
The moment I think of dessert, my mind immediately drifts to the rich and creamy Chocolate Cheesecake. There’s something about the combination of flavors and textures that feels like a warm hug on a plate. I remember the first time I attempted to make one; the anticipation was almost unbearable. The aroma of melting chocolate, the smoothness of the cream cheese, and the crumbly crust somehow filled the entire kitchen with an unforgettable scent. It was a sweet symphony, and I couldn’t help but be excited about sharing that experience with friends and family. Every slice of this decadent cheesecake brings back those memories, and I can’t help but recreate it every chance I get. It’s not just dessert; it’s a way to connect, share stories, and create lasting memories around the table.
Recipe Snapshot
1 hr 35 mins
30 mins
65 mins
Hard
360 kcal
6 g
Gluten-Free, Low FODMAP
23 g
9-inch Springform Pan, Aluminum Foil, 9 x 13-inch Baking Pan
Why This Chocolate Cheesecake Is a Winner
Decadent Flavor
The first reason why I adore Chocolate Cheesecake is its decadent flavor profile. Each bite is a balance of rich chocolate and creamy texture, making it utterly irresistible. It’s the perfect way to satisfy that sweet tooth without being overwhelming.
Texture Perfection
The smooth and velvety texture is simply divine. The cheesecake is dense yet fluffy, thanks to the careful mixing of ingredients. Each slice feels like a luxurious treat, making it ideal for special occasions or a simple indulgence.
Versatile Serving Options
Another reason to love this recipe is its versatility. Whether you enjoy it plain, topped with fresh berries, or drizzled with chocolate ganache, there’s a way for everyone to enjoy it. You can even serve it at gatherings or enjoy a quiet slice at home.
Perfect for Any Occasion
The versatility of Chocolate Cheesecake means it’s perfect for any occasion—birthdays, anniversaries, or just a cozy night in. It’s always a crowd-pleaser, making it my go-to dessert whenever I want to impress.
Easy to Prepare
You might be surprised to know how easy it is to prepare this cheesecake. With a few straightforward steps and ingredients, you can create a dessert that looks and tastes like it came from a gourmet bakery.
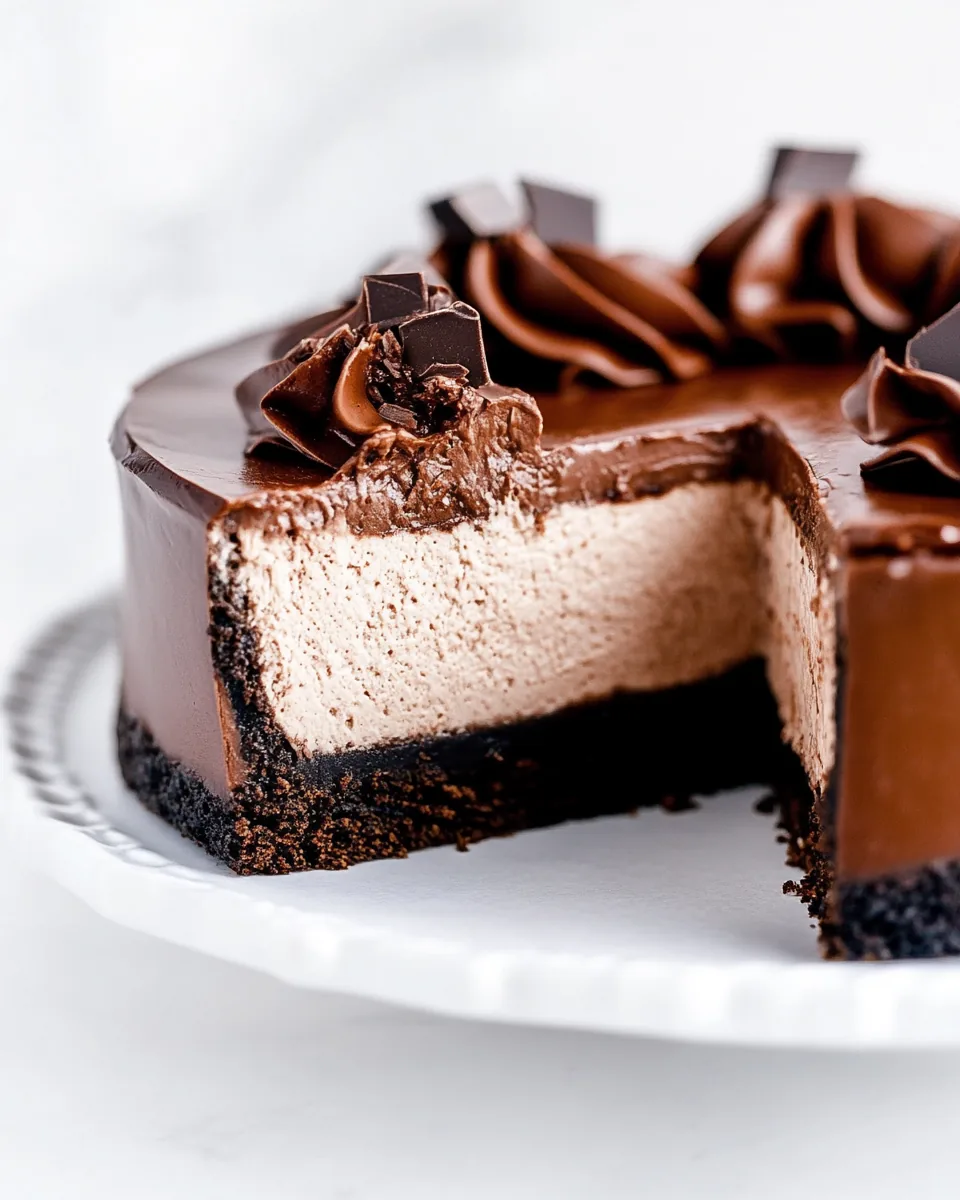
Memorable Presentation
Finally, the presentation is simply stunning. A beautifully decorated Chocolate Cheesecake can steal the show on any dessert table. When topped with whipped cream or a glossy ganache, it’s a feast for the eyes as much as for the palate.
What You Need for Chocolate Cheesecake
When it comes to baking, quality ingredients can make all the difference. For this Chocolate Cheesecake, I’ve chosen classic ingredients that work harmoniously to create that signature flavor and texture. The star players include rich chocolate, creamy cream cheese, and a crunchy crust that perfectly complements the smooth filling.
- 1-3/4 cups Oreo crumbs or other chocolate cookie sandwich: The base of our cheesecake, providing a sweet and chocolatey crunch.
- 2 tablespoons granulated sugar: A touch of sweetness to enhance the flavor profile of the crust.
- 4 tablespoons unsalted butter, melted: This helps bind the crust together for a solid base.
- 4 (8-ounce) packages cream cheese, full-fat, room temperature: Provides the rich, creamy texture that makes the cheesecake so indulgent.
- 1 (12-ounce) package semi-sweet chocolate chips: Adds a deep chocolate flavor that is simply divine.
- 1-1/2 cups granulated sugar: Sweetens the cheesecake filling to perfection.
- 4 tablespoons cocoa powder: Enhances the chocolate flavor without adding extra sweetness.
- 4 large eggs: Provides structure and helps the cheesecake to set.
- 1/2 teaspoon salt: Balances the sweetness and enhances flavor.
- 1/2 tablespoon vanilla extract: A complementary flavor that rounds out the sweetness.
- 1 cup chocolate chips: For the ganache topping, adding richness and depth.
- 1/2 cup heavy cream: Used for the ganache, lending a silky smooth texture.
- 1 tablespoon unsalted butter: Helps the ganache achieve a glossy finish.
- 3/4 cup heavy cream: For the whipped topping that adds lightness.
- 2 tablespoons powdered sugar: Sweetens the whipped cream for the perfect topping.
- 1 teaspoon vanilla extract: Again enhances the flavor of the whipped topping.
Chocolate Cheesecake Instructions
Creating a Chocolate Cheesecake is a rewarding experience, and I can’t wait to guide you through the process! Follow these easy steps, and you’ll have a stunning dessert that will impress everyone.
- Preheat your oven to 325°F. Take a well-greased, 9-inch springform pan and wrap it in two layers of heavy-duty aluminum foil. This step is crucial to prevent water from leaking into the pan during the water bath.
- In a small bowl, combine Oreo crumbs and granulated sugar, then stir in the melted butter. Press the mixture firmly into the bottom of the greased springform pan. Make sure to only press it into the bottom, not up the sides. Place the pan on a baking sheet for easy handling.
- Bake the crust in the preheated oven for about 10 minutes, then remove it from the oven and let it cool on a wire rack.
- While the crust cools, melt chocolate chips in the microwave. Heat in bursts of 15 seconds, stirring in between for about 10 seconds until the chocolate is fully melted and smooth. Allow it to cool to room temperature.
- In a very large bowl, beat the room temperature cream cheese and granulated sugar at a medium-low speed until the mixture is smooth. Be careful not to overbeat; overmixing can lead your cheesecake to crack in the oven.
- Once the cream cheese mixture is smooth, use a spatula to fold in the melted chocolate and cocoa powder until just combined.
- In a small bowl, whisk together the eggs, then add them to the cream cheese filling along with salt and vanilla extract. Beat on low speed until just combined.
- Carefully pour the cheesecake batter on top of the cooled Oreo crust. Smooth the top with a spatula.
- Place the springform pan into a larger baking pan and fill the larger pan with about 1 inch of boiling water. This creates a water bath that helps the cheesecake cook evenly and prevents cracks.
- Bake the cheesecake for 55 to 70 minutes. Look for the center to be set and the top to lose its shiny appearance. The cheesecake should have a slight jiggle in the center; it will continue to firm up as it cools. If the center jiggles too much, give it an extra 5 minutes.
- Once baked, turn off the oven and slightly open the door. Carefully pull the cheesecake out and let it cool in the water bath for about 45 minutes.
- After cooling, remove the cheesecake from the water bath and take off the foil. Let it sit at room temperature for an additional 30 minutes to cool down more slowly, which helps prevent cracks.
- Cover the cheesecake and transfer it to the fridge to chill for at least 8 hours, or preferably overnight for the best flavor.
- When you’re ready to prepare the ganache, place the remaining chocolate chips, butter, and heavy cream in a bowl. Microwave in bursts of 20 seconds, stirring between each burst until smooth. Let it cool to room temperature.
- Spread the ganache over the top of the chilled cheesecake, keeping it about an inch from the edge. Allow it to set in the fridge for one hour.
- Finally, to prepare the whipped cream topping, combine heavy cream, powdered sugar, and vanilla extract in a stand mixer. Beat on high until soft peaks form. Spoon or pipe this delightful topping over the cheesecake slices before serving.
- For perfect slices, use a large, sharp knife. Run it under hot water, dry it off, then cut cleanly through the cheesecake. Repeat for each slice for best results.
Things Worth Knowing
- Room Temperature Ingredients: Always use room temperature cream cheese and eggs to ensure a smooth batter without lumps.
- Avoid Overmixing: Be cautious to not overmix once you add the eggs. Overmixing can create air bubbles that may cause your cheesecake to crack.
- Slow Cooling: Let the cheesecake cool gradually to room temperature before refrigerating. Rapid cooling can lead to cracks.
- Water Bath: The water bath is essential for even cooking. Make sure to properly wrap your springform pan to prevent leaks.
Change It Up
There are many exciting variations you can explore with this Chocolate Cheesecake. Here are some ideas to inspire you!
- Storage: Store leftover cheesecake in an airtight container in the fridge for up to five days. You can also freeze it for up to three months.
- Freezing: To freeze, wrap individual slices in plastic wrap and place them in a freezer-safe container.
- Pairing: Serve with fresh berries or a drizzle of chocolate sauce for added flavor and presentation.
- Flavor Variations: Try adding peppermint extract for a minty twist or swirl in some raspberry puree for a fruity flavor.
- Toppings: Experiment with different toppings like crushed cookies, nuts, or a layer of caramel sauce.
What to Serve Alongside Chocolate Cheesecake
When it comes to serving your Chocolate Cheesecake, the options are plentiful. It’s a versatile dessert that pairs wonderfully with various accompaniments.
- Fresh Berries: Strawberries, raspberries, or blueberries add a refreshing contrast to the richness of the cheesecake.
- Whipped Cream: A dollop of homemade whipped cream makes a delightful addition, adding lightness to the dense texture.
- Chocolate Sauce: Drizzling warm chocolate sauce over each slice creates an indulgent experience.
- Coffee or Espresso: Serving cheesecake with a side of coffee enhances the flavors and balances sweetness.
- Seasonal Fruits: Consider pairing with seasonal fruits like sliced peaches in summer or spiced apples in autumn for a unique touch.
- Special Occasions: This cheesecake is perfect for celebrations, from birthdays to holiday gatherings, making it a quintessential dessert choice.
FAQ
Conclusion
This Chocolate Cheesecake is a standout dessert that promises to impress anyone lucky enough to have a slice. Its rich and creamy texture combined with a perfectly sweet chocolate flavor makes it a favorite for many occasions. I encourage you to try this recipe and bring a deliciously decadent treat to your table. You’ll be delighted with the results, and I’m sure your friends and family will rave about it!
Chocolate Cheesecake
Equipment
- 9-inch Springform Pan
- Aluminum Foil
- 9 x 13-inch Baking Pan
Ingredients
- 1-3/4 cups Oreo crumbs or other chocolate cookie sandwich
- 2 tablespoons granulated sugar
- 4 tablespoons unsalted butter melted
- 4 (8-ounce) packages cream cheese full-fat, room temperature
- 1 (12-ounce) package semi-sweet chocolate chips
- 1-1/2 cups granulated sugar
- 4 tablespoons cocoa powder
- 4 large eggs
- 1/2 teaspoon salt
- 1/2 tablespoon vanilla extract
- 1 cup chocolate chips
- 1/2 cup heavy cream
- 1 tablespoon unsalted butter
- 3/4 cup heavy cream
- 2 tablespoons powdered sugar
- 1 teaspoon vanilla extract
Instructions
- Preheat oven to 325°F. Wrap a well-greased, 9-inch springform pan in two layers of heavy-duty aluminum foil. Secure foil around the pan.
- In a small bowl, combine Oreo crumbs and granulated sugar, then stir in butter. Press firmly into the bottom of the greased and prepared springform pan—don’t go up the sides—just press into the bottom of the pan. Place pan on a baking sheet. Bake for 10 minutes, then remove to a cooling rack.
- Melt the chocolate chips in the microwave in bursts of 15 seconds, stirring between each burst for 10 seconds until the chocolate is melted and smooth. Allow to cool to room temperature.
- In a very large bowl, beat the room temperature cream cheese and sugar in a circular motion and with consistent medium-low speed until smooth. Be careful not to overbeat; your cheesecake will fall and crack after baking.
- Use a spatula to scrape every bit of the melted and cooled chocolate into the cheesecake filling mixture. Add cocoa powder. Beat until just combined.
- In a small bowl, whisk eggs together. Add them to the filling mixture along with salt and vanilla extract. Beat on low speed until just combined.
- Use a spatula to scrape every bit of this mixture on top of the Oreo crust in the springform pan. Smooth the top of the cheesecake with the spatula.
- Place the springform pan in a large baking pan and add 1 inch of boiling water to the baking pan.
- Bake the cheesecake at 325°F for 55 to 70 minutes, or until the center is set and the top is no longer shiny. The center should have a slight jiggle; it will firm up as it cools. If it jiggles a lot, it needs more time—check again in 5 minutes.
- Once fully baked, turn off the oven and open the door completely. Carefully pull the oven tray with the cheesecake out and let it cool in the water bath for 45 minutes.
- Afterward, remove it from the water bath, take off the foil, and let it sit at room temperature on a wire rack for 30 minutes.
- Cover the cheesecake and transfer it to the fridge to chill for at least 8 hours, preferably overnight.
- Place chocolate for the ganache in a small bowl with the butter and heavy cream. Microwave in bursts of 20 seconds, stirring between each burst for 10 seconds until the mixture is smooth.
- Let stand until it has cooled to room temperature before topping the cheesecake with the ganache. Spoon the ganache into the center of the cheesecake, keeping it about an inch away from the edge, and smooth the ganache with the back of the spoon.
- Cover ganache-topped cheesecake and place in the fridge for an hour or until fully set.
- When ready to serve, combine heavy cream, powdered sugar, and vanilla extract in a stand mixer. Beat on high until soft peaks form, then spoon or pipe the whipped cream over the cheesecake slices.
- To get the perfect slices, you’ll want to use a large, very sharp knife. Run the knife under very hot water, dry it off with a kitchen towel, and make one quick and decisive cut. Repeat this process for each cut you make.
Notes
- Tip 1: Use room-temp cream cheese so it mixes smoothly without lumps.
- Tip 2: Use room-temp eggs to help everything blend evenly and prevent cracks.
- Tip 3: Don’t overmix; overmixing adds too much air, which causes the cheesecake to rise, fall, and crack.
- Tip 4: Mix on low and consistent speeds in one direction to reduce air bubbles.
- Tip 5: Cool slowly at room temp before chilling; rushing can cause cracks or a weird texture.