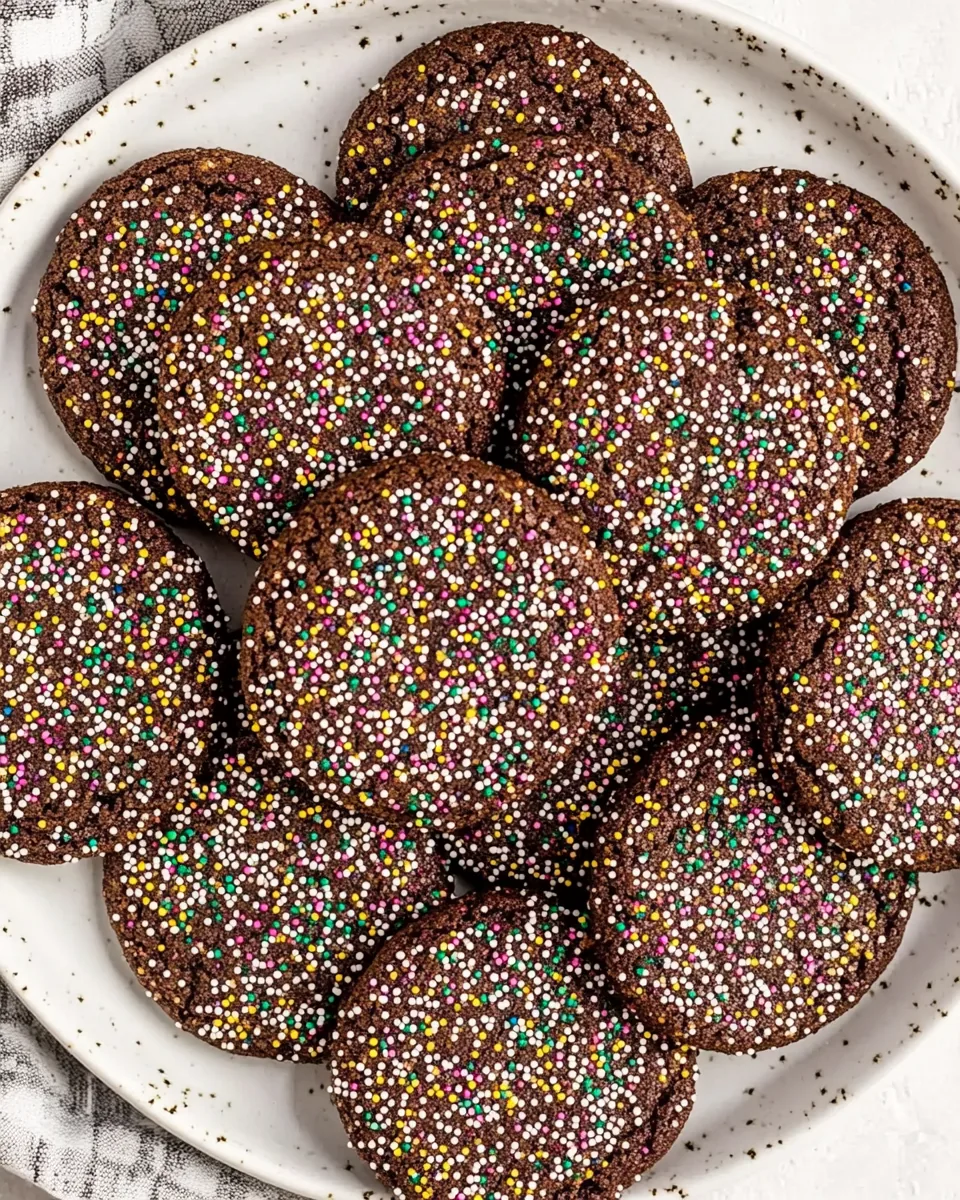
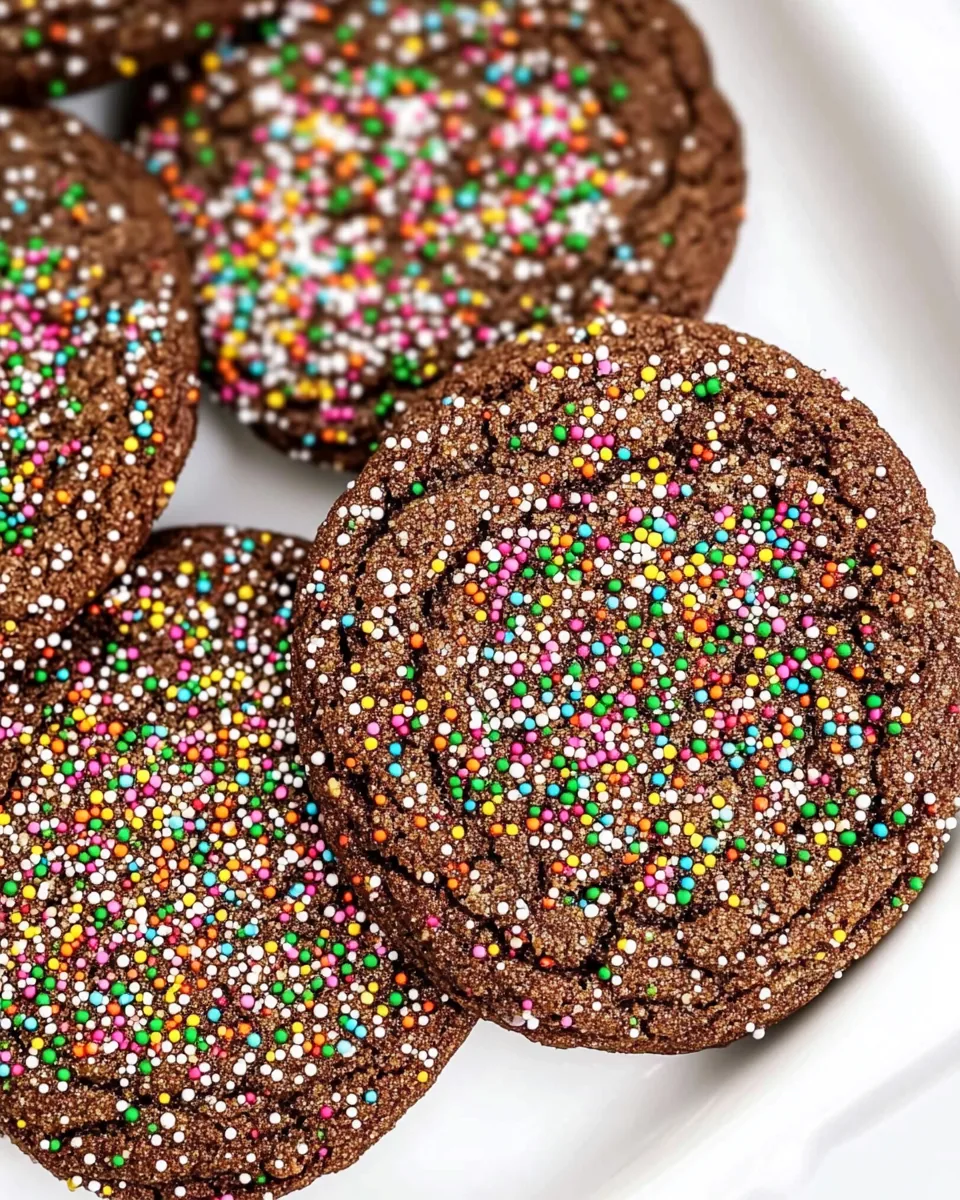
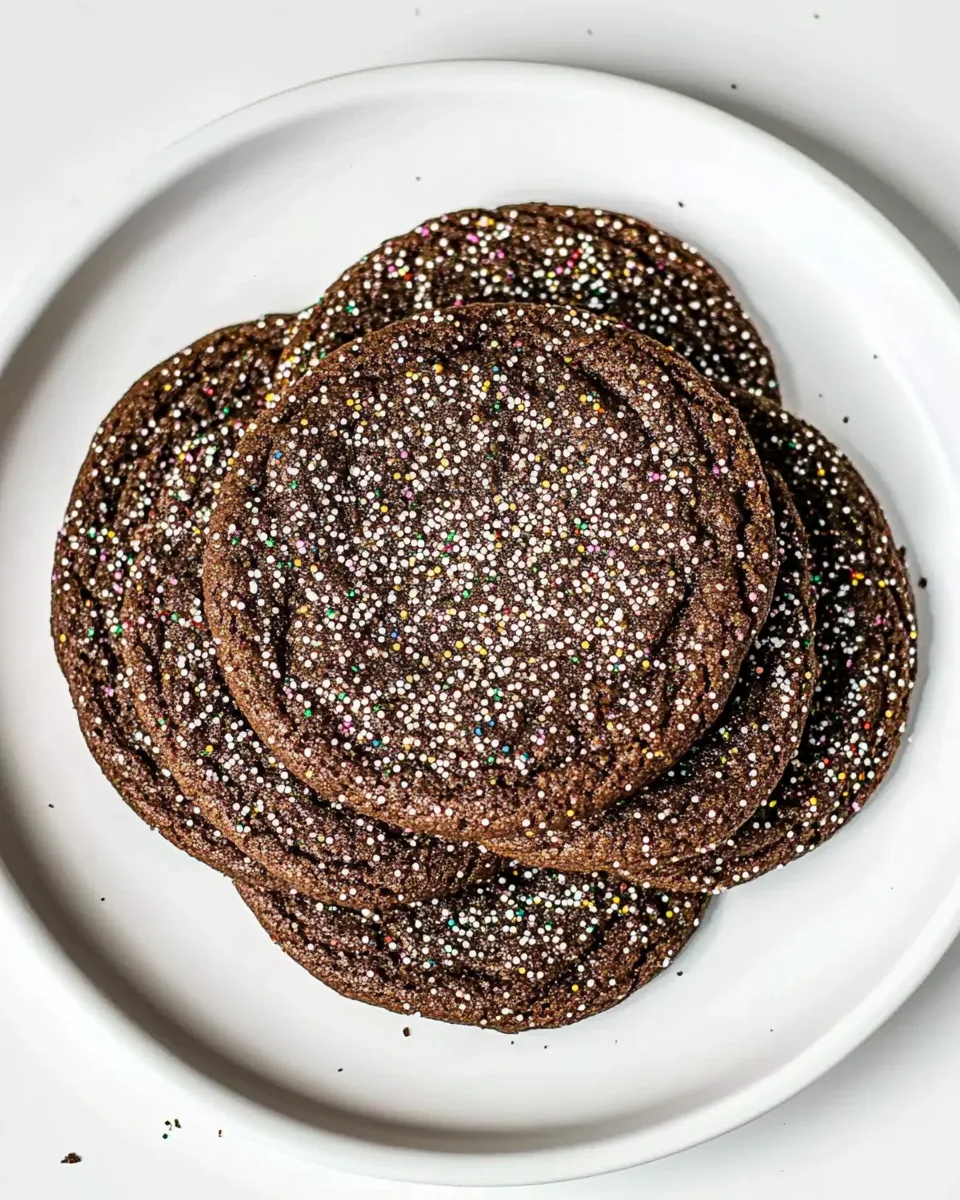
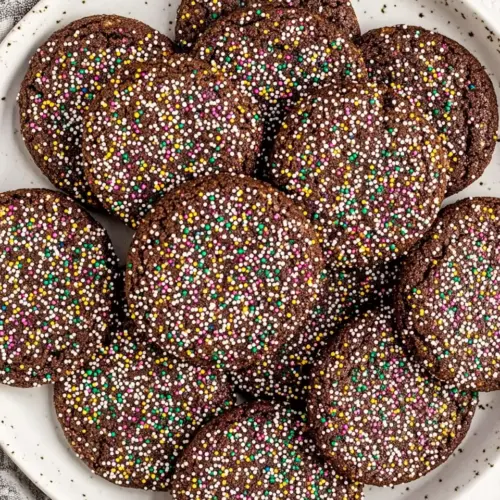
Chocolate Butter Cookies
There’s something incredibly nostalgic about the smell of freshly baked Chocolate Butter Cookies wafting through the house. It takes me back to my childhood when my mom would invite my friends over for a weekend baking session. We would gather in the kitchen, giggling as we mixed our ingredients and fought over who got to lick the bowl clean. The joy of crafting these cookies was just as sweet as the treats themselves. Each batch was a new adventure, bringing a little bit of magic to our afternoons. Today, I still cherish those memories, and I love sharing the experience with my own kids. With my recipe for Chocolate Butter Cookies, you can create your own sweet moments, filled with laughter and love.
Recipe Snapshot
40 mins
30 mins
10 mins
Medium
120 kcal
2g g
Keto, Paleo, Whole30
5g g
Kitchen Scale, Stand Mixer, Baking Sheet
Why We Love This Chocolate Butter Cookies
Comforting and Indulgent
Every bite of these Chocolate Butter Cookies delivers a rich, buttery flavor that melts in your mouth. The combination of sugars adds a delightful sweetness that perfectly complements the deep chocolate notes from the cocoa powder. These cookies are not just tasty; they evoke a sense of comfort that makes you feel at home.
Easy to Make
New to baking? Don’t worry! The steps for making Chocolate Butter Cookies are straightforward and simple. With a stand mixer, you can whip up the dough in no time. Perfect for beginners and seasoned bakers alike, this recipe invites everyone into the kitchen.
Perfect for Sharing
Whether you’re hosting a party or just want to treat your family, these cookies are a hit. Their vibrant appearance, especially with colorful nonpareils, makes them irresistible. You can easily make enough to share with friends, family, or even neighbors, spreading joy with every cookie.
Customizable Toppings
One of the best things about Chocolate Butter Cookies is the versatility in toppings. You can sprinkle on nonpareils, chocolate chips, or even nuts for an extra crunch. This flexibility allows you to tailor the cookies to suit any occasion or preference.
Great for All Occasions
These cookies are fantastic for any event, from holiday parties to casual get-togethers. They fit right in at bake sales or school functions. Plus, who can resist a cookie with a tall glass of milk after a long day?
Long-Lasting Freshness
Another reason to love Chocolate Butter Cookies is their ability to stay fresh. When stored properly in an airtight container, they can last for several days—if they last that long! Their sturdy texture makes them less prone to breakage, making them ideal for gifting and transporting.
Essential Ingredients for Chocolate Butter Cookies
In creating the perfect batch of Chocolate Butter Cookies, each ingredient plays a vital role. The foundation starts with unsalted butter, which provides rich flavor and a tender texture. Granulated sugar and brown sugar add sweetness and moisture, while cocoa powder gives that deep chocolate essence we all crave. All-purpose flour binds it all together, and a touch of baking soda ensures the cookies rise beautifully. Lastly, a pinch of salt enhances the flavors, rounding off this delightful combination.
- 1¼ cups unsalted butter (283 grams, room temperature): The star of the show! This provides the rich, creamy base that defines butter cookies.
- 1 cup granulated sugar (200 grams): This sweetens the dough, contributing to the overall flavor and texture.
- 1 cup brown sugar (213 grams): Adds moisture and a hint of caramel flavor, enhancing the cookies’ richness.
- 2 large eggs (100 grams, room temperature): Essential for binding the ingredients and adding structure to the cookies.
- 1 tablespoon pure vanilla extract (12 grams): A classic addition that brings warmth and depth to the flavor profile.
- ¾ cup unsweetened cocoa powder (63 grams): Provides the delicious chocolate flavor that makes these cookies a treat.
- 2 cups all-purpose flour (240 grams): The main structure of the cookies, ensuring they hold their shape while baking.
- 1¼ teaspoons baking soda (8 grams): Helps the cookies rise and achieve the perfect texture.
- 1½ teaspoons espresso powder (4 grams): Enhances the chocolate flavor, making it even richer without tasting like coffee.
- 1 teaspoon kosher salt (3 grams): Balances the sweetness and elevates the overall flavor of the cookies.
- ¾ teaspoon coarse sea salt: Adds a delightful texture and extra pop of flavor when sprinkled on top.
- Colorful nonpareils sprinkles: An optional fun topping that adds a festive touch to your cookies!
Making Chocolate Butter Cookies
Ready to dive into the baking process? Making Chocolate Butter Cookies is not just about the end result; it’s about enjoying each step along the way. Let’s get started!
- In the bowl of a stand mixer fitted with the paddle attachment, cream the unsalted butter and both granulated sugar and brown sugar together on medium-low speed until smooth, about 2 minutes. You’re looking for a creamy, fluffy texture here—this is where the cookies get their lightness. Make sure everything is well-blended.
- Add the eggs and vanilla extract to the mixture and mix until incorporated, about 1 minute. The mixture should look shiny and smooth, indicative of the eggs being fully combined with the butter and sugars.
- In a medium bowl, whisk together the cocoa powder, all-purpose flour, baking soda, espresso powder, and both kosher salt and coarse sea salt. This step ensures that all the dry ingredients are well distributed, preventing any clumps of cocoa or baking soda in your final dough.
- Gradually add the dry mixture to the wet mixture in the stand mixer, mixing on low speed until no dry flour remains visible. The dough will start to come together and may be a bit sticky.
- Cover a clean work surface with plastic wrap. Roll half of the dough (it will be somewhat sticky) into a log about 10-12 inches long and 2 inches in diameter. Use the plastic wrap to help you shape the log neatly. Repeat with the other half of the dough.
- Wrap the logs tightly in plastic wrap and refrigerate the cookie dough for at least 2 hours. Chilling the dough is crucial as it helps the cookies maintain their shape during baking and enhances the flavors.
- When you’re ready to bake, set the oven rack to the middle position and preheat the oven to 350°F (175°C). Line 3 baking sheets with parchment paper to prevent sticking and make cleanup easier.
- Slice the chilled dough logs into ½-inch thick rounds. Place the slices onto prepared baking sheets, ensuring they are spaced 3 inches apart to allow for spreading while baking.
- Optionally, liberally sprinkle each dough circle with nonpareils, pressing lightly to ensure they adhere to the dough. This step adds a fun and colorful touch to your cookies!
- Bake for 10 minutes, or until the cookies are just set around the edges. They should look soft in the center. Don’t worry; they will firm up as they cool.
- Transfer the cookies to a wire rack to cool completely. This step is important as it allows the cookies to firm up while maintaining a soft center.
Things Worth Knowing
- Chill the Dough: It’s vital to chill the dough for at least 2 hours. This step solidifies the fats and helps prevent the cookies from spreading too much while baking.
- Check Oven Temperature: Make sure to preheat your oven properly. An accurate temperature is essential for achieving the perfect bake.
- Experiment with Flavors: Feel free to add nuts or different types of chocolate chips for a personalized twist on the classic recipe.
- Watch Baking Time: Since ovens vary, keep an eye on the cookies. They should be set but slightly soft in the center when you take them out.
Pro Tips and Tweaks

To enhance your baking experience, here are some pro tips to keep in mind while preparing your Chocolate Butter Cookies.
- Storage: Store your cookies in an airtight container at room temperature for up to a week. If you want them to stay fresher longer, you can refrigerate them.
- Freezing: You can freeze the cookie dough logs before baking. Wrap them well in plastic wrap and then in aluminum foil. When ready to bake, just slice and bake straight from the freezer, adding a few extra minutes to the baking time.
- Pairing: These cookies go perfectly with a glass of cold milk or a hot cup of coffee. The flavors complement each other beautifully!
- Variations: Try using dark chocolate cocoa powder or add a dash of mint extract for a refreshing twist.
Serving This Chocolate Butter Cookies
When it comes to enjoying your Chocolate Butter Cookies, there are endless ways to serve and enjoy them. Here are some ideas:
- Cookie Platter: Arrange your freshly baked cookies on a beautiful platter for a stunning centerpiece at parties.
- With Ice Cream: Serve warm cookies with a scoop of vanilla ice cream for a delightful dessert that combines textures and temperatures.
- For Holidays: These cookies make a fantastic addition to holiday cookie trays. Their fun appearance will brighten up your festive gatherings.
- Snack Time: Pack a couple in your kid’s lunchboxes or enjoy them as a snack alongside your afternoon coffee.
- Gift Giving: Package your cookies in a decorative box or jar and gift them to friends and family. Homemade treats are always appreciated!
- Seasonal Variations: Consider decorating with seasonal sprinkles or toppings, adapting the look for birthdays, holidays, or celebrations.
FAQ
Conclusion
These Chocolate Butter Cookies are truly special, offering a delightful combination of rich flavors and a soft, buttery texture. They are perfect for any occasion, whether you’re celebrating a holiday or simply indulging yourself. I encourage you to try making this recipe; you won’t regret the joy it brings to your kitchen and those you share it with!
Chocolate Butter Cookies
Equipment
- Kitchen Scale
- Stand Mixer
- Baking Sheet
Ingredients
- 1¼ cups grams Unsalted Butter 283 grams, room temperature
- 1 cup grams Granulated Sugar 200 grams
- 1 cup grams Brown Sugar 213 grams
- 2 large grams Eggs 100 grams, room temperature
- 1 tablespoon grams Pure Vanilla Extract 12 grams
- ¾ cup grams Unsweetened Cocoa Powder 63 grams
- 2 cups grams All-Purpose Flour 240 grams
- 1¼ teaspoons grams Baking Soda 8 grams
- 1½ teaspoons grams Espresso Powder 4 grams
- 1 teaspoon grams Kosher Salt 3 grams
- ¾ teaspoon Coarse Sea Salt
- Colorful Nonpareils Sprinkles optional, for topping
Instructions
- In the bowl of a stand mixer fitted with the paddle attachment, cream the unsalted butter and both granulated sugar and brown sugar together on medium-low speed until smooth, about 2 minutes. You’re looking for a creamy, fluffy texture here—this is where the cookies get their lightness. Make sure everything is well-blended.
- Add the eggs and vanilla extract to the mixture and mix until incorporated, about 1 minute. The mixture should look shiny and smooth, indicative of the eggs being fully combined with the butter and sugars.
- In a medium bowl, whisk together the cocoa powder, all-purpose flour, baking soda, espresso powder, and both kosher salt and coarse sea salt. This step ensures that all the dry ingredients are well distributed, preventing any clumps of cocoa or baking soda in your final dough.
- Gradually add the dry mixture to the wet mixture in the stand mixer, mixing on low speed until no dry flour remains visible. The dough will start to come together and may be a bit sticky.
- Cover a clean work surface with plastic wrap. Roll half of the dough (it will be somewhat sticky) into a log about 10-12 inches long and 2 inches in diameter. Use the plastic wrap to help you shape the log neatly. Repeat with the other half of the dough.
- Wrap the logs tightly in plastic wrap and refrigerate the cookie dough for at least 2 hours. Chilling the dough is crucial as it helps the cookies maintain their shape during baking and enhances the flavors.
- When you’re ready to bake, set the oven rack to the middle position and preheat the oven to 350°F (175°C). Line 3 baking sheets with parchment paper to prevent sticking and make cleanup easier.
- Slice the chilled dough logs into ½-inch thick rounds. Place the slices onto prepared baking sheets, ensuring they are spaced 3 inches apart to allow for spreading while baking.
- Optionally, liberally sprinkle each dough circle with nonpareils, pressing lightly to ensure they adhere to the dough. This step adds a fun and colorful touch to your cookies!
- Bake for 10 minutes, or until the cookies are just set around the edges. They should look soft in the center. Don’t worry; they will firm up as they cool.
- Transfer the cookies to a wire rack to cool completely. This step is important as it allows the cookies to firm up while maintaining a soft center.