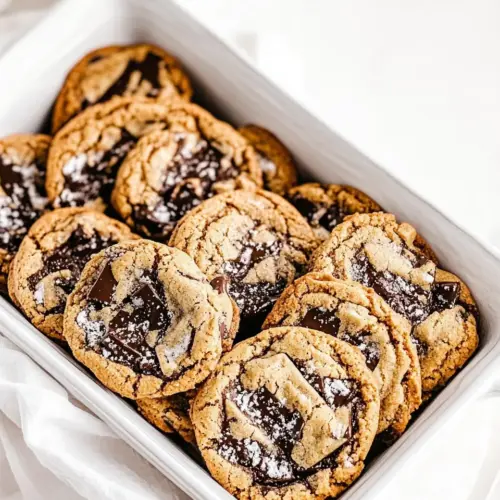
Brown Butter Chocolate Chip Cookies
There’s something incredibly nostalgic about baking cookies, particularly when it comes to Brown Butter Chocolate Chip Cookies. I remember the first time I tried making these delightful treats; the aroma of the butter browning filled my kitchen, instantly transporting me to my childhood days spent in my grandmother’s cozy home. She always had a batch of cookies waiting when we arrived, and her secret ingredient was always the love she poured into each batch. The process of browning the butter adds a rich, nutty flavor that elevates these cookies to a whole new level. It’s a small step that makes a huge difference, and once you try these cookies, you’ll understand why they’re a favorite in my household.
Recipe Snapshot
30 mins
15 mins
15 mins
Medium
190 kcal
2 g
Gluten-Free, Low FODMAP
9 g
Frying Pan, Whisk, Food Processor, Oven, Wooden Spoon, Mixing Bowl, Baking Sheet
Why You Need This Brown Butter Chocolate Chip Cookies
1. Rich, Nutty Flavor
The key to making Brown Butter Chocolate Chip Cookies truly unforgettable lies in the browning of the butter. This simple technique transforms ordinary butter into a fragrant, nutty delight. The flavor is deepened, adding complexity and warmth that will make your cookies taste gourmet.
2. Texture That’s Just Right
These cookies boast the perfect texture. They’re crispy around the edges yet soft and chewy in the center. This combination creates a satisfying bite that everyone will love. It’s a texture that invites you to take just one more cookie!
3. Easy and Fun to Make
If you’re looking for a fun baking project, look no further. Making Brown Butter Chocolate Chip Cookies is an enjoyable process. From melting the butter to mixing in the chocolate chunks, each step is engaging. Plus, there’s nothing quite like sharing cookies fresh from the oven with friends and family.
4. Perfect for Any Occasion
These cookies are versatile, making them great for any occasion. Whether you’re hosting a gathering, looking for a sweet treat to enjoy with coffee, or simply indulging yourself, these cookies will fit right in. Their appeal is universal, and they’re sure to please a crowd.
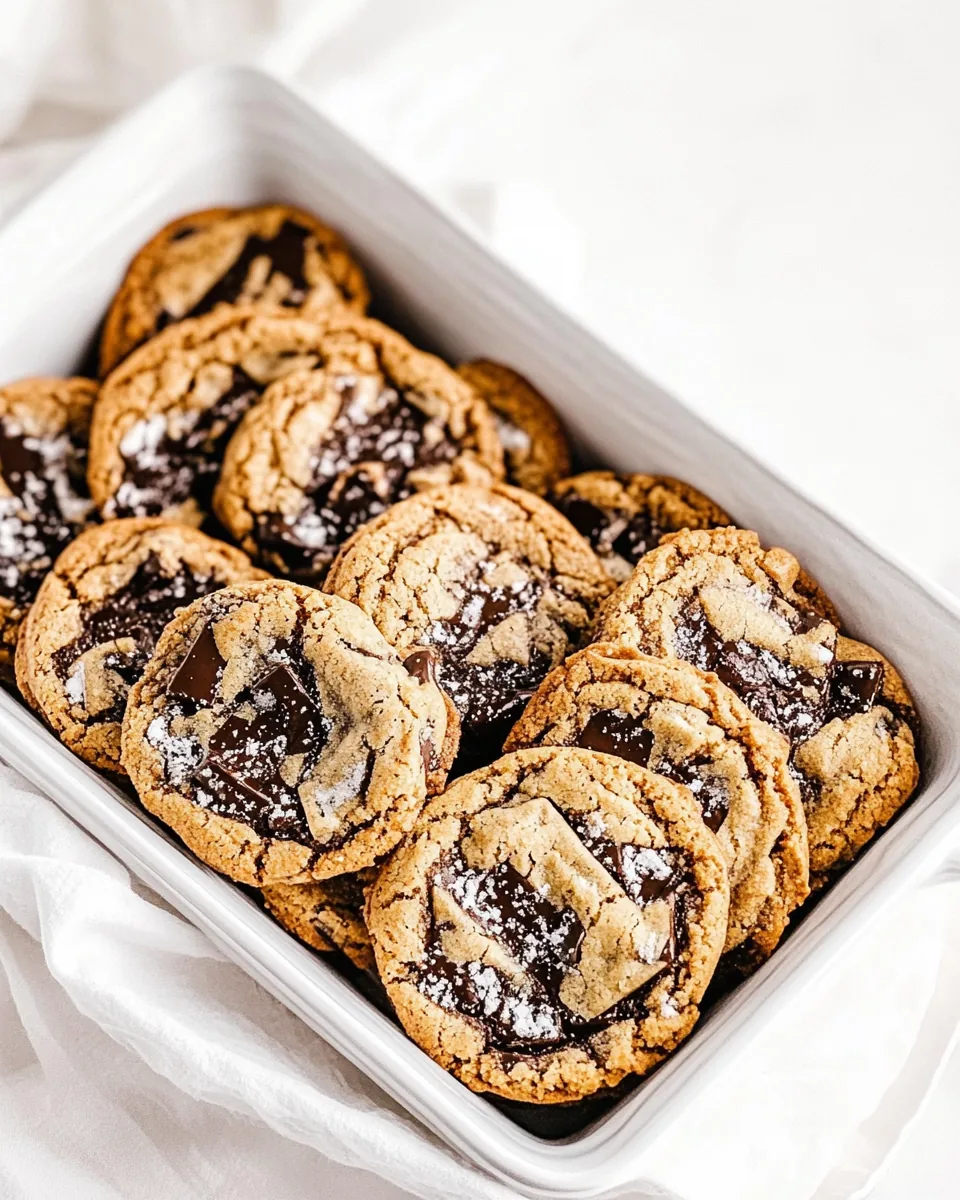
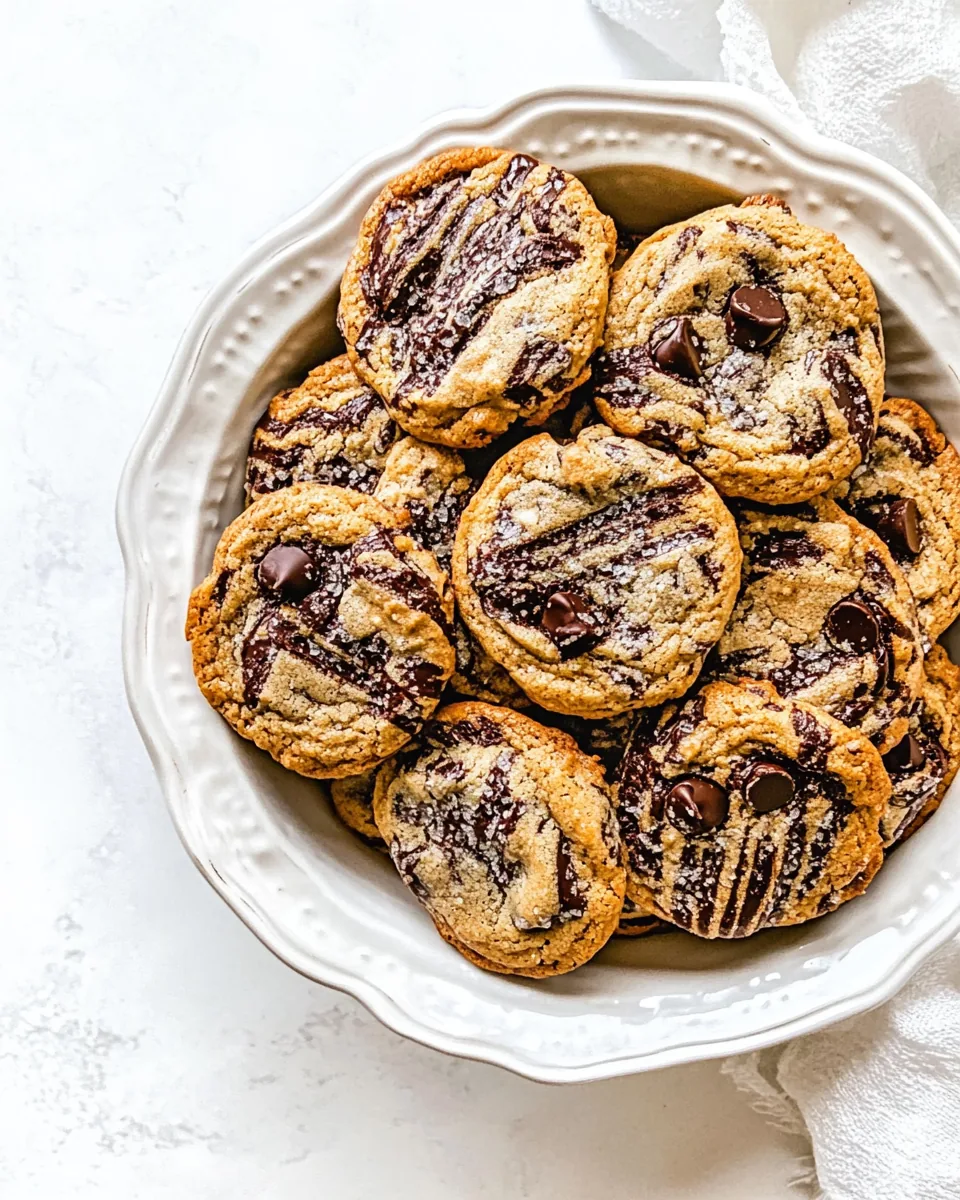
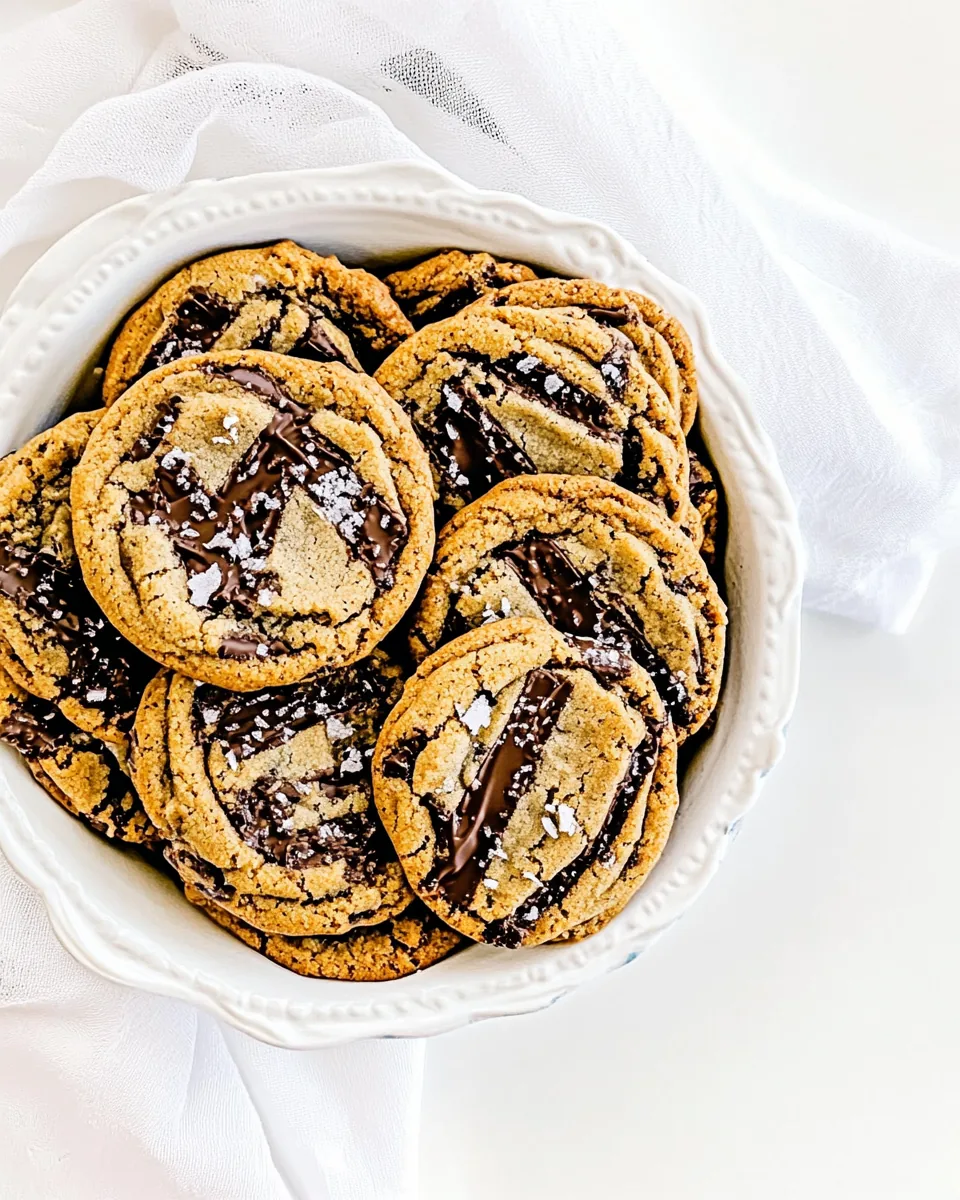
5. A Touch of Flaky Sea Salt
Just when you think these cookies couldn’t get any better, a sprinkle of flaky sea salt takes them to new heights. The salt enhances the sweetness of the chocolate and butter, creating a beautiful balance that’s hard to resist. It’s that extra touch that transforms a good cookie into a great one.
What’s In This Brown Butter Chocolate Chip Cookies

The ingredients in Brown Butter Chocolate Chip Cookies are classic yet crucial for achieving that perfect cookie. Each component plays a vital role in flavor and texture. The star of the show is, of course, the brown butter, which adds depth and richness. Combined with the sweetness of brown sugar and granulated sugar, these cookies become irresistible. The chocolate chunks melt beautifully, creating gooey pockets of chocolate that are simply delightful.
- Unsalted Butter: 1 cup, cut into tablespoon pieces. This is the base that will be transformed into brown butter, imparting a nutty flavor.
- All-Purpose Flour: 2 1/2 cups. Essential for structure, giving the cookies their body and chewiness.
- Baking Soda: 1 teaspoon. This helps the cookies rise and gives them that perfect texture.
- Sea Salt: 1 teaspoon. Enhances the flavors and balances the sweetness.
- Light Brown Sugar: 1 1/4 cups, packed. Adds moisture and a slight caramel flavor.
- Granulated Sugar: 1/2 cup. For sweetness and crispness.
- Large Egg: 1. Binds the ingredients together and provides richness.
- Egg Yolks: 2. Adds moisture and richness, creating a more tender cookie.
- Chocolate Chunks: 1 1/4 cups. The stars of the cookie, providing rich bursts of chocolate.
- Flaky Sea Salt: For sprinkling on top. A finishing touch that elevates the flavor.
Preparation Steps for Brown Butter Chocolate Chip Cookies
Preparing to bake Brown Butter Chocolate Chip Cookies is a delightful experience. You’ll find that the process is straightforward, and soon enough, the sweet aroma will fill your kitchen. Follow these steps carefully to create the perfect cookies that will impress everyone.
- Start by placing unsalted butter in a light-colored medium saucepan. Melt it over medium heat, stirring often. Watch closely as it foams and gradually turns a beautiful golden brown, developing a nutty aroma. This usually takes about 5 to 7 minutes. Once browned, scrape the butter into a large bowl and let it cool to room temperature. If you’re in a hurry, feel free to pop it in the fridge for a few minutes to speed up the cooling process.
- In a medium bowl, whisk together all-purpose flour, baking soda, and sea salt. This mixture ensures that the dry ingredients are evenly distributed and that your cookies will rise perfectly.
- In the bowl of your stand mixer, combine the cooled browned butter, brown sugar, and granulated sugar. Using the beater blade, mix until everything is well combined and smooth. Add the large egg, egg yolks, and any alternative flavoring, mixing until everything is perfectly smooth. Scrape down the sides of the bowl as necessary to incorporate all the ingredients.
- Once your wet ingredients are mixed, turn off the mixer and add the dry ingredients from the previous step. Mix on low speed until just combined. Be careful not to overmix, as this can lead to tougher cookies.
- Now it’s time to stir in the chocolate chunks. Use a spatula to fold them gently into the dough, ensuring they’re evenly distributed throughout.
- Next, scoop the dough into balls, about 2 tablespoons per cookie. Place the cookie balls on a baking sheet lined with parchment paper, leaving about 2 inches of space between each one. This space is crucial as the cookies will spread while baking.
- Cover the dough balls and chill them in an airtight container for at least 2 hours. If you can wait, chilling them overnight will enhance the flavors even further.
- When you’re ready to bake, preheat your oven to 350 degrees F. Remove the chilled dough from the fridge. Place the balls on a large baking sheet lined with parchment paper, ensuring to leave enough space between each cookie.
- Bake the cookies for 10 to 14 minutes, or until the edges are set but the centers are still soft. Watch them closely; you want that ideal texture! Once baked, remove them from the oven and sprinkle with flaky sea salt.
- Let the cookies cool on the baking sheet for about 5 minutes before transferring them to a cooling rack. Allow them to cool completely before enjoying.
Things Worth Knowing
- Brown the Butter Carefully: Keep an eye on the butter while it’s browning. It can go from perfect to burnt in a matter of seconds, so stir frequently and watch for a nutty aroma.
- Chill the Dough: Chill the cookie dough to enhance flavors and prevent spreading. The longer you chill, the better the taste!
- Use Quality Chocolate: The quality of your chocolate chunks directly affects the flavor. Go for high-quality chocolate for the best results.
- Don’t Overbake: Keep an eye on the cookies toward the end of baking. They should be golden around the edges but still soft in the middle. They will continue to firm up as they cool.
Recipe Variations about Brown Butter Chocolate Chip Cookies
Once you’ve mastered the classic Brown Butter Chocolate Chip Cookies, consider trying these fun variations to keep your cookie game exciting!
- Add Nuts: For an extra crunch, fold in some chopped nuts like walnuts or pecans.
- Different Mix-ins: Try adding a mix of chocolate chips and white chocolate chunks for a unique flavor combination.
- Seasonal Spices: Add a pinch of cinnamon or nutmeg for a warm, spicy touch, especially during the holidays.
- Stuffed Cookies: For a gooey surprise, try stuffing the center of your cookie with a piece of chocolate or a dollop of cookie butter.
- Swap the Flour: Experiment with different types of flour like whole wheat or almond flour for a different taste and texture.
- Make Them Sandwich Cookies: Use two cookies with a layer of frosting or ice cream in between for a decadent treat.
Best Served With
Pairing your freshly baked Brown Butter Chocolate Chip Cookies with the right accompaniments can enhance your experience. Here’s how to serve them:
- Milk: A classic pairing, nothing beats a glass of cold milk with warm cookies. The combination is iconic and loved by many.
- Coffee: Enjoy these cookies with a cup of your favorite coffee or espresso. The bittersweet notes contrast beautifully with the sweetness of the cookie.
- Ice Cream: For a delightful treat, serve your cookies with a scoop of vanilla or chocolate ice cream, creating a delectable cookie sandwich.
- Fruit: Pair with fresh fruit like strawberries or raspberries for a refreshing contrast to the rich cookies.
- Seasonal Treats: Consider serving them at gatherings or celebrations, especially during holidays and cozy family get-togethers.
- Gifts: These cookies also make a lovely gift. Package them nicely to share the joy with friends and family.
FAQ
Conclusion
In conclusion, Brown Butter Chocolate Chip Cookies are a true delight that combines nostalgia with gourmet flavors. The rich, nutty taste of browned butter takes these cookies to the next level, making them a favorite in any household. I encourage you to try making them yourself; you won’t be disappointed. They are perfect for sharing, gifting, or simply indulging in all by yourself. So roll up your sleeves and get baking!
Brown Butter Chocolate Chip Cookies
Equipment
- Frying Pan
- Whisk
- Food Processor
- Oven
- Wooden Spoon
- Mixing Bowl
- Baking Sheet
Ingredients
- 1 cup Unsalted Butter cut into tablespoon pieces
- 2.5 cups All-Purpose Flour
- 1 teaspoon Baking Soda
- 1 teaspoon Sea Salt
- 1.25 cups Light Brown Sugar packed
- 0.5 cup Granulated Sugar
- 1 large Egg
- 2 large Egg Yolks
- 1 tablespoon Pure Vanilla extract
- 1.25 cups Chocolate Chunks
- Flaky Sea Salt for sprinkling on cookies
Instructions
- Start by placing unsalted butter in a light-colored medium saucepan. Melt it over medium heat, stirring often. Watch closely as it foams and gradually turns a beautiful golden brown, developing a nutty aroma, about 5 to 7 minutes. Once browned, scrape into a large bowl and let cool to room temperature. If in a hurry, feel free to pop it in the fridge for a few minutes to speed up the cooling process.
- In a medium bowl, whisk together all-purpose flour, baking soda, and sea salt. This mixture ensures that the dry ingredients are evenly distributed and that your cookies will rise perfectly.
- In the bowl of your stand mixer, combine the cooled browned butter, brown sugar, and granulated sugar. Using the beater blade, mix until everything is well combined and smooth. Add the large egg, egg yolks, and any alternative flavoring, mixing until everything is perfectly smooth. Scrape down the sides of the bowl as necessary to incorporate all the ingredients.
- Once your wet ingredients are mixed, turn off the mixer and add the dry ingredients from the previous step. Mix on low speed until just combined. Be careful not to overmix, as this can lead to tougher cookies.
- Now it’s time to stir in the chocolate chunks. Use a spatula to fold them gently into the dough, ensuring they’re evenly distributed throughout.
- Next, scoop the dough into balls, about 2 tablespoons per cookie. Place the cookie balls on a baking sheet lined with parchment paper, leaving about 2 inches of space between each one. This space is crucial as the cookies will spread while baking.
- Cover the dough balls and chill them in an airtight container for at least 2 hours. If you can wait, chilling them overnight will enhance the flavors even further.
- When you’re ready to bake, preheat your oven to 350 degrees F. Remove the chilled dough from the fridge. Place the balls on a large baking sheet lined with parchment paper, ensuring to leave enough space between each cookie.
- Bake the cookies for 10 to 14 minutes, or until the edges are set but the centers are still soft. Watch them closely; you want that ideal texture! Once baked, remove them from the oven and sprinkle with flaky sea salt.
- Let the cookies cool on the baking sheet for about 5 minutes before transferring them to a cooling rack. Allow them to cool completely before enjoying.