
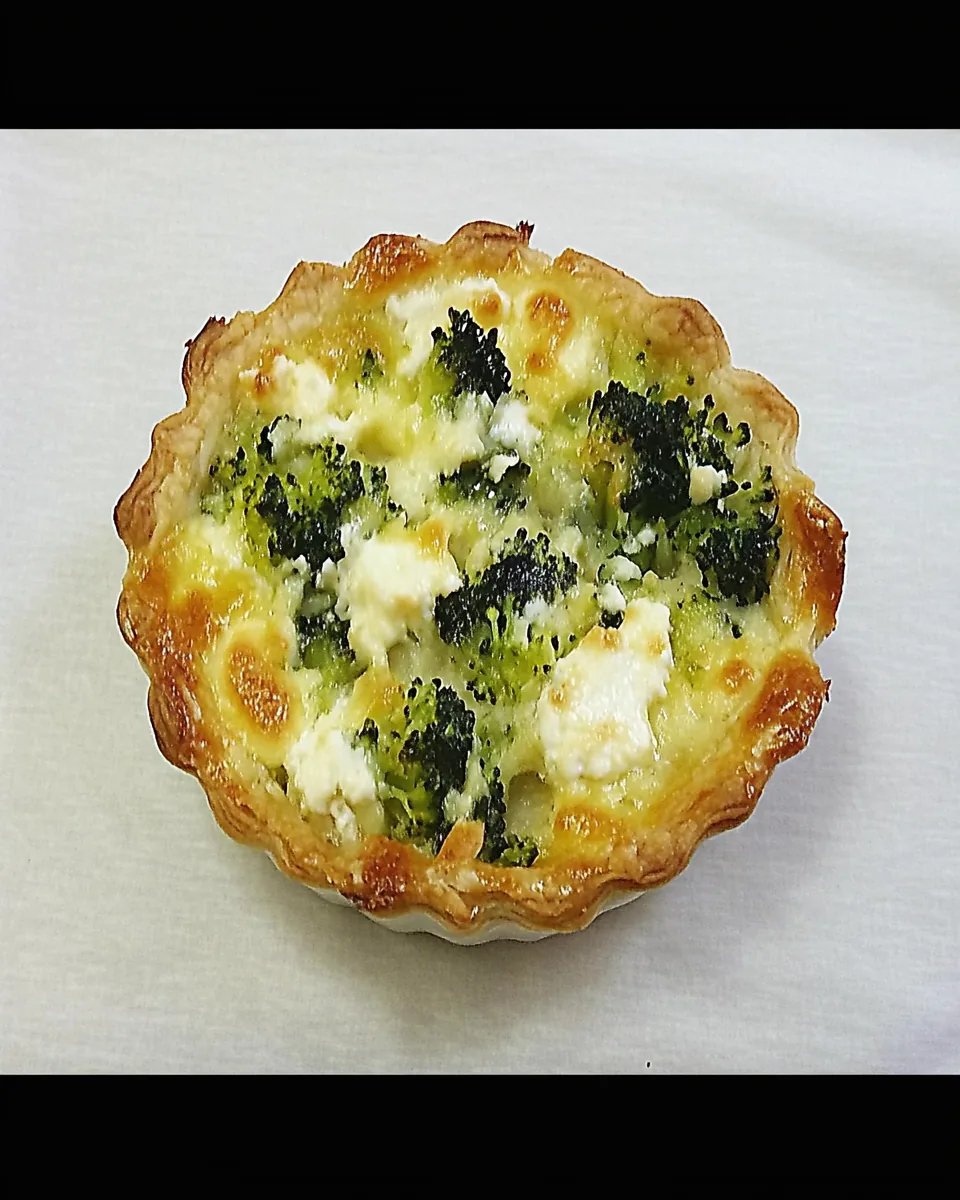
Broccoli Tarts
Every time I think about using fresh vegetables in a creative way, I come back to these Broccoli Tarts. It’s not just a simple dish; it’s a burst of flavor combined with comfort. I remember the first time I made them for a brunch with friends. The vibrant green of the broccoli against the rich, melted cheddar cheese was striking. My friends couldn’t believe something so delicious could be so easy to make! The best part? You can whip up a batch and have them ready to go for busy mornings or quick lunches. These tarts hold a special place in my heart and in my kitchen.
Recipe Snapshot
60 mins
0 mins
0 mins
Medium
220 kcal
14 g
Keto, Gluten-Free, Low FODMAP
15 g
Frying Pan, Oven, Large Pot, Grater, Chef’s Knife, Mixing Bowl, Wooden Spoon, Baking Sheet
What Sets This Broccoli Tarts Apart
Perfect for Any Meal
One of the best things about Broccoli Tarts is their versatility. They can be served for breakfast, lunch, or even dinner. It’s a dish that shines at any time of the day!
Easy to Prepare
If you’re short on time but still want to impress, these tarts deliver without demanding too much time in the kitchen. You can throw them together in just a few simple steps, and they bake themselves while you go about your day.
Deliciously Satisfying
The combination of creamy cheddar cheese and rich cottage cheese creates a satisfying filling that complements the crispness of the broccoli. Every bite feels hearty and fulfilling.
Great for Meal Prep
These tarts are fantastic for meal prep! You can make a batch ahead of time, keep them in the fridge, and reheat them when you need a quick meal. They’re perfect for those busy weeks when cooking from scratch isn’t an option.
Healthy Yet Indulgent
Using fresh veggies like broccoli means you’re getting nutrients while enjoying something that feels a bit indulgent. It’s the best of both worlds!
So Many Variations
While I love the classic version with broccoli and cheese, you can easily adapt this recipe to include your favorite vegetables or cheeses. Think about adding spinach or mushrooms for a fun twist!
Main Ingredients for Broccoli Tarts
When it comes to making the perfect Broccoli Tarts, each ingredient plays a crucial role in crafting the flavors and textures that make this dish a winner. The creamy cheddar cheese and cottage cheese meld beautifully with the broccoli, creating a rich filling that’s both satisfying and delicious. Freshly cracked black pepper adds a hint of spice, while the eggs bind everything together, giving the tarts a delightful texture.
- 2 1/2 cups chopped broccoli pieces – Fresh broccoli brings a burst of color and nutrients to the tarts.
- 1 cup grated cheddar cheese – This adds a rich, creamy flavor that melts beautifully.
- 6 T coarsely-grated Parmesan cheese – A sprinkle of Parmesan provides a salty kick that enhances the overall flavor.
- 8 eggs – These are essential for binding the filling together.
- 1 cup cottage cheese (rinsed, then drained) – Adds creaminess and protein.
- 2 tsp. Spike seasoning (or use other all-purpose seasoning of your choice) – This seasoning adds depth and flavor.
- fresh-ground black pepper to taste – A little spice to elevate the flavors.
Directions for Broccoli Tarts

Let’s get started on creating these delightful Broccoli Tarts. Follow these simple instructions, and you’ll have a delicious dish ready in no time!
- Preheat your oven to 375F/190C. This ensures that your Broccoli Tarts cook evenly and develop a nice golden crust.
- Spray a mini tart pan or muffin cups with non-stick spray. This step is crucial to prevent the tarts from sticking.
- Cut the broccoli into small, bite-sized flowerets. If you cut through the broccoli stem and then pull the floweret part apart, you can avoid the mess from broccoli crumbs on the cutting board.
- Put the chopped broccoli into a bowl or large measuring cup, cover it with cling wrap, and microwave on high for about 1 to 2 minutes, or until the broccoli just starts to cook. Alternatively, you can cook it in boiling water for a few minutes and then drain well.
- Once cooked, divide the broccoli evenly among the tart wells in the pan. Each well should have a nice portion of broccoli.
- Next, put a generous pinch of cheddar cheese on top of the broccoli, then add the coarsely-grated Parmesan cheese on top of the cheddar. This layering creates a delicious cheesy texture.
- Now, take the cottage cheese and put it into a fine-mesh colander, rinse with cold water, and let it drain. This keeps the tarts from becoming too watery.
- In a glass measuring cup with a pour spout, break the eggs and beat them with a fork until the yolks and whites are fully combined. Add the drained cottage cheese, Spike seasoning, or other seasoning, and black pepper, and stir to combine.
- Pour the egg mixture over the broccoli and cheese in the tart wells, dividing the eggs evenly. This ensures each tart is filled.
- Stir gently with a fork so the ingredients are evenly distributed within each well.
- Bake for about 30 minutes, or until the eggs are firm and the tarts are starting to get slightly browned on top. This will give you a beautiful golden finish.
- Serve hot, topped with a dollop of sour cream, salsa, or hot sauce if desired. These toppings add an extra burst of flavor.
- Broccoli Tarts can be kept in the fridge for several days and microwaved to reheat. Just be careful not to microwave for more than about a minute, or the eggs will get rubbery.
Things Worth Knowing
- Broccoli Preparation: Cutting the broccoli into small pieces allows for even cooking and distribution in the tarts.
- Cheese Choices: Feel free to experiment with different types of cheese like feta or gouda for varied flavors.
- Cook Time Variation: Keep an eye on the tarts while they bake, as oven temperatures can vary.
- Cooling Time: Allow them to cool for a few minutes before serving to let the filling set.
Ways to Adapt This Recipe

Every kitchen deserves a touch of creativity! Here are some ways you can adapt your Broccoli Tarts:
- Add More Veggies: Consider incorporating chopped spinach, bell peppers, or even zucchini for added nutrition.
- Different Cheeses: Experiment with different cheeses such as feta, mozzarella, or even a spicy pepper jack for a kick.
- Gluten-Free Option: Use gluten-free alternatives for the tart crust if you’re following a gluten-free diet.
- Spice it Up: Add some diced jalapeños or a sprinkle of cayenne pepper to the egg mixture for some heat.
- Herb Infusion: Try adding fresh herbs like chives, parsley, or basil to enhance the flavor profile.
- Make it Vegan: Swap the eggs for a plant-based substitute like silken tofu for a vegan version.
Serving Ideas for Broccoli Tarts
When it comes to serving your delicious Broccoli Tarts, the possibilities are endless!
- Ideal for Brunch: These tarts are perfect for brunch gatherings. Serve them alongside fresh fruit and a light salad.
- Lunch Option: Pack them as a quick and healthy lunch with some sliced tomatoes or a green salad.
- Light Dinner: Pair them with a side of roasted vegetables or a hearty soup for a satisfying dinner.
- Storage: Store any leftovers in the fridge for up to three days. They reheat beautifully in the microwave.
- Seasonal Pairings: In fall, serve with pumpkin soup; in spring, pair with a fresh garden salad.
- Perfect for Picnics: These tarts are great for outdoor picnics or potlucks since they’re easy to transport!
FAQ
Conclusion
These Broccoli Tarts are truly a special dish, bringing together flavorful ingredients in a way that’s easy and satisfying. Their versatility allows for endless creativity, making them a favorite in any kitchen. I encourage you to give this recipe a try! Whether for brunch, lunch, or dinner, you’re bound to enjoy every cheesy, savory bite.

Broccoli Tarts
Equipment
- Frying Pan
- Oven
- Large Pot
- Grater
- Chef's Knife
- Mixing Bowl
- Wooden Spoon
- Baking Sheet
Ingredients
- 2 1/2 cups broccoli
- 1 cup cheddar cheese
- 6 T Parmesan cheese
- 8 eggs
- 1 cup cottage cheese
- 2 tsp. Spike seasoning
- to taste black pepper
Instructions
- Preheat your oven to 375F/190C. This ensures that your Broccoli Tarts cook evenly and develop a nice golden crust.
- Spray a mini tart pan or muffin cups with non-stick spray. This step is crucial to prevent the tarts from sticking.
- Cut the broccoli into small, bite-sized flowerets. If you cut through the broccoli stem and then pull the floweret part apart, you can avoid the mess from broccoli crumbs on the cutting board.
- Put the chopped broccoli into a bowl or large measuring cup, cover it with cling wrap, and microwave on high for about 1 to 2 minutes, or until the broccoli just starts to cook. Alternatively, you can cook it in boiling water for a few minutes and then drain well.
- Once cooked, divide the broccoli evenly among the tart wells in the pan. Each well should have a nice portion of broccoli.
- Next, put a generous pinch of cheddar cheese on top of the broccoli, then add the coarsely-grated Parmesan cheese on top of the cheddar. This layering creates a delicious cheesy texture.
- Now, take the cottage cheese and put it into a fine-mesh colander, rinse with cold water, and let it drain. This keeps the tarts from becoming too watery.
- In a glass measuring cup with a pour spout, break the eggs and beat them with a fork until the yolks and whites are fully combined. Add the drained cottage cheese, Spike seasoning, or other seasoning, and black pepper, and stir to combine.
- Pour the egg mixture over the broccoli and cheese in the tart wells, dividing the eggs evenly. This ensures each tart is filled.
- Stir gently with a fork so the ingredients are evenly distributed within each well.
- Bake for about 30 minutes, or until the eggs are firm and the tarts are starting to get slightly browned on top. This will give you a beautiful golden finish.
- Serve hot, topped with a dollop of sour cream, salsa, or hot sauce if desired. These toppings add an extra burst of flavor.
- Broccoli Tarts can be kept in the fridge for several days and microwaved to reheat. Just be careful not to microwave for more than about a minute, or the eggs will get rubbery.