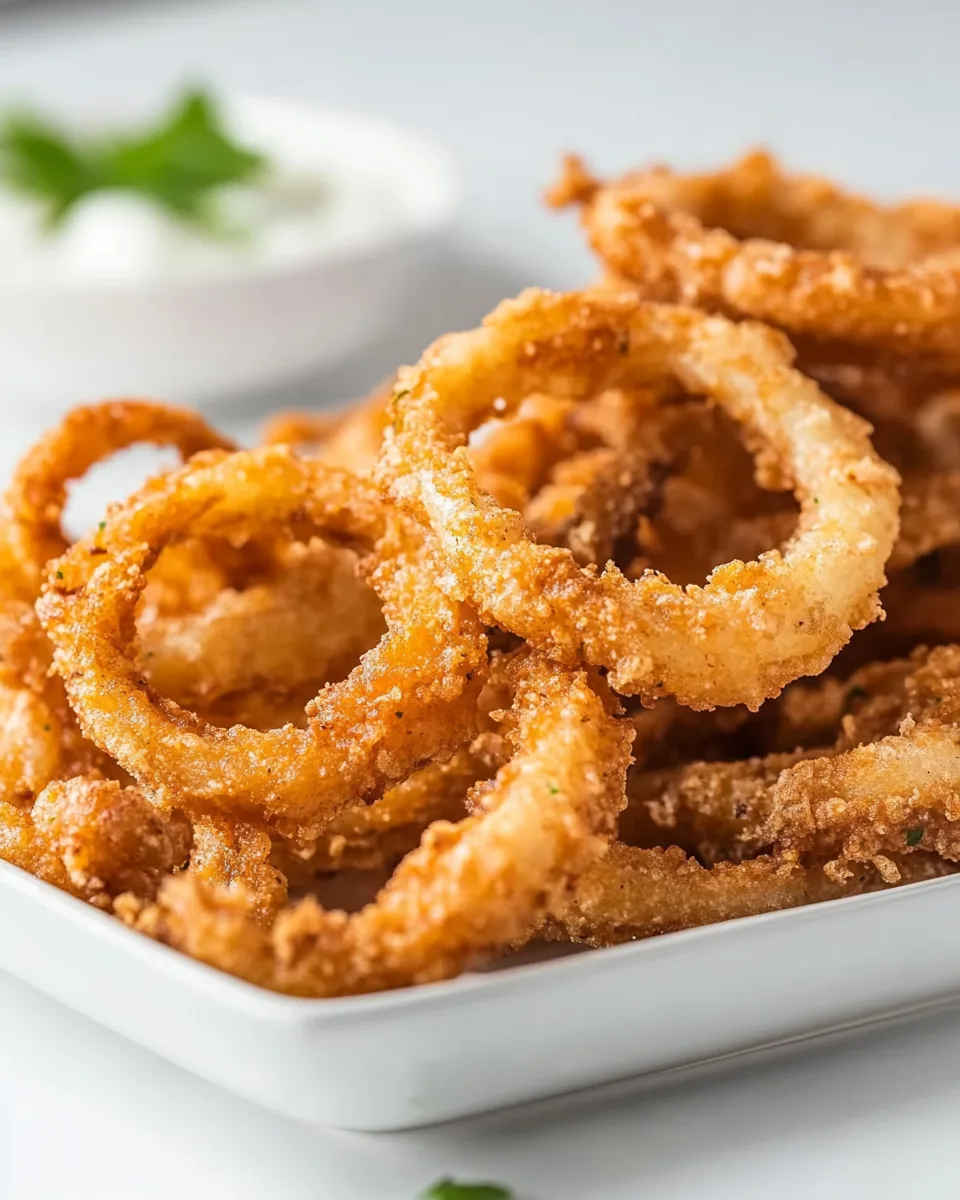
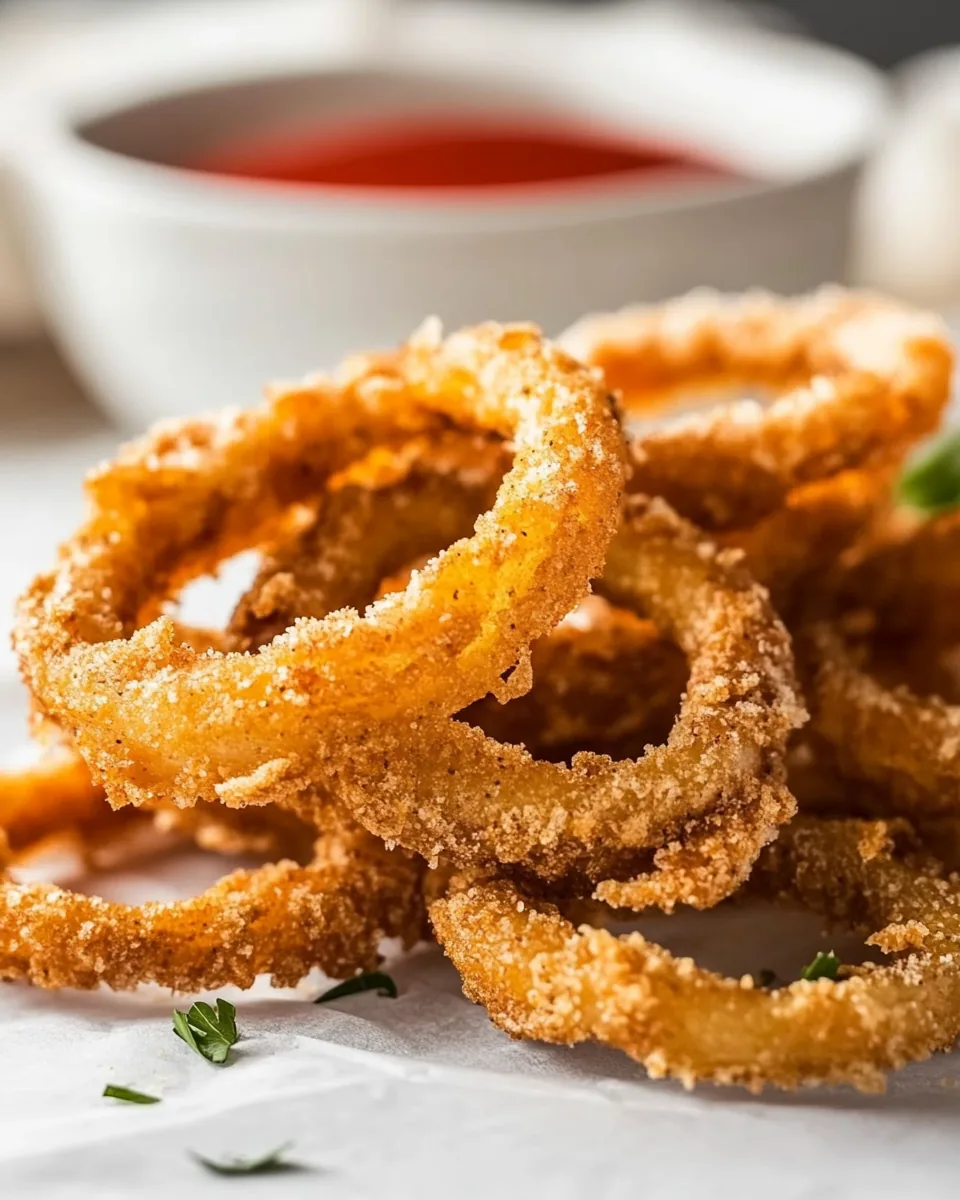
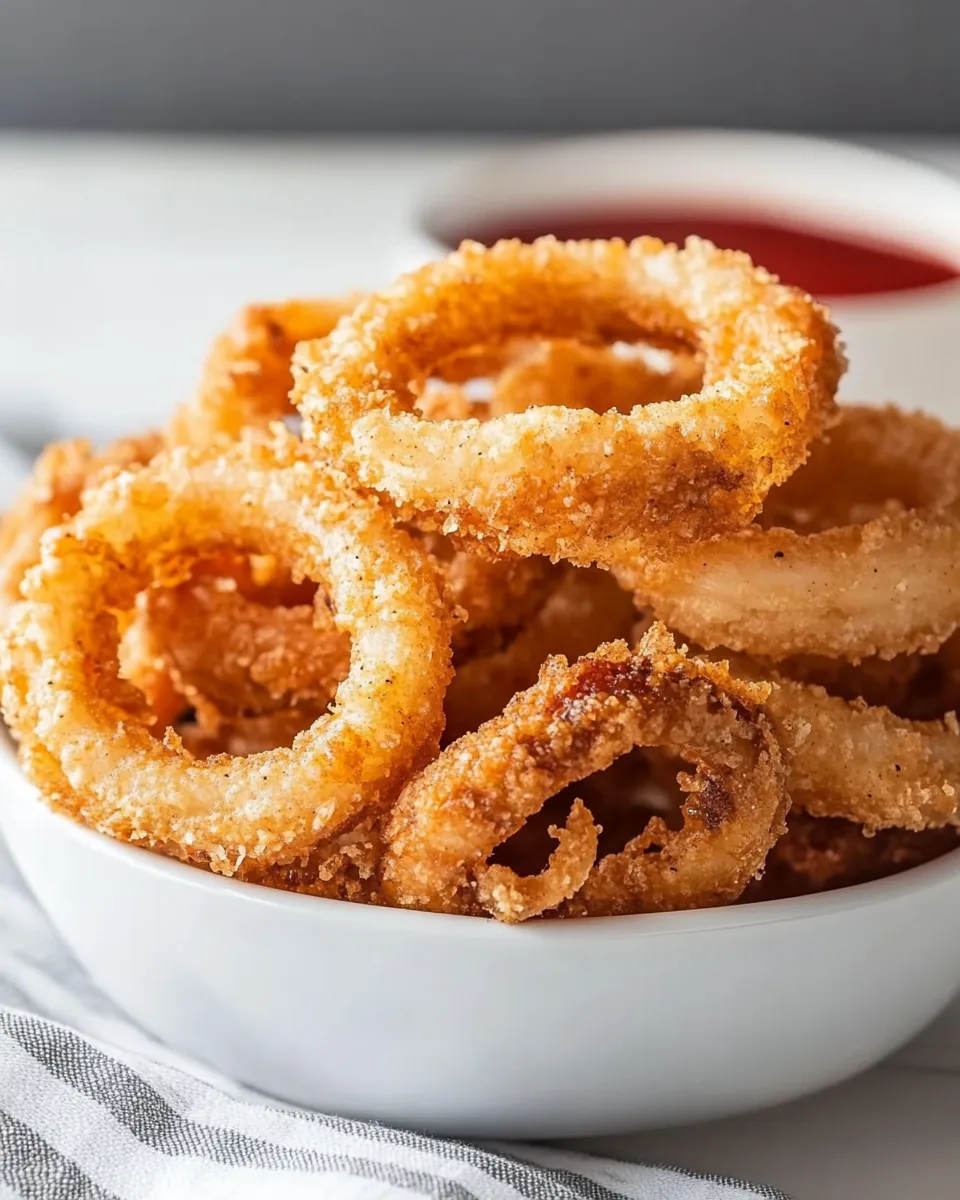
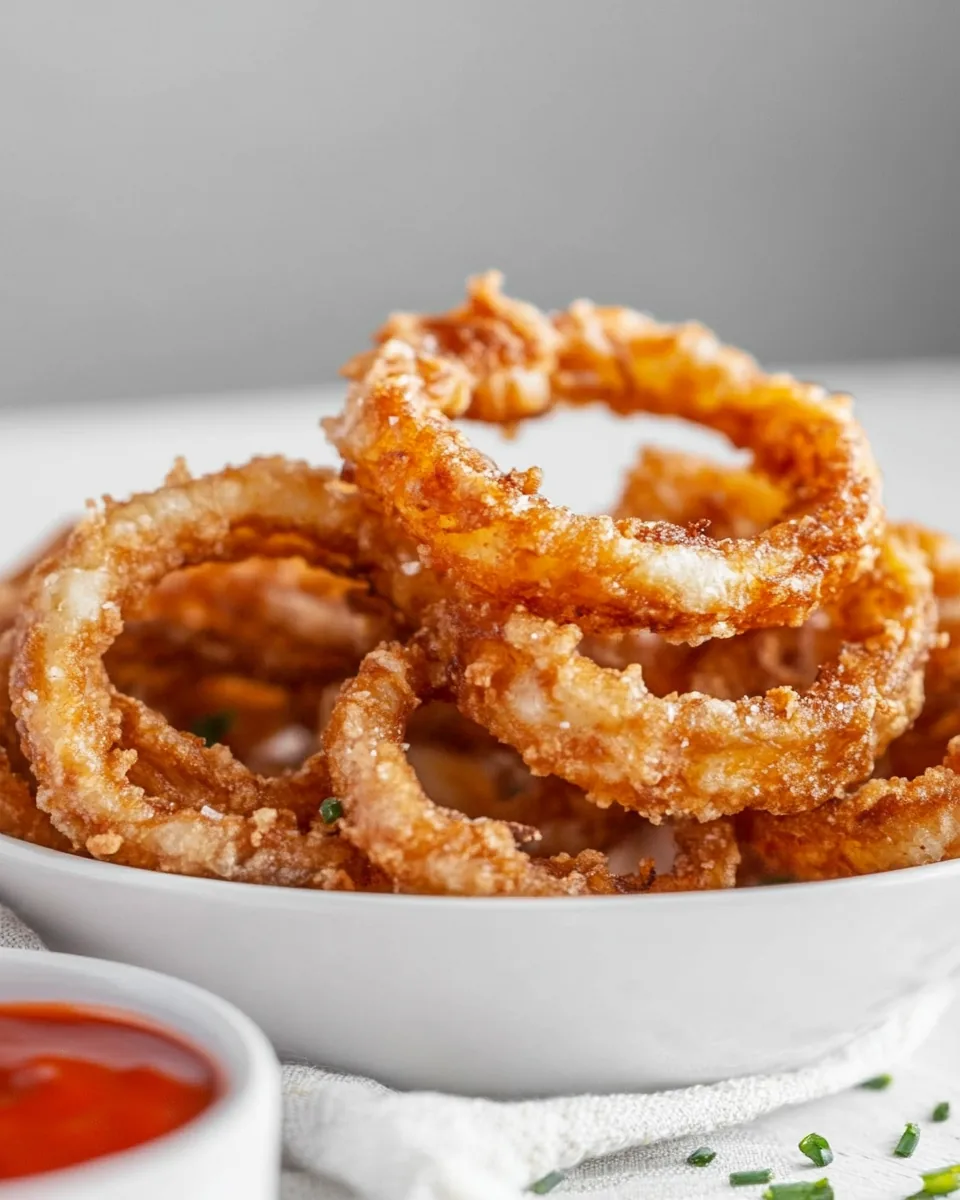
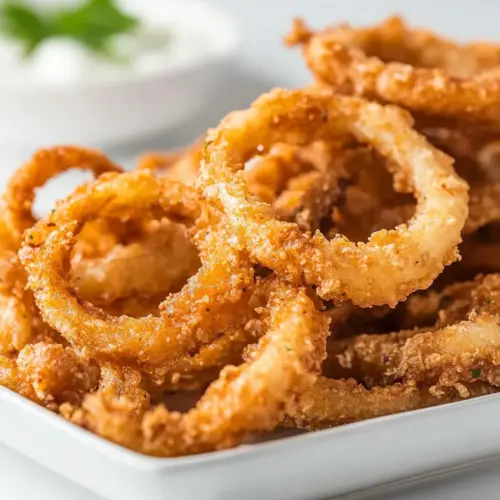
Onion Rings
There’s something magical about the crunch of Onion Rings that transports me to my favorite diner. I remember sitting in a cozy booth, the aroma of freshly fried food wafting through the air, and the anticipation building as I waited for that first bite. These crispy delights were always my go-to snack, perfectly paired with a side of tangy dipping sauce. As the first bite crunched and the sweet flavor of the onion filled my mouth, I knew I had to recreate that experience at home. Making your own Onion Rings is not only fun but allows you to customize them just the way you like. Let’s delve into this crispy treat and whip up a batch that will bring back those nostalgic feelings and satisfy any craving!
Recipe Snapshot
30 mins
15 mins
15 mins
Easy
300 kcal
4 g
Paleo, Whole30, Gluten-Free
15 g
Skillet, Frying Pan, Whisk, Chef’s Knife, Mixing Bowl
The Appeal of This Onion Rings
The Texture Is Everything
There’s nothing quite like the satisfying crunch of a perfectly fried Onion Ring. When you bite into one, the crisp exterior gives way to a tender, flavorful interior that just melts in your mouth. This contrast is what makes these rings so special; it’s a harmony of textures that you just can’t find in store-bought versions.
Perfect for Any Occasion
Whether you’re hosting a game night, throwing a barbecue, or simply enjoying a quiet dinner at home, Onion Rings are the perfect addition to your meal. They fit seamlessly into any menu, acting as an appetizer, side dish, or even a snack on their own. Their versatility makes them a must-have!
Easy to Make
You might think that making Onion Rings from scratch could be complicated, but it’s actually quite simple! With just a handful of ingredients and a bit of technique, you can fry up a batch that rivals any restaurant. Plus, you get the satisfaction of creating something delicious from scratch.
Customize Your Flavor
One of the best parts about making Onion Rings at home is the ability to customize them. Want a little heat? Add some cayenne pepper to the flour mix. Prefer a herby twist? Toss in some dried herbs. The options are endless, allowing you to tailor the flavor to your liking!
Great for Sharing
What’s better than enjoying a plate of Onion Rings with friends and family? They’re perfect for sharing, and their size makes them easy to grab and enjoy. Plus, they spark conversation and laughter, making them a great addition to any social gathering.
Made with Love
When you make Onion Rings at home, you put your heart into it. From slicing the onions to frying them to golden perfection, you’re creating not just food, but a memory to share with loved ones. There’s a certain love that goes into homemade cooking that simply can’t be replicated.
Onion Rings Shopping List
Creating the perfect Onion Rings starts with choosing the right ingredients. Each element plays a crucial role in achieving that delightful crunch and flavor explosion. The key players here include sweet onions, which provide a delicate sweetness that pairs beautifully with the crispy coating. Flour and panko breadcrumbs work together to create the perfect textured coating, while buttermilk adds a rich and tangy base that ensures the flavor is spot on.
- 1 large sweet onion sliced into 1/4-inch rings: Sweet onions are the best choice for Onion Rings because of their mild flavor and tender texture.
- 1 quart vegetable oil for frying: High-quality oil is essential for frying, ensuring your Onion Rings come out crispy rather than greasy.
- 1 cup all-purpose flour: This will form the base of your dredging mix, providing structure to the batter.
- 1 teaspoon baking powder: This ingredient adds lightness and aids in browning, ensuring your Onion Rings are perfectly crispy.
- 1 teaspoon salt: Essential for enhancing the flavors of the batter and the onion.
- 1 cup buttermilk: This adds a tangy flavor and helps the batter stick to the onion rings.
- 1 large egg: Contributes to the richness of the batter and helps bind the coating.
- 1 cup panko breadcrumbs: The secret to that satisfying crunch is found in these Japanese-style breadcrumbs.
Step by Step Instructions for Onion Rings
Frying Onion Rings at home is a fun and rewarding experience! Follow these steps for a delicious outcome. It’s all about technique, and once you get the hang of it, you’ll be making them like a pro!
- Start by slicing the onion into 1/4-inch-thick rings. Carefully separate them, ensuring not to break any of the rings. The goal is to have uniform pieces that will fry evenly.
- Heat the vegetable oil in a deep fryer or a large saucepan over medium heat. You want the oil to reach 365°F for ideal frying. A kitchen thermometer is handy here as it ensures the perfect frying temperature!
- While the oil heats, prepare your dredging stations. In a shallow dish, whisk together the flour, baking powder, and salt. This will be your dry mix for coating the onions.
- In a separate bowl, whisk together the buttermilk and the egg until smooth. This wet mixture will help the onion rings to bond with the dry mixture.
- Next, place the panko breadcrumbs in a third dish. The panko is going to give your Onion Rings that extra crunch!
- Now it’s time to dredge! Take each onion ring and coat it in the dry mixture, making sure it’s fully covered. Shake off any excess.
- Next, dip the coated ring into the buttermilk mixture, allowing it to soak for a moment to ensure the dry mix adheres well.
- Finally, coat the ring with the panko breadcrumbs, pressing lightly to make sure it sticks. Repeat this process for all the onion rings.
- Once your oil is hot enough, carefully place a few battered onion rings into the oil. Fry them in batches to avoid crowding. Fry until they are golden brown, about 2 to 3 minutes per side.
- When golden and crispy, remove the onion rings with a slotted spoon and place them on paper towels to drain any excess oil. Serve immediately!
Things Worth Knowing
- Ensure Proper Oil Temperature: Using a kitchen thermometer to maintain the oil temperature at 365°F is crucial for achieving crispy Onion Rings.
- Don’t Overcrowd the Fryer: Fry the onion rings in small batches to ensure they cook evenly and get that perfect crunch.
- Use Fresh Ingredients: Fresh onions and quality oil make a significant difference in flavor and texture.
- Let Them Rest: Allowing the cooked Onion Rings to rest on paper towels after frying helps absorb excess oil.
How to Switch It Up
If you love Onion Rings, you might enjoy experimenting with variations. Here are some fun ideas to switch things up a bit!
- Spicy Kick: Incorporate some cayenne pepper or hot sauce into the batter to give your Onion Rings a spicy flair.
- Herb Flavored: Fresh or dried herbs like thyme or oregano can be added to the breadcrumb coating for a flavor boost.
- Cheese Crust: Mix in grated Parmesan or cheddar cheese with the breadcrumbs for a cheesy twist.
- Sweet Onion Variations: Try using different types of onions, like Vidalia or red onions, for unique flavor profiles.
- Alternate Dipping Sauces: Experiment with different sauces for dipping, such as ranch, barbecue, or spicy mayo.
- Vegetable Alternatives: Try other vegetables like zucchini or bell peppers, cut into rings, for a delightful change.
Serving Ideas for Onion Rings
When it comes to serving Onion Rings, the options are endless! Here are some delightful ideas to consider:
- As a Snack: Enjoy Onion Rings on their own with your favorite dipping sauce for a quick snack.
- With Burgers: They pair perfectly as a side with burgers, adding a crunchy texture to your meal.
- Game Day Treat: Serve them at game day parties alongside nachos and wings for a fun, sharing platter.
- BBQ Companion: Add Onion Rings to your barbecue spread as an impressive and tasty side dish.
- For Lunch: Serve them as an addition to a salad or sandwich for added crunch and flavor.
- Seasonal Pairings: Try serving them in summer with fresh salads or during the colder months alongside hearty stews.
- Creative Plating: Use a small basket or cone to present your Onion Rings, making them visually appealing.
FAQ
Conclusion
Homemade Onion Rings are a delightful treat that combines simplicity and satisfaction in every bite. The perfect balance of crispy and tender, they stand out as an unbeatable snack or side dish. I encourage you to try making them at home; each batch brings its own unique crunch and flavor. You won’t regret it!
Onion Rings
Equipment
- Skillet
- Frying Pan
- Whisk
- Chef's Knife
- Mixing Bowl
Ingredients
- 1 Large Sweet Onion sliced into 1/4-inch rings
- 1 Vegetable Oil for frying
- 1 All-Purpose Flour
- 1 Baking Powder teaspoon
- 1 Salt teaspoon
- 1 Buttermilk cup
- 1 Large Egg
- 1 Panko Breadcrumbs cup
Instructions
- Slice the onion into 1/4-inch-thick rings and separate them carefully.
- Heat the oil in a deep-fryer or large saucepan to 365°F.
- In a shallow dish, whisk together the flour, baking powder, and salt. In another dish, whisk the buttermilk and egg. Place the breadcrumbs in a third dish.
- Dredge each onion ring in the flour mixture, dip into the buttermilk mixture, then coat with breadcrumbs. Place on a wire rack.
- Fry the onion rings in batches until golden brown, about 2-3 minutes per side. Drain on paper towels.
Notes
- Storage: Any leftovers can be stored in an airtight container in the fridge for up to 3 days.
- Freezing: You can freeze uncooked Onion Rings before frying for easier preparation later.
- Pairing: Great with burgers, sandwiches, or as a snack!
- Serving Warm: For the best taste, serve them warm and freshly fried.
- Make Ahead: Prepare the onion rings in advance and freeze them for quick cooking later.