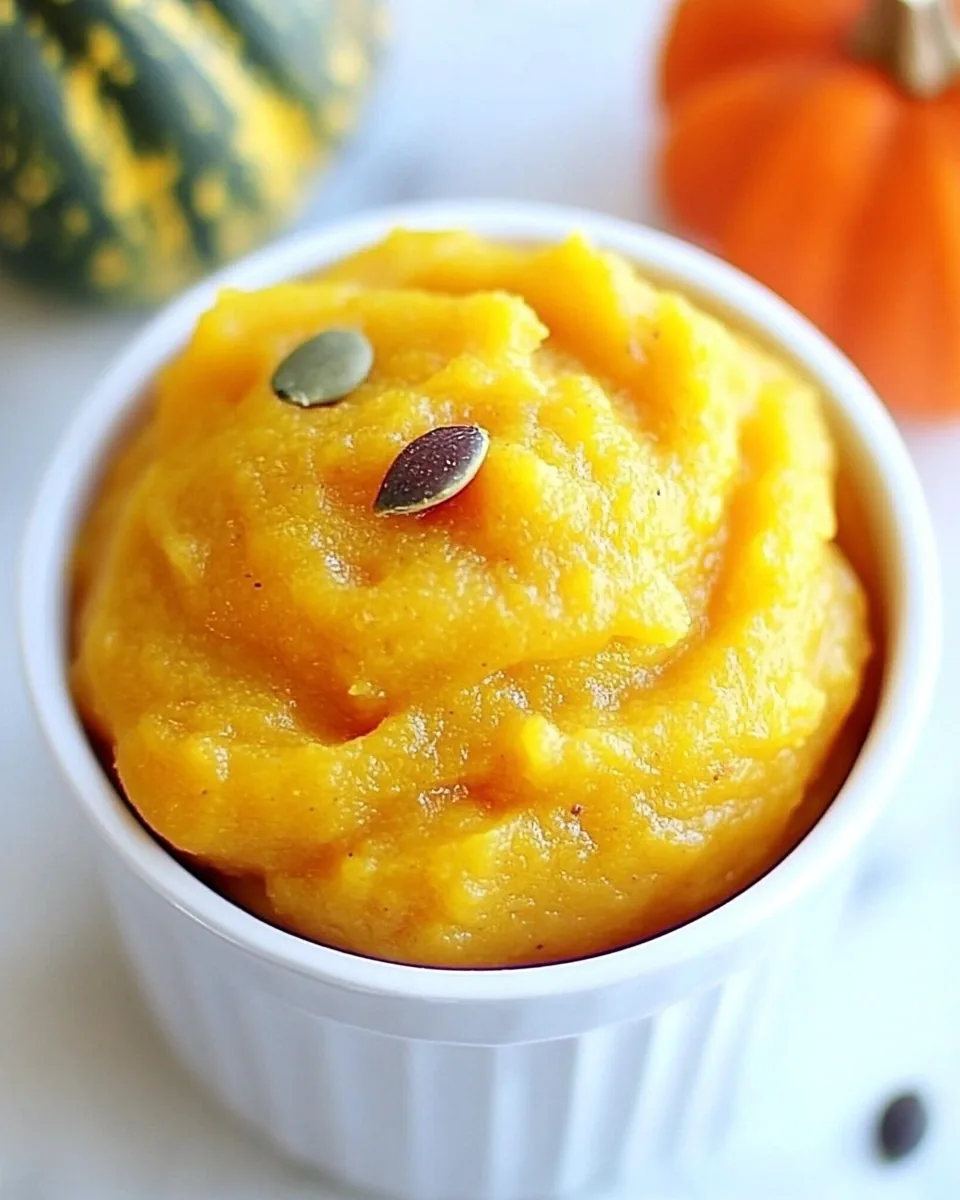
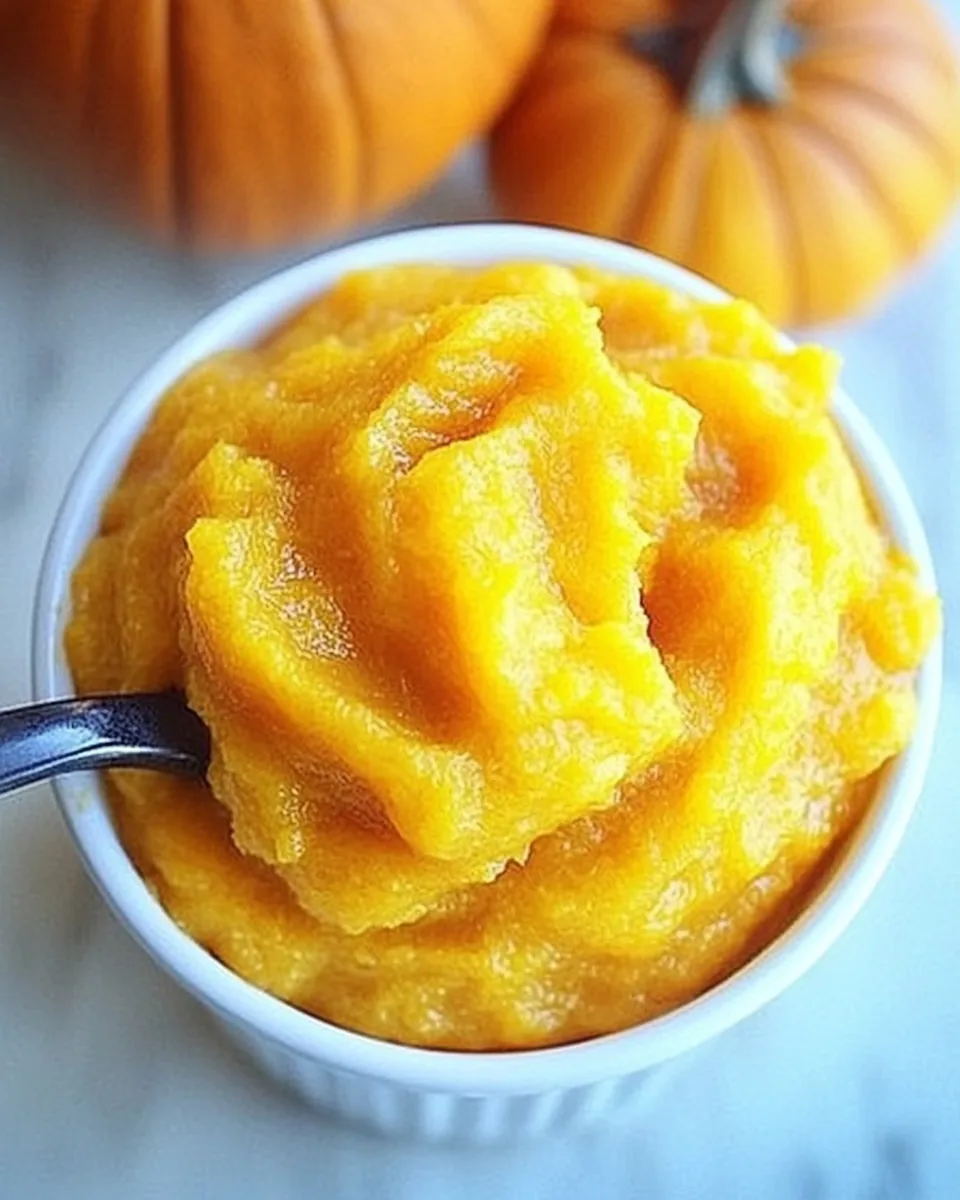
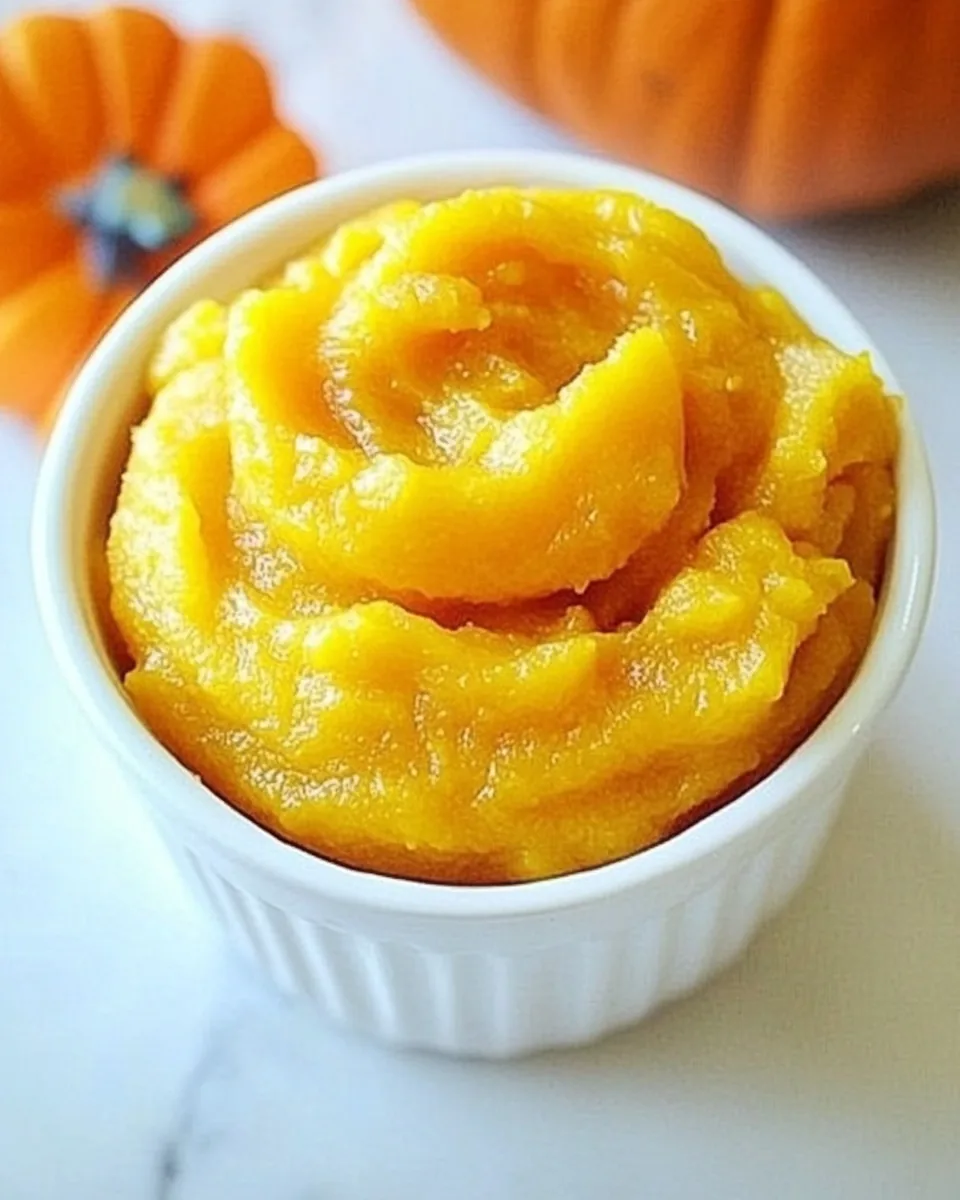
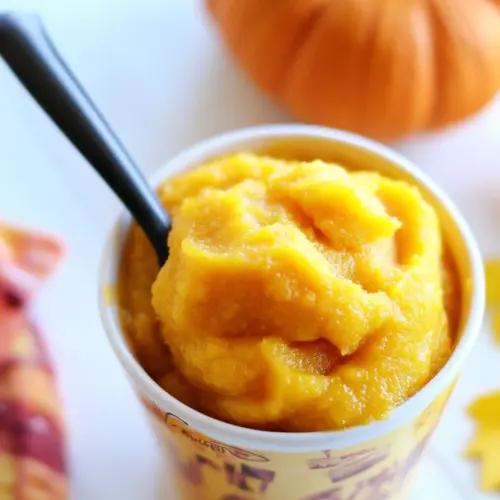
Pumpkin Puree
Making your own Pumpkin Puree is a delightful experience that brings the essence of fall right into your kitchen. I still remember the first time I decided to make it from scratch; the vibrant orange of the pumpkins and the warm, earthy aroma filled my home, setting the perfect mood for autumn. It was a crisp afternoon, and I was inspired by all the pumpkin-flavored treats I had been seeing everywhere. It felt like the right moment to dive into this wonderful process. The best part? Not only is homemade Pumpkin Puree fresher and more flavorful than anything from a can, but it also allows you to be creative in the kitchen. From soups to pies, the possibilities are endless! Plus, it’s incredibly easy to prepare, making it a great project whether you’re a seasoned chef or just starting out.
Recipe Snapshot
1 hr 15 mins
15 mins
60 mins
Medium
80 kcal
2 g
Vegan, Gluten-Free, AIP
0.5 g
Blender, Food Processor, Oven, Peeler, Chef’s Knife, Baking Sheet
The Beauty of This Pumpkin Puree
Reason 1: Freshness You Can Taste
When you make your own Pumpkin Puree, you experience the pure, fresh flavor of the pumpkin. Store-bought options often lack the vibrant taste found in freshly made puree. The difference is like night and day!
Reason 2: Nutritional Benefits
Fresh Pumpkin Puree is packed with nutrients, including vitamins A and C, potassium, and fiber. Using whole pumpkins ensures that you retain all these health benefits, making your recipes not just tasty but nutritious too.
Reason 3: Control Over Ingredients
By making your own Pumpkin Puree, you have complete control over the ingredients. You won’t find any preservatives or added sugars here. This is a wholesome option that you can feel good about serving to your family.
Reason 4: Versatility in the Kitchen
The uses for Pumpkin Puree are virtually limitless! From savory dishes like pumpkin soup to sweet treats like pumpkin pie, having a batch ready opens the door to a variety of culinary creations. It’s perfect for experimenting!
Reason 5: Simple Steps
This recipe is straightforward, making it accessible even for beginners. You’ll only need a few steps to transform a pumpkin into a smooth, creamy puree, and I’ll guide you through each part of the process.
Everything You Need for Pumpkin Puree
For this recipe, we’ll focus on a few simple yet powerful ingredients that come together to create a smooth and flavorful Pumpkin Puree. Each ingredient plays a vital role in ensuring that your puree is rich and delicious.
- Sugar pumpkins or sugar pie pumpkins: These small pumpkins are ideal for making puree thanks to their sweet, dense flesh. They have a higher sugar content than larger pumpkins, making them perfect for pies and other desserts.
- Rimmed baking sheet(s): This will catch any drips while roasting the pumpkins, making cleanup easy and ensuring your oven stays clean. You want everything to stay in one place during baking.
- Foil: Using foil helps to keep the moisture in while the pumpkin bakes, ensuring a tender texture for your puree.
- Food processor or high-powered blender: This tool is essential for turning your roasted pumpkin into a smooth and creamy puree. A food processor is often easier to use, but a blender can work just as well.
Directions for Pumpkin Puree
Making Pumpkin Puree is a simple process that anyone can master. Follow these detailed steps to create your own delicious puree at home!
- Preheat your oven to 325 degrees Fahrenheit. This temperature is perfect for roasting the pumpkins, allowing them to soften properly.
- Line your rimmed baking sheet with foil. This step is optional, but it can make cleanup easier and help capture any moisture that escapes while baking.
- Wash the pumpkin thoroughly to remove any dirt or debris. This ensures that what you’re cooking is clean and safe to eat.
- Cut off the top of the pumpkin using a sharp knife. Then slice it in half to expose the seeds and stringy innards.
- Use a sturdy spoon to scoop out the seeds. It’s perfectly fine if some strings are left behind; they will not affect the final product.
- Lay the pumpkin halves cut-side down on the baking sheet. Cover each half tightly with foil, which helps retain moisture during roasting.
- Bake the pumpkin for about one hour. You’ll know it’s ready when a fork easily pierces the flesh. Keep an eye on it to avoid overcooking!
- Once done, let the pumpkin cool for about 30 minutes. This makes it easier to handle and safer to work with.
- Peel the skin off the cooled pumpkin. Depending on the variety, the skin might come off easily, or you may need to scrape it away with a spoon.
- Place the chunks of pumpkin flesh into your food processor or blender. Pulse or blend until it reaches a smooth consistency. If your pumpkin is a bit dry, you can add a teaspoon of water at a time to help it along.
- Once blended, your Pumpkin Puree is ready to use! It can be used immediately or stored in an airtight container in the refrigerator for three to four days. You can also freeze it for several months.
Things Worth Knowing
- Choosing the right pumpkin: Opt for sugar pumpkins or sugar pie pumpkins for the best flavor. Their sweetness makes your puree more delicious and suitable for desserts.
- Testing doneness: To ensure the pumpkin is baked properly, check that it is fork-tender. If it’s still hard, give it more time in the oven.
- Blending tips: For a creamier texture, blend longer. If using a blender, work in batches if necessary to avoid overfilling.
- Storage tips: Store your Pumpkin Puree in the fridge for up to four days or freeze it in portions for easy use later.
Helpful Notes about Pumpkin Puree
Here are some helpful tips to ensure your Pumpkin Puree turns out perfectly every time.
- Storage: Keep any leftovers in an airtight container in the refrigerator and use within three to four days to enjoy the best flavor.
- Freezing: You can freeze Pumpkin Puree for several months. Portion it into freezer bags for easy access later.
- Pairing: Use Pumpkin Puree in soups, baked goods, or as a base for sauces. It’s versatile and adds a unique flavor to many dishes.
- Quality check: Always choose pumpkins that feel heavy for their size and have a smooth, even skin. Avoid those with blemishes or soft spots.
- Taste testing: Feel free to taste your puree and adjust for sweetness or spices if you’re using it in desserts!
Best Served With
- Soups: Add Pumpkin Puree to your favorite soup recipes for a creamy texture and rich flavor. It enhances flavors beautifully!
- Baked goods: Use Pumpkin Puree in muffins, breads, and pies. It’s a classic ingredient for delicious seasonal treats.
- Side dishes: Incorporate Pumpkin Puree into mash for a twist on traditional sides, or mix it into risotto for added creaminess.
- Breakfast: Stir Pumpkin Puree into oatmeal or yogurt for a seasonal breakfast that’s both comforting and nutritious.
- Fall gatherings: Serve Pumpkin Puree as a part of your Thanksgiving feast, pairing it with roasted meats and seasonal vegetables for a festive touch.
FAQ
Conclusion
The beauty of homemade Pumpkin Puree lies in its freshness and flavor. Not only does it elevate your recipes, but it also brings the essence of fall to your table. I encourage you to try making it yourself; the process is easy, and the results are oh-so-rewarding! Enjoy the natural sweetness and versatility of your own puree in various dishes, and make this autumn season truly special.
Pumpkin Puree
Equipment
- Blender
- Food Processor
- Oven
- Peeler
- Chef's Knife
- Baking Sheet
Ingredients
- 1 or more Sugar pumpkins or sugar pie pumpkins
- Rimmed baking sheet(s)
- Foil
- Food processor or high-powered blender
Instructions
- Preheat your oven to 325 degrees Fahrenheit. This temperature is perfect for roasting the pumpkins, allowing them to soften properly.
- Line your rimmed baking sheet with foil. This step is optional, but it can make cleanup easier and help capture any moisture that escapes while baking.
- Wash the pumpkin thoroughly to remove any dirt or debris. This ensures that what you’re cooking is clean and safe to eat.
- Cut off the top of the pumpkin using a sharp knife. Then slice it in half to expose the seeds and stringy innards.
- Use a sturdy spoon to scoop out the seeds. It’s perfectly fine if some strings are left behind; they will not affect the final product.
- Lay the pumpkin halves cut-side down on the baking sheet. Cover each half tightly with foil, which helps retain moisture during roasting.
- Bake the pumpkin for about one hour. You’ll know it's ready when a fork easily pierces the flesh. Keep an eye on it to avoid overcooking!
- Once done, let the pumpkin cool for about 30 minutes. This makes it easier to handle and safer to work with.
- Peel the skin off the cooled pumpkin. Depending on the variety, the skin might come off easily, or you may need to scrape it away with a spoon.
- Place the chunks of pumpkin flesh into your food processor or blender. Pulse or blend until it reaches a smooth consistency. If your pumpkin is a bit dry, you can add a teaspoon of water at a time to help it along.
- Once blended, your Pumpkin Puree is ready to use! It can be used immediately or stored in an airtight container in the refrigerator for three to four days. You can also freeze it for several months.
Notes
- Storage: Keep any leftovers in an airtight container in the refrigerator and use within three to four days to enjoy the best flavor.
- Freezing: You can freeze Pumpkin Puree for several months. Portion it into freezer bags for easy access later.
- Pairing: Use Pumpkin Puree in soups, baked goods, or as a base for sauces. It’s versatile and adds a unique flavor to many dishes.
- Quality check: Always choose pumpkins that feel heavy for their size and have a smooth, even skin. Avoid those with blemishes or soft spots.
- Taste testing: Feel free to taste your puree and adjust for sweetness or spices if you're using it in desserts!