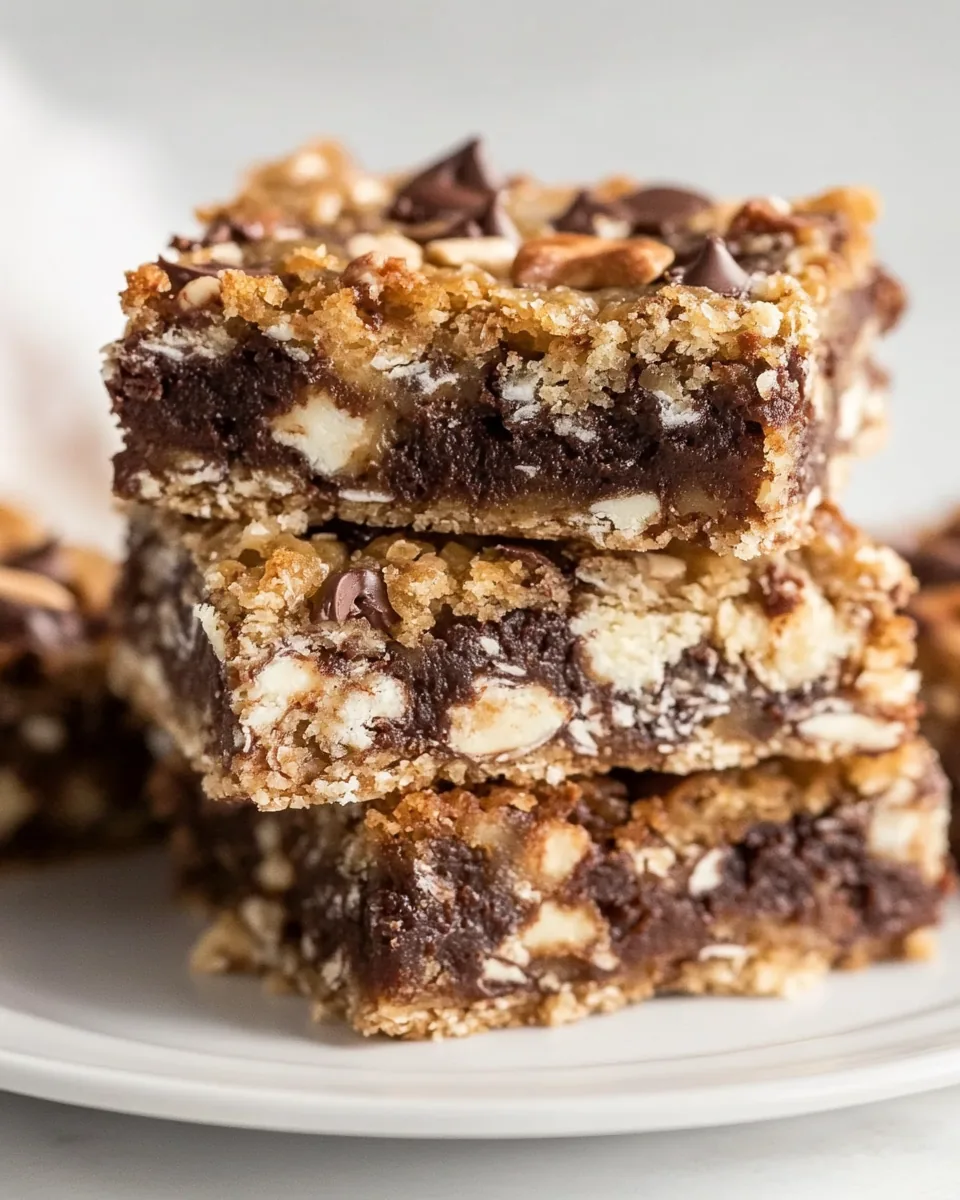
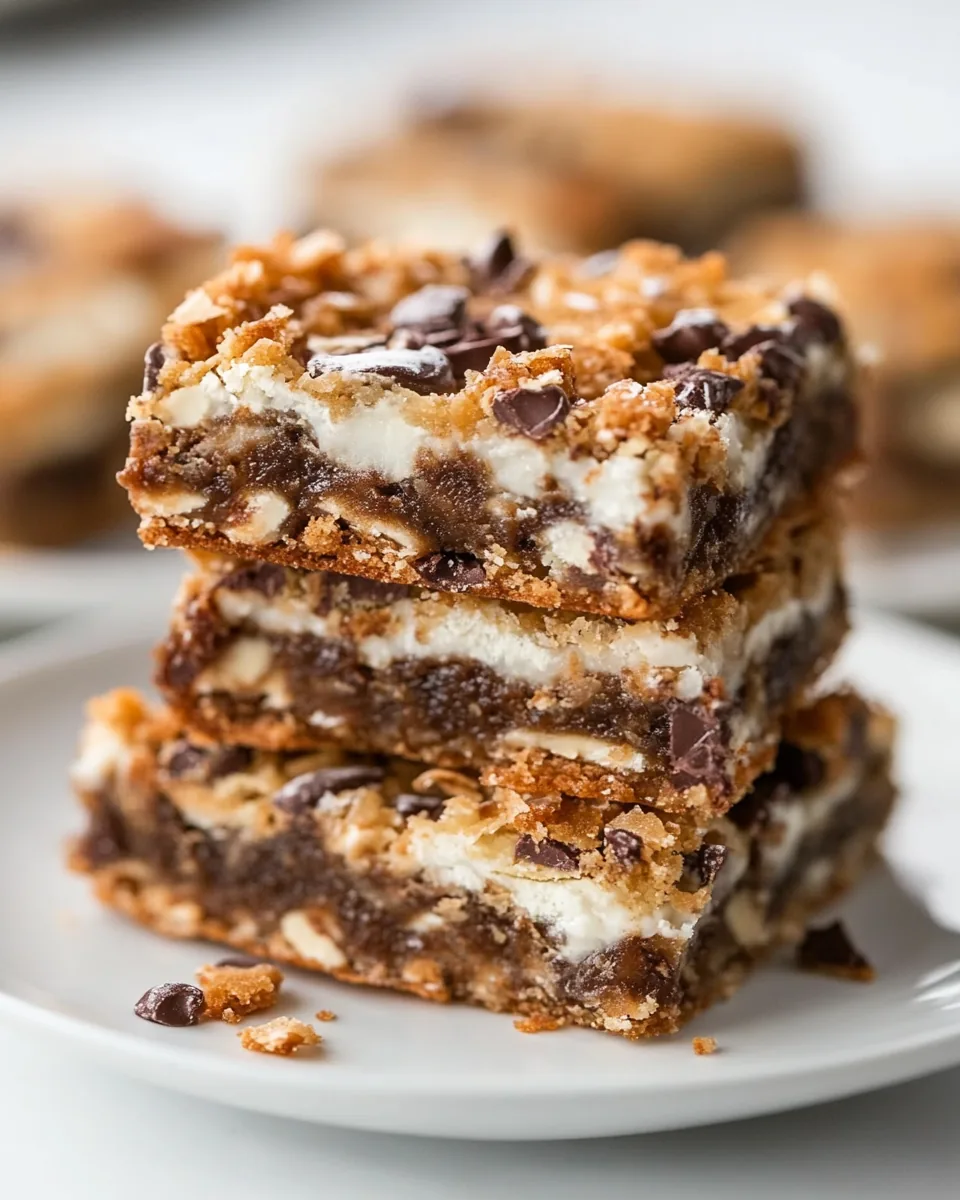
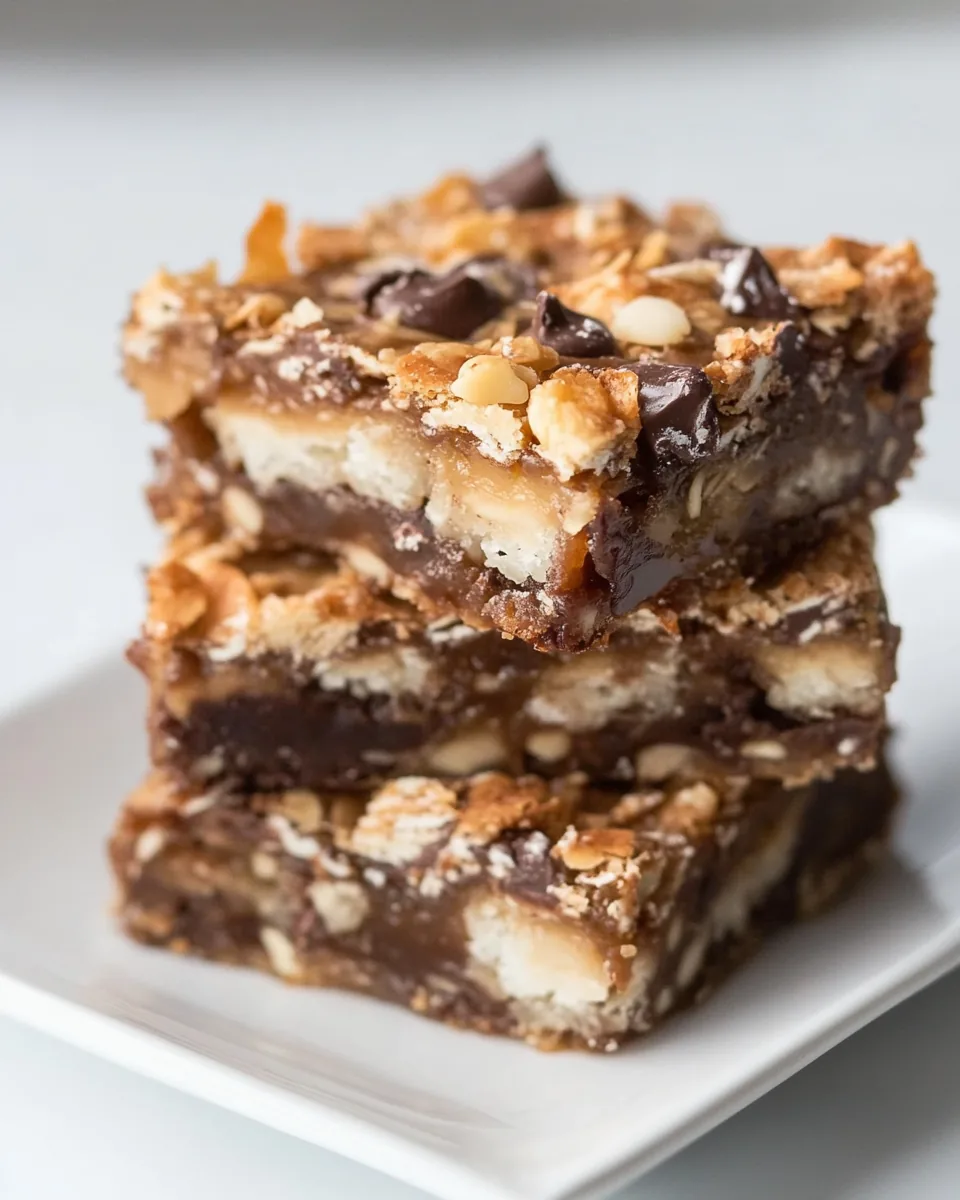
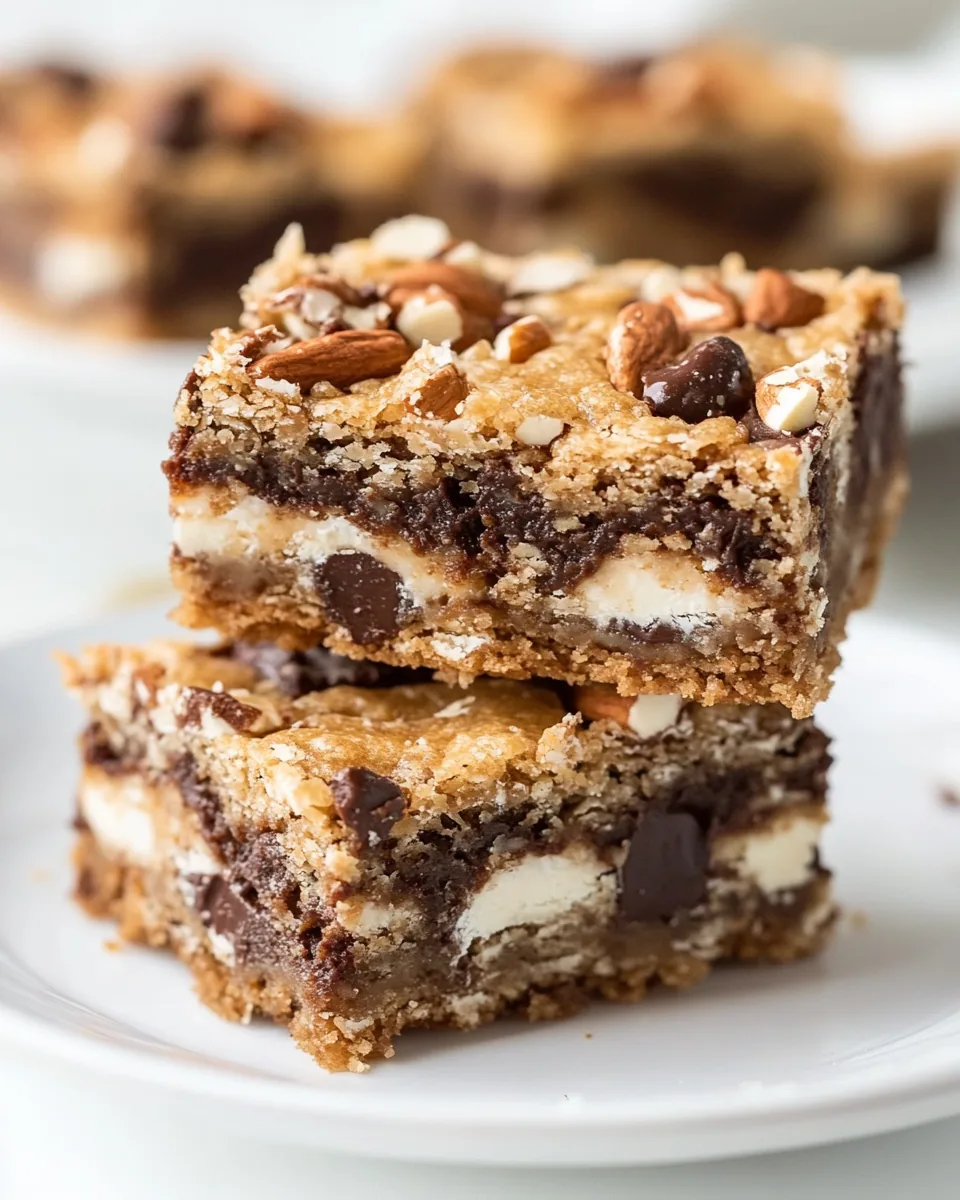
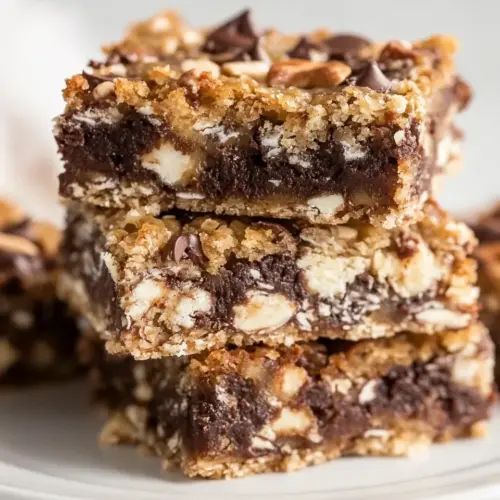
7 Layer Bars
There’s something undeniably nostalgic about making 7 Layer Bars. I remember the first time I encountered them at a family gathering; they were like magic squares of sweetness! Each layer brought its own personality, bringing together flavors in a way that truly made my taste buds dance. As I took my first bite, the rich blend of textures, from the crunchy nuts to the gooey sweetness of the condensed milk, created an experience I still cherish. Whenever I whip up a batch of these delightful bars, I can’t help but feel a wave of joy wash over me, just like that first time. Whether it’s a cozy family get-together or a lively potluck, 7 Layer Bars never fail to impress and satisfy. They’re the perfect treat to share and always spark conversations about everyone’s favorite childhood desserts. So let’s dive into this delicious journey together!
Recipe Snapshot
45 mins
15 mins
30 mins
Medium
220 kcal
2g g
Gluten-Free, Low FODMAP
12g g
9×13 baking dish, Measuring Cups and Spoons, Can opener
The Beauty of This 7 Layer Bars
Indulgent Layers
One of the reasons I adore 7 Layer Bars is their delightful layering. Each bite reveals a new texture and flavor, from the crunchy base of graham cracker crumbs to the smooth richness of sweetened condensed milk. These layers make every piece exciting and satisfying.
Simple Ingredients
The beauty of 7 Layer Bars lies in their simplicity. With just a handful of ingredients, you can create something truly spectacular. I love that I can easily find chocolate chips, butterscotch chips, and coconut at my local grocery store. It’s a recipe that’s accessible yet indulgent!
Perfect for Sharing
These bars are fantastic for gatherings! Whether it’s a birthday party or a casual get-together, 7 Layer Bars are easy to cut into squares and serve. They’re a hit with both kids and adults, making them a go-to treat for any occasion.
Customizable Delight
Another reason these bars stand out is their versatility. You can easily tweak the recipe to suit your preferences. Want more crunch? Add extra nuts. Feel like adding some fruit? Chopped bananas or strawberries could be a delightful surprise! The possibilities are endless.
Quick and Easy
Let’s face it, we all lead busy lives, and that’s why I appreciate how quick 7 Layer Bars come together. They bake in about 25 minutes, making them a convenient dessert option for those last-minute cravings.
Classic Comfort
Lastly, there’s something comforting about traditional recipes like 7 Layer Bars. They connect us to our childhood memories, family gatherings, and the simple joy of being together. Each time I make them, I’m reminded of the love that goes into sharing food with others.
What to Buy for 7 Layer Bars
To make 7 Layer Bars truly shine, you need to understand the role of each ingredient. The combination of sweet and crunchy elements creates a perfect balance, making every bite a delightful experience. The key players, such as butter, graham cracker crumbs, and sweetened condensed milk, come together beautifully in this recipe.
- ½ cup butter: This acts as the glue for your base, adding richness and flavor.
- 2 cups graham cracker crumbs: Provides the foundational crunchy layer that everyone loves.
- 1 cup chocolate chips: Adds melty sweetness that’s hard to resist.
- ¾ cup butterscotch chips: Brings a unique flavor twist that complements chocolate perfectly.
- 1 cup shredded coconut: Offers a chewy texture and tropical flair.
- 1 cup chopped nuts: I usually go for pecans or walnuts, adding crunch and nuttiness.
- 14 ounces sweetened condensed milk: This magical ingredient binds everything together, creating a luscious finish.
Step by Step Instructions for 7 Layer Bars
Making 7 Layer Bars is a straightforward process that anyone can master. Let’s get started on creating these sweet treats, and I promise you’ll be pleased with the results!
Preheat your oven to 350 degrees Fahrenheit. This step is crucial because it ensures your bars bake evenly. A well-preheated oven helps create that perfect golden-brown top that everyone loves.
Place butter in a 9×13 inch pan and put it in the oven as it preheats, allowing it to melt for about 2 to 4 minutes. Watch closely to ensure it doesn’t brown. Once melted, remove the pan from the oven carefully.
Pour graham cracker crumbs into the melted butter. Mix them together with a fork until fully combined and crumbly. Spread the mixture evenly over the bottom of the pan using your fingers or a spatula to pack it down gently.
Now, it’s time to layer on the fun! Begin by pouring chocolate chips over the crust, creating an even layer. Make sure to spread them out so every bite has that delicious chocolate flavor.
Next, sprinkle butterscotch chips on top of the chocolate chips. The combination of these two types of chips creates a rich, decadent layer.
Then, add shredded coconut evenly across the top. Coconut adds a lovely chewiness that complements the crunch of the crust.
After that, sprinkle chopped nuts evenly over the coconut layer. This adds yet another texture and flavor profile to your delightful bars.
Finally, take your can of sweetened condensed milk and drizzle it evenly over the entire mixture. You want to make sure every layer gets some of that sweet, gooey goodness.
Place the pan back into the oven and bake for 25 to 30 minutes. Keep an eye on them; you’re looking for the edges to turn golden-brown and start pulling away from the sides of the pan. The smell will be absolutely divine!
Once baked, remove the pan from the oven and let the bars cool completely before cutting them into squares. Patience is key here; cutting them too soon will result in a messy situation.
Things Worth Knowing
- Layering Technique: Ensure each layer is evenly distributed for perfect bites. It helps maintain a good balance of flavors and textures.
- Cooling Time: Allow the bars to cool completely for about 2 hours. This ensures they set properly and are easier to cut.
- Ingredient Quality: Use high-quality chocolate and nuts to elevate the flavor profile of your 7 Layer Bars. Trust me, it makes a difference!
- Baking Dish Choice: A glass or metal 9×13 pan works best. Metal allows for a crisper bottom while glass provides even heating.
Tips and Variations
Here are some helpful tips to enhance your experience making 7 Layer Bars:
- Storage: Keep your 7 Layer Bars at room temperature in an airtight container for up to 4 days. This helps maintain their texture and taste.
- Freezing: You can freeze these bars! Slice them and store in a freezer-safe container with parchment paper between layers to prevent sticking.
- Variations: Feel free to swap out nuts or add dried fruit like cranberries or raisins for a fun spin!
- Serving: These bars are great for picnics, potlucks, and family gatherings. They’re easy to transport and don’t require utensils!
- Topping Ideas: Drizzle melted chocolate or caramel sauce over the top for an extra decadent touch!
What to Serve Alongside 7 Layer Bars
When it comes to serving 7 Layer Bars, there are plenty of delightful options to consider:
- Ice Cream: Pairing these bars with a scoop of vanilla or chocolate ice cream creates a fantastic dessert experience.
- Coffee: Enjoy these bars alongside a cup of freshly brewed coffee or espresso for a delightful afternoon treat.
- Fruit Salad: A refreshing fruit salad can help balance the sweetness of the bars, making it a great side option.
- Chocolate Sauce: Serve with drizzles of chocolate sauce or caramel for added indulgence.
- Seasonal Celebrations: Perfect for holidays or birthdays, these bars can be the star dessert at any gathering!
- Cheese Board: Create a cheese and charcuterie board and include these bars for a sweet touch.
FAQ
Conclusion
7 Layer Bars are truly a standout dessert that combines layers of flavor and texture, making each bite a delightful experience. I invite you to try making them for your next gathering or simply to satisfy your sweet tooth. It’s a recipe that brings warmth and nostalgia, perfect for sharing with family and friends.
7 Layer Bars
Equipment
- 9x13 baking dish
- Measuring cups and spoons
- Can opener
Ingredients
- ½ cup butter
- 2 cups graham cracker crumbs
- 1 cup chocolate chips
- ¾ cup butterscotch chips
- 1 cup shredded coconut
- 1 cup chopped nuts
- 14 ounces sweetened condensed milk
Instructions
- Preheat your oven to 350 degrees Fahrenheit. This step is crucial because it ensures your bars bake evenly. A well-preheated oven helps create that perfect golden-brown top that everyone loves.
- Place butter in a 9×13 inch pan and put it in the oven as it preheats, allowing it to melt for about 2 to 4 minutes. Watch closely to ensure it doesn’t brown. Once melted, remove the pan from the oven carefully.
- Pour graham cracker crumbs into the melted butter. Mix them together with a fork until fully combined and crumbly. Spread the mixture evenly over the bottom of the pan using your fingers or a spatula to pack it down gently.
- Now, it’s time to layer on the fun! Begin by pouring chocolate chips over the crust, creating an even layer. Make sure to spread them out so every bite has that delicious chocolate flavor.
- Next, sprinkle butterscotch chips on top of the chocolate chips. The combination of these two types of chips creates a rich, decadent layer.
- Then, add shredded coconut evenly across the top. Coconut adds a lovely chewiness that complements the crunch of the crust.
- After that, sprinkle chopped nuts evenly over the coconut layer. This adds yet another texture and flavor profile to your delightful bars.
- Finally, take your can of sweetened condensed milk and drizzle it evenly over the entire mixture. You want to make sure every layer gets some of that sweet, gooey goodness.
- Place the pan back into the oven and bake for 25 to 30 minutes. Keep an eye on them; you’re looking for the edges to turn golden-brown and start pulling away from the sides of the pan. The smell will be absolutely divine!
- Once baked, remove the pan from the oven and let the bars cool completely before cutting them into squares. Patience is key here; cutting them too soon will result in a messy situation.