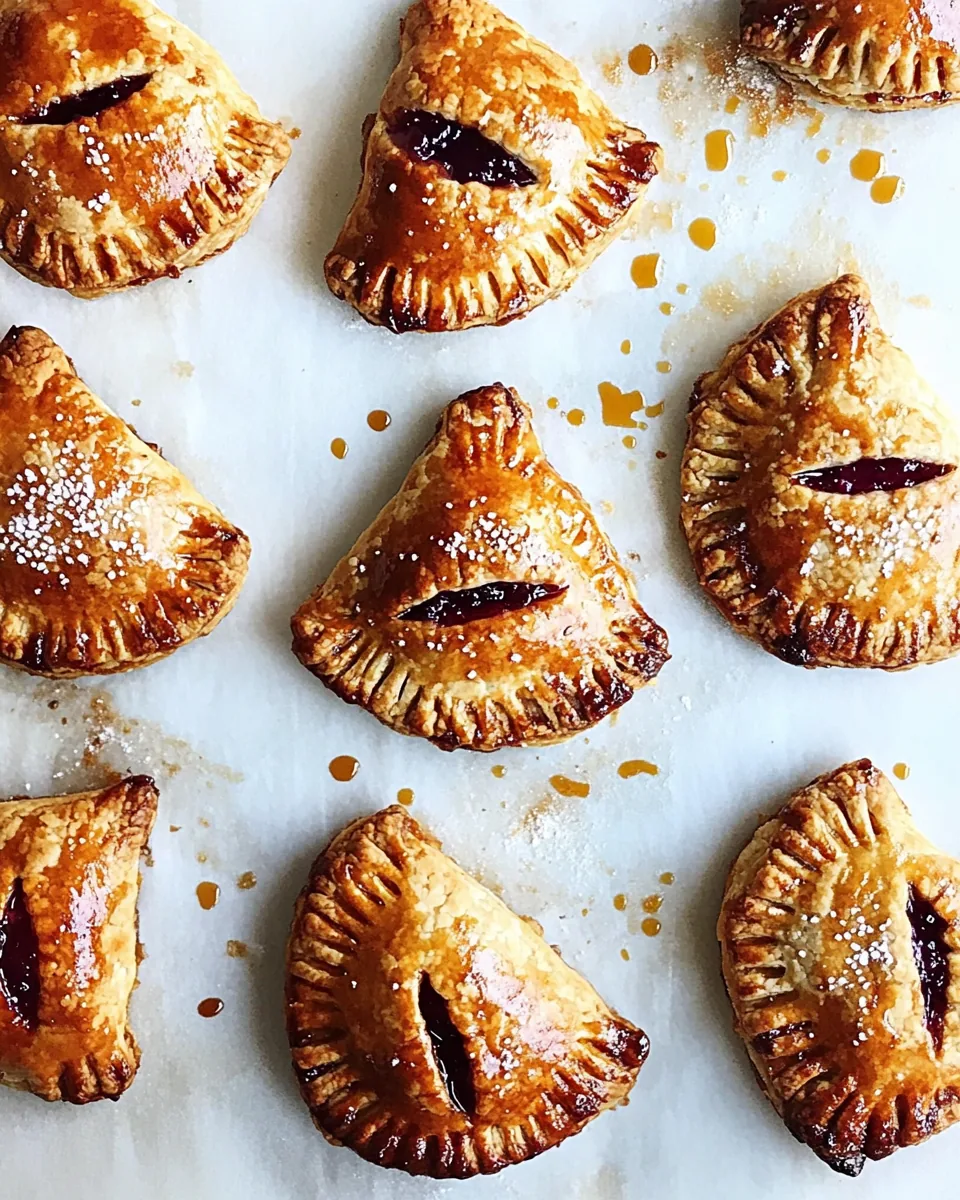
Peanut Butter and Jelly Hand Pies
There’s something incredibly comforting about childhood snacks, and one of my all-time favorites has to be the Peanut Butter and Jelly Hand Pies. Growing up, these hand pies were a delightful treat that I looked forward to after school. The combination of creamy peanut butter, sweet grape jelly, and flaky pastry could turn any ordinary day into a special occasion. As the aroma of freshly baked pies wafted through the kitchen, I felt a warm sense of nostalgia. The best part? They are just as fun to make as they are to eat. Whether you’re cooking with kids or whipping them up for a cozy night in, these hand pies bring joy to the table!
Recipe Snapshot
60 mins
0 mins
0 mins
Medium
170 kcal
3 g
Gluten-Free, Low FODMAP
9 g
Mixing Bowl, Oven, Whisk, Baking Sheet
What You’ll Enjoy About This Peanut Butter and Jelly Hand Pies
What makes the Peanut Butter and Jelly Hand Pies truly stand out is not just their delicious flavor but also the memories they evoke. Here are a few reasons I absolutely love making them.
Perfectly Portable
These hand pies are the ultimate snack. You can easily grab one on your way out the door, making them perfect for busy mornings or picnics in the park. They fit perfectly in lunchboxes, providing a sweet surprise that kids adore!
Endless Customization
While I adore the classic combination of peanut butter and jelly, the filling possibilities are endless. You could try different types of nut butters or even swap out the grape jelly for raspberry or strawberry to suit your taste. The world is your oyster!
Fun to Make Together
This recipe is a fantastic way to bond with friends or family. Rolling out the puff pastry and stuffing the pies can turn into a fun kitchen activity. Kids love to help with the crimping edges, and it’s a great chance to teach them some cooking skills.
Make Ahead and Freeze
These hand pies freeze beautifully, allowing you to make a big batch and enjoy them later. Just bake, cool, and freeze them in an airtight container. When you’re ready, pop them in the oven for a quick heat-up and enjoy the fresh-baked taste any time!
Great for Any Occasion
Whether it’s a birthday party, a casual get-together, or a cozy family dinner, the Peanut Butter and Jelly Hand Pies are a hit. They’re not just for kids; adults love them too! Serve them with some fresh fruit or a scoop of ice cream for a delightful dessert.
Key Ingredients for Peanut Butter and Jelly Hand Pies
Creating delicious Peanut Butter and Jelly Hand Pies starts with a handful of simple ingredients that come together in harmony. Each ingredient plays a vital role in building the flavor and texture of these delightful treats.
- Cream Cheese (4 ounces, at room temperature): Adds a creamy texture to the filling, balancing the sweetness of the sugar and jelly.
- Chunky Peanut Butter (⅓ cup): Provides the classic peanut flavor and a delightful crunch.
- Sugar (3 tablespoons): Sweetens the filling, making it irresistible.
- Honey (1 tablespoon): A natural sweetener that adds a hint of floral notes to the filling.
- Milk (1 tablespoon, plus a splash for the egg wash): Helps create a creamy filling and is used to achieve a beautiful golden crust when brushed on the pastry.
- Kosher Salt (Pinch): Enhances the flavors of the other ingredients.
- Puff Pastry (1 package, 17 ounces): The flaky, buttery crust that wraps around the filling, creating the perfect hand pie.
- Grape Jelly (9 teaspoons, 1 teaspoon per pie): A classic pairing with peanut butter, adding sweetness and a touch of fruitiness.
- Egg (1): Used to create an egg wash, giving the pies a glossy finish.
- Turbinado Sugar: Sprinkled on top for added sweetness and crunch.
Cooking Instructions for Peanut Butter and Jelly Hand Pies

Making Peanut Butter and Jelly Hand Pies is a straightforward and enjoyable process. Let’s dive into the steps and create these delightful treats together!
- In a medium bowl, combine cream cheese, chunky peanut butter, sugar, honey, milk, and kosher salt. Use a spatula to mix until everything is well incorporated and creamy. Set the mixture aside.
- Take one sheet of cold puff pastry and roll it out on a lightly floured surface to form an 11” x 11” square. It should be about 1/8 inch thick. If you don’t have a rolling pin, use a wine bottle or any round object.
- Using a 3” round cookie cutter or a glass, cut out nine circles from the rolled puff pastry. Place these circles on a parchment-lined baking sheet to keep them from sticking.
- In the center of each round, spoon about one tablespoon of the peanut butter filling and one teaspoon of grape jelly. Make sure to leave some space around the edges.
- In a small bowl, whisk together the egg and a splash of milk to create an egg wash. Brush this mixture around the edges of each circle to help seal the pies.
- Roll out the remaining sheet of puff pastry and cut out the same number of 3” rounds. Place these over the filled rounds, pressing down gently to seal.
- Using a fork, crimp the edges of each pie to ensure they are tightly sealed. This also adds a decorative touch!
- Transfer the baking sheet to the freezer and let the pies chill for 30 minutes to 1 hour. This step is crucial for keeping the shapes during baking.
- While the pies are chilling, preheat your oven to 425°F. Make sure to place a rack in the middle of the oven for even baking.
- Once chilled, remove the baking sheet from the freezer and brush the tops of each pie with the remaining egg wash. Cut two small slits in the top of each pie to allow steam to escape. Lastly, sprinkle turbinado sugar over the top for a sweet crunch!
- Bake the pies in the preheated oven for 15 minutes at 425°F. After that, reduce the heat to 400°F and continue baking for an additional 5 to 10 minutes, or until the pies are golden brown and bubbling.
- After baking, allow the pies to cool on the baking sheet for about 10 minutes before serving. They’re best enjoyed warm!
Things Worth Knowing
- Chilling the Pastry: Chilling the puff pastry before baking is essential. It helps maintain the flakiness and prevents shrinkage during baking.
- Crimping Edges: Don’t skip the crimping! This not only seals the pies but also adds a charming detail that enhances their presentation.
- Experimenting with Fillings: Feel free to get creative with your fillings. Think chocolate, almond butter, or any fruit preserves you love!
- Checking for Doneness: The pies should be golden brown on the outside. If you notice they’re browning too quickly, cover them with foil to prevent burning.
Tips for Success
To make your experience with Peanut Butter and Jelly Hand Pies as enjoyable as possible, here are some tips to ensure success.
- Storage: For any leftovers, store the pies in an airtight container in the refrigerator for up to three days.
- Freezing: These hand pies freeze incredibly well. To freeze, place them in a single layer in an airtight container and enjoy them within three months.
- Pairing: These hand pies pair wonderfully with a glass of cold milk or a scoop of vanilla ice cream for an indulgent dessert.
- Serving Warm: Always serve the pies warm for the best flavor and texture. You can reheat them in the oven for a few minutes if needed.
- Making Ahead: You can prepare the filling in advance and assemble the pies when you’re ready to bake.
Serving Ideas for Peanut Butter and Jelly Hand Pies
- Picnic Delight: These hand pies are perfect for picnics. Pack them up with some fresh fruit and drinks for a delightful outdoor meal.
- Lunch Box Treat: Surprise your kids with these pies in their lunch boxes. They make a fun and nostalgic dessert that’s easy to eat!
- Cozy Desserts: Enjoy these pies with a warm cup of tea or coffee during chilly evenings for a comforting treat.
- Breakfast Option: These hand pies can even work as a sweet breakfast option. Serve them with fruit slices for a balanced meal.
- Party Snack: Cut them into smaller sizes for parties or brunches, and watch them disappear in no time!
- Seasonal Celebrations: These hand pies are great for seasonal gatherings or holiday parties. They bring a touch of nostalgia that everyone will love!
FAQ
Conclusion
The Peanut Butter and Jelly Hand Pies are a delightful treat that combines nostalgia with deliciousness. They are easy to make, fun to eat, and perfect for any occasion. I invite you to try making these charming hand pies for your next gathering or even just for a cozy night at home. You’ll be glad you did!
Peanut Butter and Jelly Hand Pies
Equipment
- Mixing Bowl
- Oven
- Whisk
- Baking Sheet
Ingredients
- 4 ounces Cream Cheese at room temperature
- ⅓ cup Chunky Peanut Butter
- 3 tablespoons Sugar
- 1 tablespoon Honey
- 1 tablespoon Milk plus a splash for the egg wash
- Pinch Kosher Salt
- 1 package (17 ounces) Puff Pastry thawed in the refrigerator
- 9 teaspoons Grape Jelly 1 teaspoon per pie
- 1 Egg
- Turbinado Sugar for sprinkling
Instructions
- In a medium bowl, combine cream cheese, chunky peanut butter, sugar, honey, milk, and kosher salt. Use a spatula to mix until everything is well incorporated and creamy. Set the mixture aside.
- Take one sheet of cold puff pastry and roll it out on a lightly floured surface to form an 11” x 11” square. It should be about 1/8 inch thick. If you don’t have a rolling pin, use a wine bottle or any round object.
- Using a 3” round cookie cutter or a glass, cut out nine circles from the rolled puff pastry. Place these circles on a parchment-lined baking sheet to keep them from sticking.
- In the center of each round, spoon about one tablespoon of the peanut butter filling and one teaspoon of grape jelly. Make sure to leave some space around the edges.
- In a small bowl, whisk together the egg and a splash of milk to create an egg wash. Brush this mixture around the edges of each circle to help seal the pies.
- Roll out the remaining sheet of puff pastry and cut out the same number of 3” rounds. Place these over the filled rounds, pressing down gently to seal.
- Using a fork, crimp the edges of each pie to ensure they are tightly sealed. This also adds a decorative touch!
- Transfer the baking sheet to the freezer and let the pies chill for 30 minutes to 1 hour. This step is crucial for keeping the shapes during baking.
- While the pies are chilling, preheat your oven to 425°F. Make sure to place a rack in the middle of the oven for even baking.
- Once chilled, remove the baking sheet from the freezer and brush the tops of each pie with the remaining egg wash. Cut two small slits in the top of each pie to allow steam to escape. Lastly, sprinkle turbinado sugar over the top for a sweet crunch!
- Bake the pies in the preheated oven for 15 minutes at 425°F. After that, reduce the heat to 400°F and continue baking for an additional 5 to 10 minutes, or until the pies are golden brown and bubbling.
- After baking, allow the pies to cool on the baking sheet for about 10 minutes before serving. They’re best enjoyed warm!
Notes
- Tip 1: For any leftovers, store the pies in an airtight container in the refrigerator for up to three days.
- Tip 2: These hand pies freeze incredibly well. To freeze, place them in a single layer in an airtight container and enjoy them within three months.
- Tip 3: These hand pies pair wonderfully with a glass of cold milk or a scoop of vanilla ice cream for an indulgent dessert.
- Tip 4: Always serve the pies warm for the best flavor and texture. You can reheat them in the oven for a few minutes if needed.
- Tip 5: You can prepare the filling in advance and assemble the pies when you’re ready to bake.