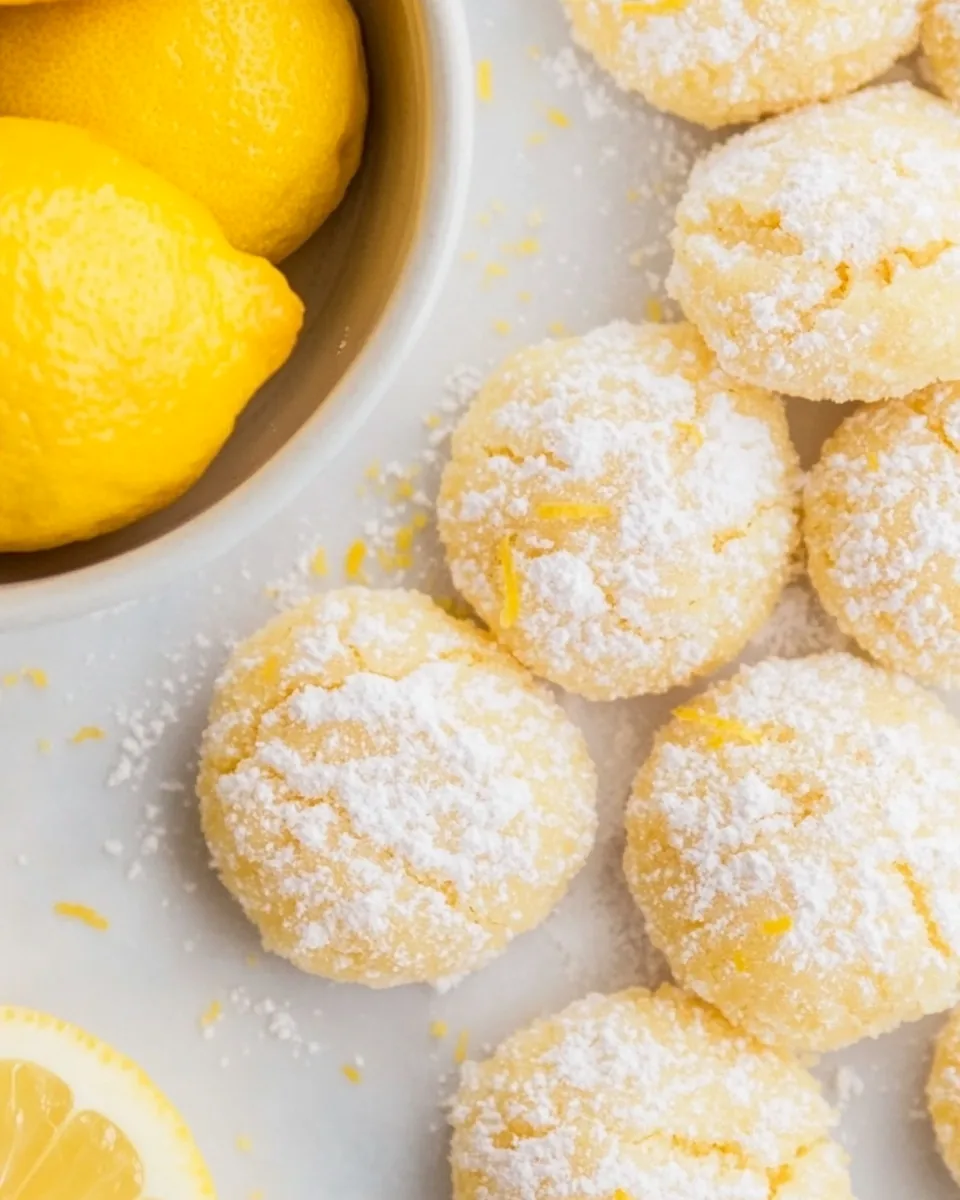
Lemon Pixie Cookies
Every time I bake these Lemon Pixie Cookies, it feels like I’m walking through a sunlit orchard. The bright, zesty flavor of lemon brings back memories of lazy afternoons spent in the backyard, enjoying sweet treats with family. These cookies are not just delicious; they are a delightful escape that captures that fresh citrus essence. I can still hear the laughter, the clinking of glasses, and the chatter as we enjoyed the simple pleasure of homemade cookies. Whether it’s a regular Tuesday or a special gathering, these cookies are a perfect touch of sweetness. Just one bite, and you’re instantly transported to a sunny day filled with joy and warmth. Let’s dive into how to make these heavenly bites that are bound to brighten your day!
Recipe Snapshot
10 mins
0 mins
10 mins
Medium
120 kcal
2 g
Keto, Paleo, Vegan
9 g
Wooden Spoon, Oven, Baking Sheet
Why This Lemon Pixie Cookies Is So Good
Irresistibly Refreshing Flavor
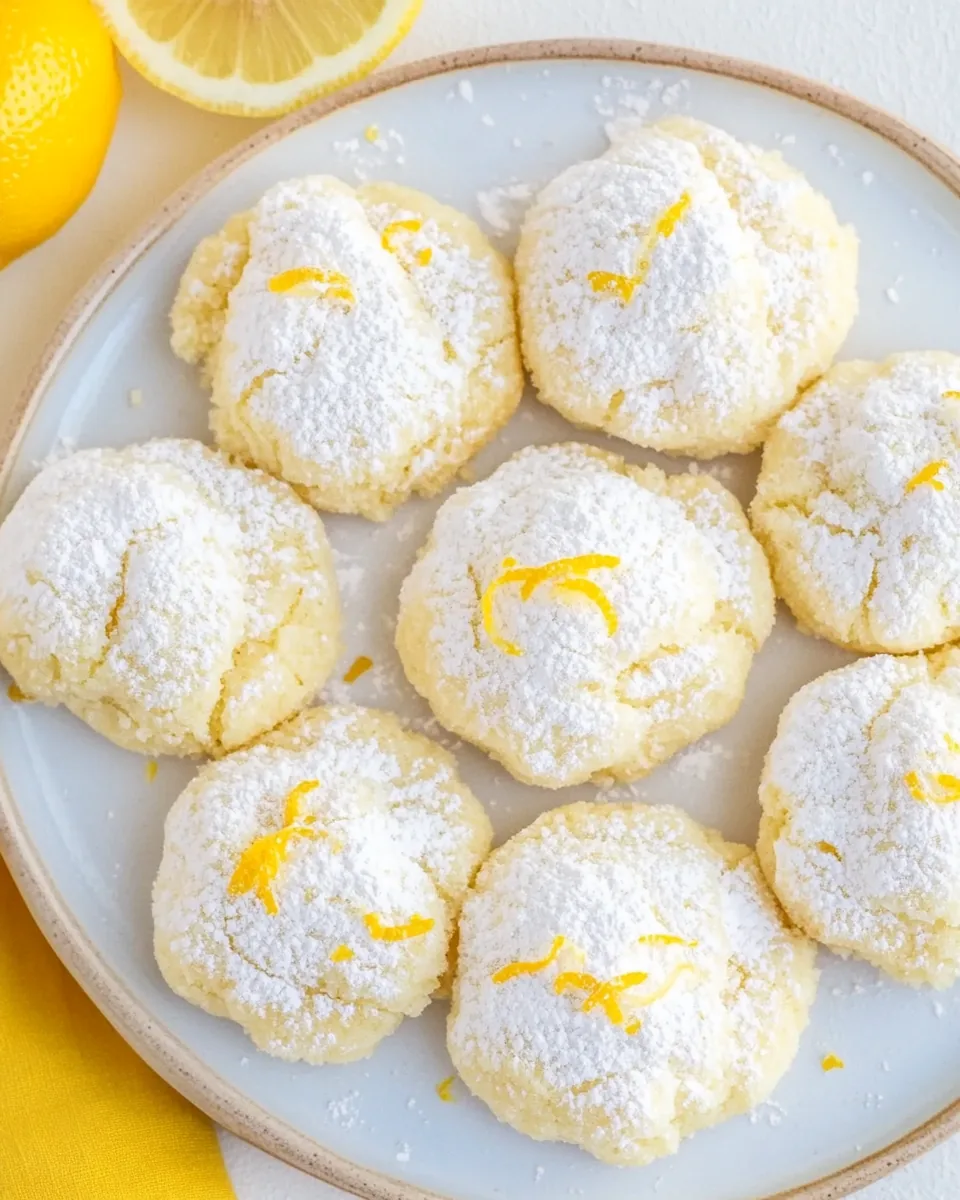
The first thing that stands out about these Lemon Pixie Cookies is their refreshing flavor. The blend of lemon zest and lemon juice creates a bright and tangy taste that dances on your palate. It’s a perfect balance that leaves you wanting more.
Quick and Easy to Make
Who doesn’t love a recipe that’s easy to whip up? These cookies come together quickly and require minimal ingredients. You can mix them up in no time, making them ideal for spontaneous cravings or last-minute gatherings.
Perfect for Any Occasion
Whether you’re hosting a party or just need a sweet treat for yourself, these cookies fit right in. They are versatile enough for formal occasions or casual get-togethers. Plus, their lightness makes them a perfect companion for a cup of tea or coffee.
Chewy or Crunchy, You Decide
One of the best aspects of these cookies is the ability to customize them. If you prefer a chewier texture, simply chill the dough before baking. If you like them a bit crispier, you can bake them right away. Either way, you’ll end up with delightful cookies!
A Guilt-Free Indulgence
Using almond flour instead of traditional flour makes these cookies not only gluten-free but also adds a nutty flavor that pairs beautifully with lemon. Additionally, substituting powdered sugar with erythritol can lower the sugar content, making them a guilt-free indulgence.
Fun for the Kids
These cookies are perfect for involving the little ones in the kitchen! Kids love rolling the dough into balls and coating them in powdered sugar. It’s a fun way to teach them about baking while creating lasting memories together.
Main Ingredients for Lemon Pixie Cookies
These ingredients work beautifully together to create the perfect balance of flavor and texture in your Lemon Pixie Cookies. The combination of almond flour and butter provides a tender crumb, while the natural sweetness from powdered sugar and the zing from lemon juice make these cookies irresistibly tasty. Each ingredient plays a pivotal role in bringing this delightful treat to life.
- 1 cup almond flour – A nutty and gluten-free alternative to regular flour, it adds a lovely texture to the cookies.
- 2 tbsp powdered sugar or erythritol – This sweetener gives the cookies their delightful sweetness, with erythritol offering a lower-calorie option.
- zest of one lemon – Adds a burst of citrus flavor that enhances the overall taste.
- scant 1/4 tsp salt – Balances the sweetness and highlights the flavors of the other ingredients.
- 1/8 tsp baking soda – Provides a little lift and ensures the cookies don’t turn out too dense.
- 2 tbsp butter or coconut oil – Provides richness and a smooth texture, with coconut oil offering a dairy-free option.
- 1 tsp pure vanilla extract – Enhances the cookie’s flavor profile with a hint of warmth.
- 2 tsp lemon juice – Intensifies the lemon flavor and adds moisture to the dough.
- optional powdered sugar or erythritol for rolling – For that extra touch of sweetness on the outside.
The Process for Making Lemon Pixie Cookies
Making Lemon Pixie Cookies is as easy as it is rewarding. The aroma of melting butter fills the kitchen, and the anticipation builds as you prepare to enjoy these delightful treats. Follow these steps, and you’ll have a batch of cookies that are sure to please everyone!
- Start by melting your butter or coconut oil in a small saucepan over low heat. You want it just melted, not bubbling. This process helps to combine the ingredients smoothly.
- Once melted, remove from heat and transfer it to a mixing bowl. Stir in the powdered sugar (or erythritol) until well combined. You should see a luscious mixture that is slightly glossy.
- Add the almond flour, lemon zest, salt, baking soda, lemon juice, and vanilla extract to the bowl. Mix everything until a dough forms. It should be soft but not sticky. Don’t worry if it feels a bit crumbly—this is normal!
- Next, using your hands, scoop out small portions of the dough and roll them into balls, about 1 inch in diameter. Place them on a parchment-lined baking tray, ensuring there’s enough space between them.
- If you like chewier cookies, cover the tray with plastic wrap and refrigerate the dough balls for at least thirty minutes. This step helps to firm them up and enhances the flavors.
- If you’re ready to bake right away, preheat your oven to 325°F (or 165°C). As the oven warms, you can prepare your baking sheet.
- After the oven reaches temperature, remove the tray from the refrigerator (if chilling), and optionally roll the balls in additional powdered sugar for a sweet crust.
- Place the tray in the preheated oven and bake for about 10 to 12 minutes. Keep an eye on them; they should be slightly golden at the edges while remaining soft in the center.
- Once baked, remove them from the oven and allow them to cool on the tray for a few minutes. They will be delicate at first but firm up once they cool completely.
- Finally, transfer the cookies to a wire rack to cool down fully. This is the hardest part—waiting! But the reward will be worth it when you finally take that first bite of your Lemon Pixie Cookies.
Things Worth Knowing
- Cooling Time: Be patient while your cookies cool. They may seem fragile right out of the oven but will firm up as they cool.
- Ingredient Quality: Using fresh lemons for zest and juice will enhance the flavor significantly. Always choose organic if possible.
- Almond Flour: This ingredient can vary in texture and absorbency. If your dough seems too dry, a teaspoon of water can help adjust it.
- Storage: Store your cookies in an airtight container at room temperature to maintain freshness. If they last longer than a few days (which is rare!), you can refrigerate them.
Tips for Success

To ensure your Lemon Pixie Cookies turn out perfectly every time, here are some helpful tips to keep in mind.
- Storage: Keep your cookies in an airtight container at room temperature for up to a week. They also freeze well for longer storage.
- Freezing: You can freeze the cookie dough balls before baking. Just roll them into balls, freeze until solid, then transfer to a freezer bag. Bake directly from frozen, adding a couple of extra minutes to the baking time.
- Pairing: Serve these cookies with a refreshing herbal tea or a scoop of vanilla ice cream for a delightful dessert.
- Variations: Consider adding nuts or dried fruit to the dough for an extra texture and flavor boost. Chopped walnuts or cranberries pair wonderfully with the lemon.
- Don’t Overmix: When combining the dough ingredients, mix just until combined. Overmixing can lead to tough cookies.
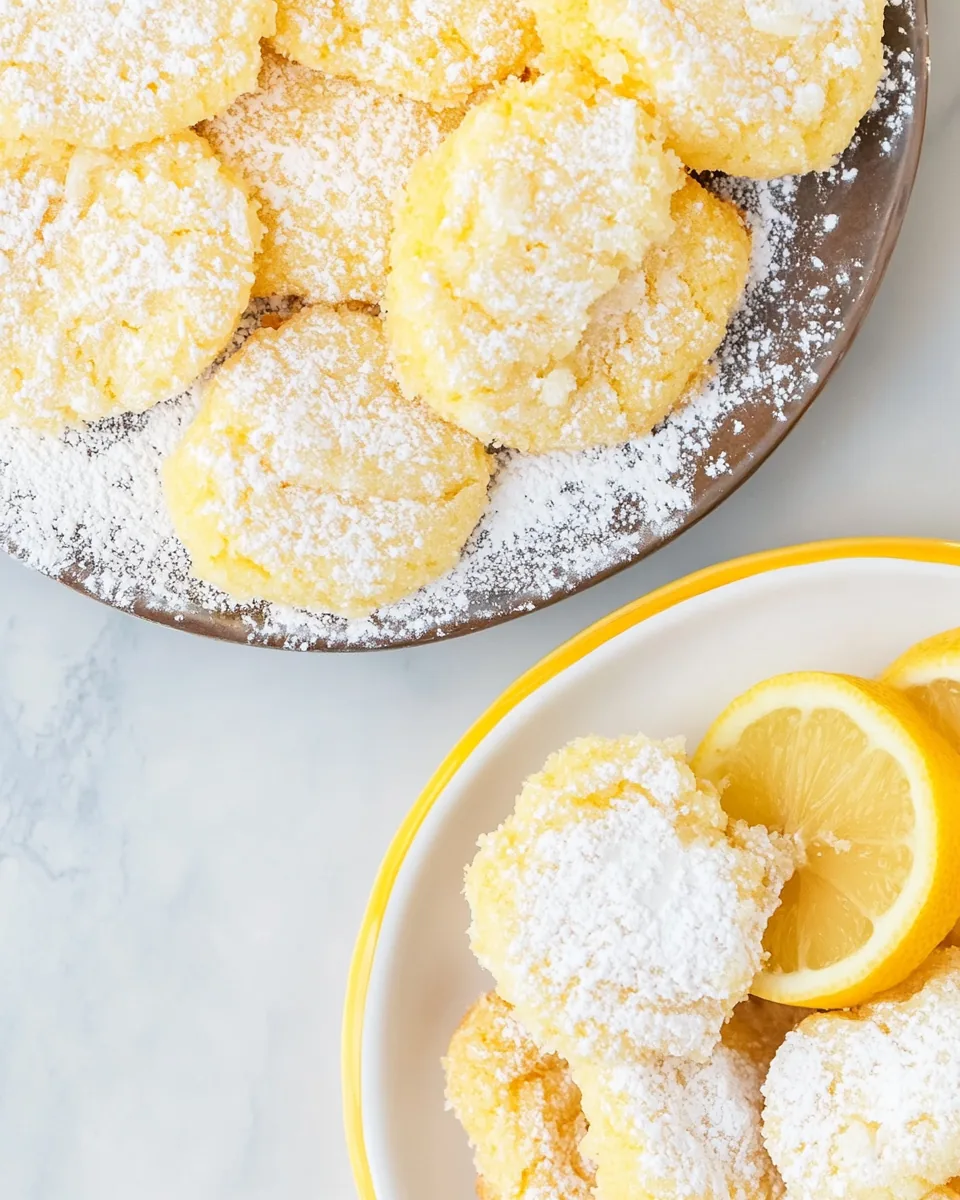
How to Serve Lemon Pixie Cookies
When it comes to serving your delicious Lemon Pixie Cookies, the possibilities are endless. Here are some ideas to elevate your cookie experience:
- Tea Time: Pair these cookies with your favorite tea for a delightful afternoon treat. Their lemony flavor complements herbal and green teas beautifully.
- Picnic Treat: Pack these cookies for a picnic or outdoor gathering. They’re easy to transport and a hit among friends and family.
- Special Celebrations: Serve them at birthday parties or celebrations. Their refreshing taste makes them a great addition to any dessert table.
- Gift Giving: Consider packaging these cookies in a cute jar with a ribbon as a thoughtful gift for friends and family.
- Seasonal Appeal: These cookies are perfect for spring and summer events, but honestly, they can brighten any season!
FAQ
Conclusion
These Lemon Pixie Cookies are truly a bright spot in the world of sweets. With their unique flavor and delightful texture, they are bound to impress anyone who tries them. I encourage you to give them a go—you won’t regret it! Enjoy the baking process and the joyful moments that come with sharing these treats with loved ones.
Lemon Pixie Cookies
Equipment
- Wooden Spoon
- Oven
- Baking Sheet
Ingredients
- 1 cup almond flour
- 2 tbsp powdered sugar or erythritol
- 1 zest of one lemon
- scant 1/4 tsp salt
- 1/8 tsp baking soda
- 2 tbsp butter or coconut oil
- 1 tsp pure vanilla extract
- 2 tsp lemon juice
- optional powdered sugar for rolling
Instructions
- Start by melting your butter or coconut oil in a small saucepan over low heat. You want it just melted, not bubbling. This process helps to combine the ingredients smoothly.
- Once melted, remove from heat and transfer it to a mixing bowl. Stir in the powdered sugar (or erythritol) until well combined. You should see a luscious mixture that is slightly glossy.
- Add the almond flour, lemon zest, salt, baking soda, lemon juice, and vanilla extract to the bowl. Mix everything until a dough forms. It should be soft but not sticky. Don't worry if it feels a bit crumbly—this is normal!
- Next, using your hands, scoop out small portions of the dough and roll them into balls, about 1 inch in diameter. Place them on a parchment-lined baking tray, ensuring there’s enough space between them.
- If you like chewier cookies, cover the tray with plastic wrap and refrigerate the dough balls for at least thirty minutes. This step helps to firm them up and enhances the flavors.
- If you're ready to bake right away, preheat your oven to 325°F (or 165°C). As the oven warms, you can prepare your baking sheet.
- After the oven reaches temperature, remove the tray from the refrigerator (if chilling), and optionally roll the balls in additional powdered sugar for a sweet crust.
- Place the tray in the preheated oven and bake for about 10 to 12 minutes. Keep an eye on them; they should be slightly golden at the edges while remaining soft in the center.
- Once baked, remove them from the oven and allow them to cool on the tray for a few minutes. They will be delicate at first but firm up once they cool completely.
- Finally, transfer the cookies to a wire rack to cool down fully. This is the hardest part—waiting! But the reward will be worth it when you finally take that first bite of your Lemon Pixie Cookies.
Notes
- Storage: Keep your cookies in an airtight container at room temperature for up to a week. They also freeze well for longer storage.
- Freezing: You can freeze the cookie dough balls before baking. Just roll them into balls, freeze until solid, then transfer to a freezer bag. Bake directly from frozen, adding a couple of extra minutes to the baking time.
- Pairing: Serve these cookies with a refreshing herbal tea or a scoop of vanilla ice cream for a delightful dessert.
- Variations: Consider adding nuts or dried fruit to the dough for an extra texture and flavor boost. Chopped walnuts or cranberries pair wonderfully with the lemon.
- Don’t Overmix: When combining the dough ingredients, mix just until combined. Overmixing can lead to tough cookies.