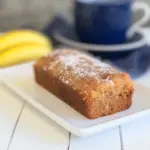
Homemade Banana Pudding
There’s something truly magical about a dish like Homemade Banana Pudding. I still remember the first time I savored it; it was a hot summer day, and my grandmother had just pulled it out of the fridge. The layers of creamy pudding, sweet bananas, and crunchy vanilla wafers captivated my taste buds and created a comforting experience I’ll never forget. Every spoonful felt like a warm embrace, bringing back memories of family gatherings and laughter. I knew right then that this delightful dessert would become a staple in my kitchen.
Making Homemade Banana Pudding feels like a labor of love. Each step is infused with nostalgia, from whisking the rich, velvety pudding to layering it with perfectly ripe bananas and crispy wafers. It’s not just a dessert; it’s a reminder of cherished moments and the simple joys of life. I often find myself reminiscing while preparing this dish, eager to share it with friends and family, knowing how much joy it can bring.
You can customize it, serve it on special occasions, or just enjoy it as a sweet treat after dinner. Whatever the reason, making Homemade Banana Pudding is always a good idea. So, let’s dive into this delicious recipe and create some sweet memories together!
Recipe Snapshot
30 mins
15 mins
15 mins
Medium
330 kcal
4 g
Keto, Paleo, Whole30
14 g
Kitchen Scale (optional), 8×8-inch Baking Pan
What Sets This Homemade Banana Pudding Apart
Comforting and Nostalgic
There’s no denying that Homemade Banana Pudding offers a sense of comfort. Just like a warm hug, it soothes the soul and brings back memories of simpler times. Each bite transports you back to cherished family moments, making it more than just a dessert—it’s a tradition.
Layers of Flavor
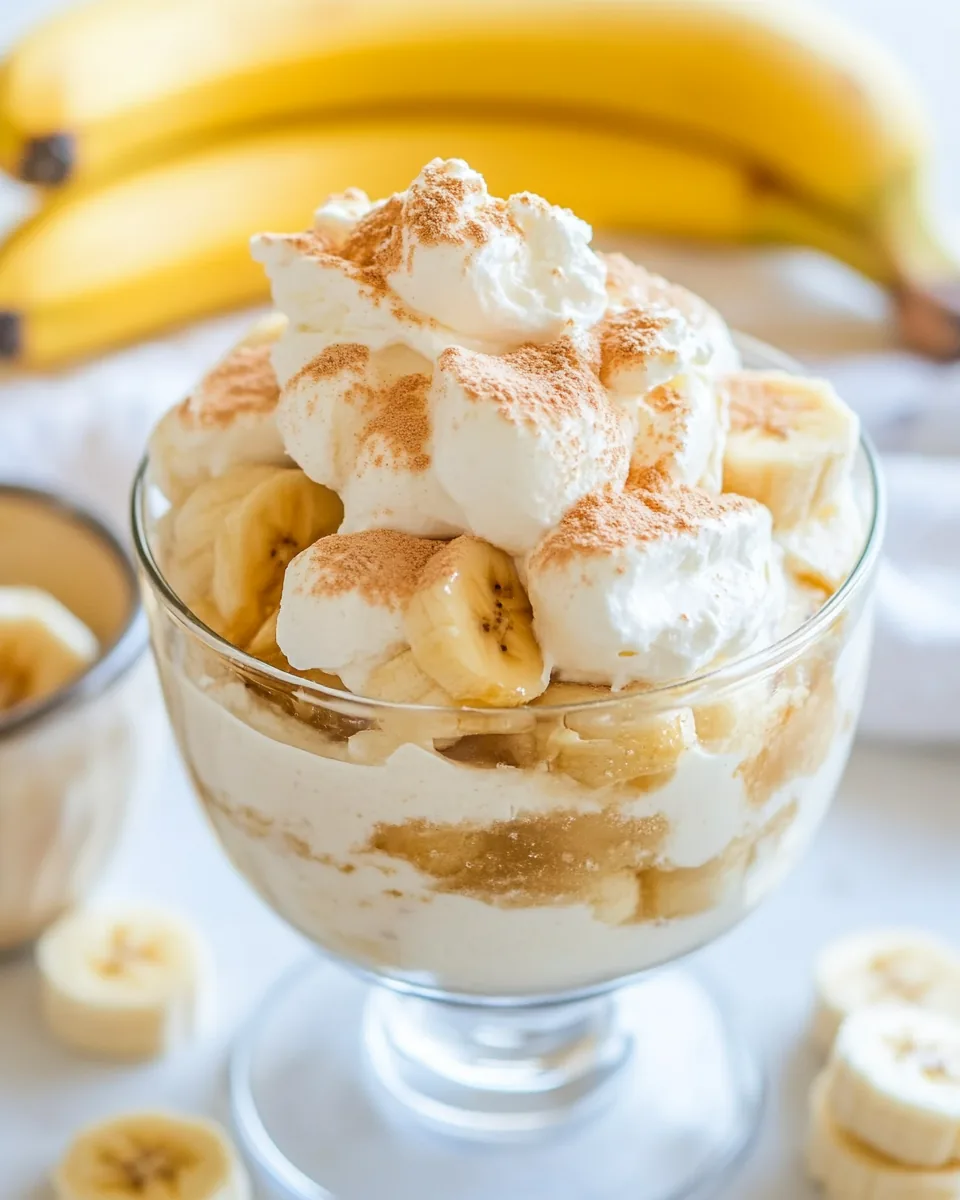
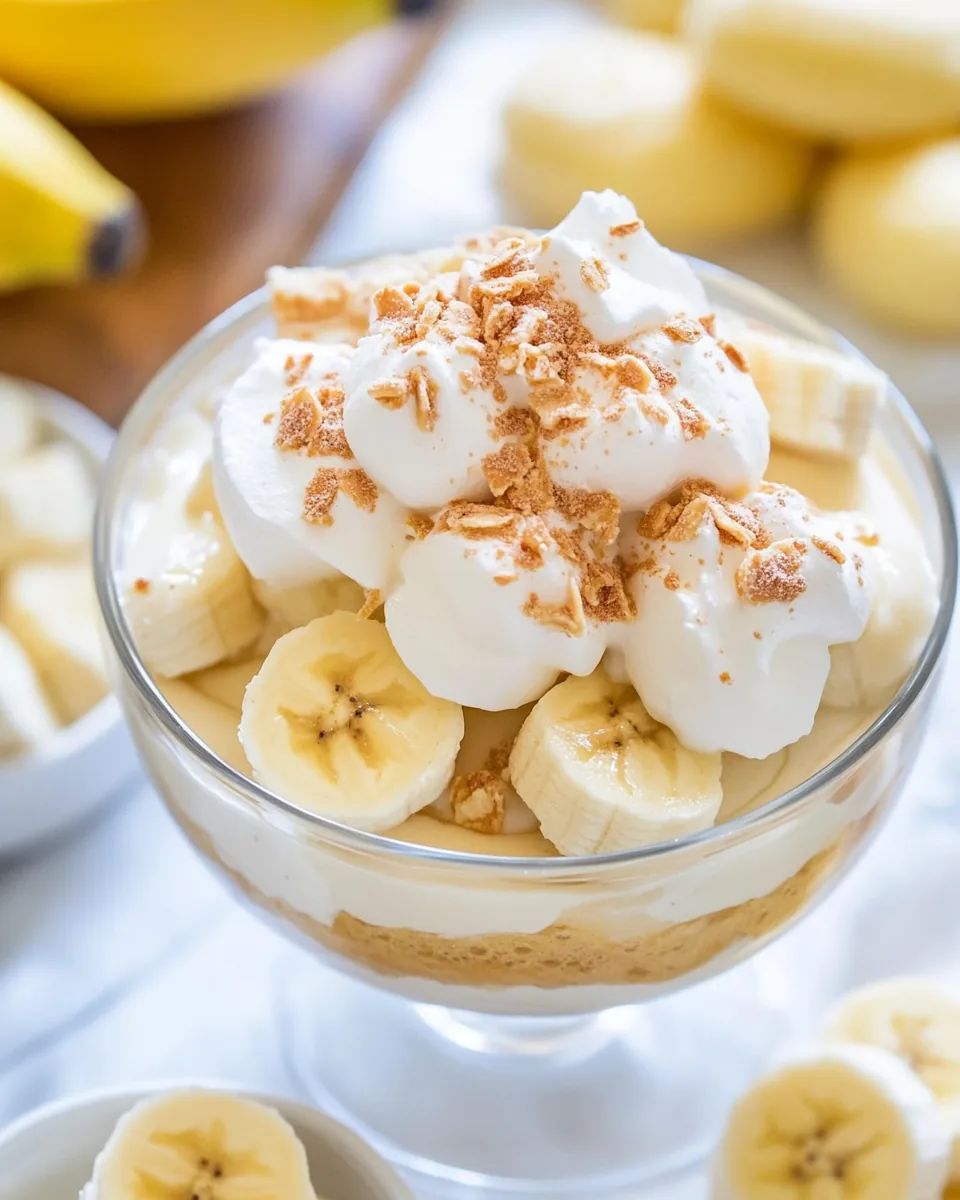
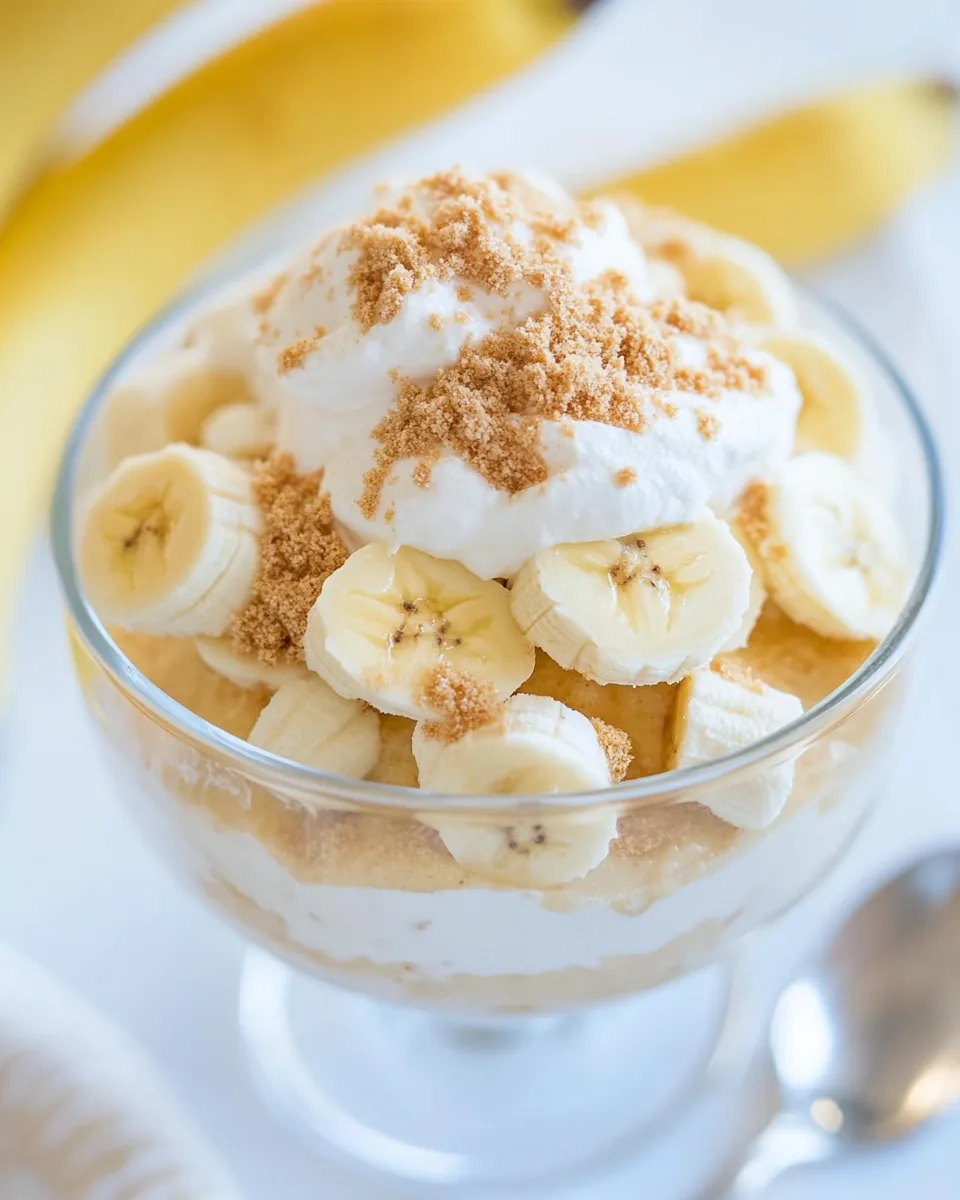
The beauty of this dish lies in its layers. The luscious pudding blends beautifully with sweet banana slices and crunchy Nilla Wafers, creating a delightful contrast in every spoonful. The combination of textures keeps every bite interesting, making it a favorite for both kids and adults alike.
Easy to Make
Don’t worry if you’re not an experienced baker; Homemade Banana Pudding is incredibly easy to whip up. The steps are straightforward, allowing even novice cooks to shine in the kitchen. With just a few ingredients, you can impress your family and friends without feeling overwhelmed.
Perfect for Any Occasion
Whether it’s a summer barbecue or a cozy family dinner, Homemade Banana Pudding fits right in. It’s a versatile dessert that can be enjoyed year-round, making it a fantastic choice for any gathering or celebration.
Customizable Delight
One of the best things about this recipe is its versatility. You can play around with flavors by adding chocolate, caramel, or even nuts. Feel free to experiment with your favorite ingredients and make this dessert your own!
Make Ahead Convenience
Want to simplify your life during busy gatherings? Homemade Banana Pudding is a great make-ahead dessert that actually tastes better when chilled. Prepare it a day in advance and let it sit in the fridge. When it’s time for dessert, you’ll have a delicious treat ready to serve!
Ingredients to Make Homemade Banana Pudding
The ingredients for Homemade Banana Pudding come together beautifully to create a dessert that’s rich, creamy, and utterly satisfying. Each component plays a crucial role in delivering that classic flavor we all love. Let’s take a closer look at the key players in this scrumptious recipe.
- ½ cup granulated sugar – The sweetness that binds all flavors together, creating a luscious base for the pudding.
- ⅓ cup cornstarch – This ingredient thickens the pudding, giving it that perfect creamy consistency.
- 2½ cups whole milk – The creamy backdrop that enhances the richness of the pudding.
- ½ teaspoon kosher salt – A pinch of salt to balance the sweetness and elevate the flavors.
- 3 egg yolks – They add richness and help to thicken the pudding further.
- 2 teaspoons pure vanilla extract – A touch of vanilla brings warmth and depth to the overall flavor.
- 3 tablespoons salted butter – Adding butter makes the pudding decadently creamy.
- 4 drops yellow food coloring – Optional, but it adds a lovely hue to the pudding.
- 11 ounces Nilla Wafers – These cookies provide the perfect crunch and flavor contrast.
- 2 large bananas – Sliced bananas add natural sweetness and a fruity burst to every bite.
- 8 ounces whipped topping – A light finishing touch that makes this dessert extra special.
The Process for Making Homemade Banana Pudding
Now that we have our ingredients ready, let’s dive into the delightful process of making Homemade Banana Pudding. Each step is simple yet rewarding, and I’ll guide you through it.
- Start by combining ½ cup granulated sugar, ⅓ cup cornstarch, 2½ cups whole milk, and ½ teaspoon kosher salt in a double boiler or a heatproof bowl set over a saucepan. Place it over medium heat. Stir continuously until the mixture begins to thicken, which should take around 10 to 15 minutes. Keep an eye on it— the goal is a smooth, thick consistency.
- While the pudding thickens, place 3 egg yolks in a separate bowl. After the pudding has thickened, take about ½ cup of the thickened mixture and whisk it into the egg yolks to temper them. This step is crucial as it prevents the eggs from scrambling when added to the hot pudding.
- Once the egg yolks are tempered, add them back into the pudding mixture. Continue whisking until it thickens further, about 3 to 5 minutes. It might look slightly thinner at this point, but don’t worry—it will thicken more in the refrigerator. Remove from heat.
- Next, whisk in 2 teaspoons pure vanilla extract, 3 tablespoons salted butter, and 4 drops of yellow food coloring (if using). Make sure the butter melts completely, blending everything into a creamy dream.
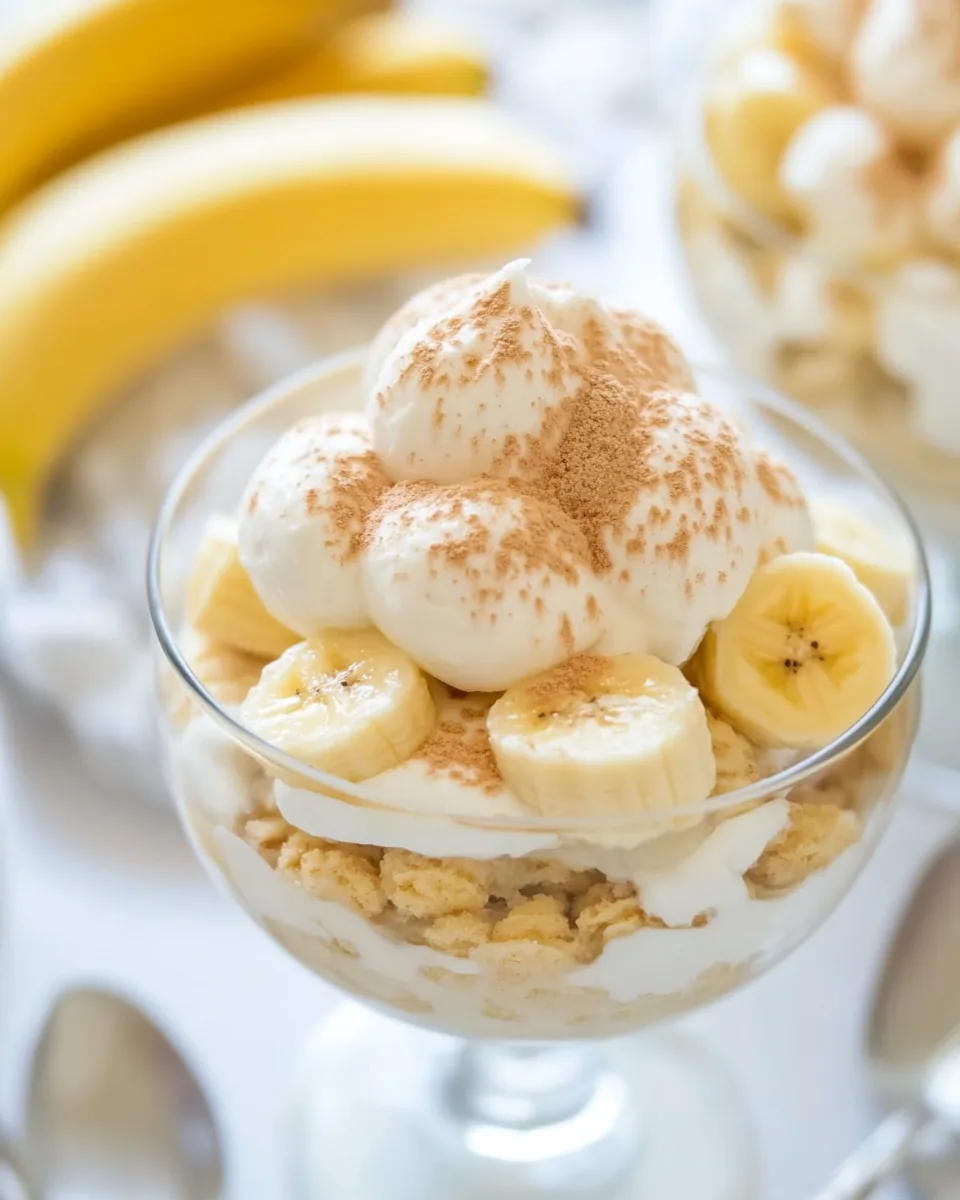
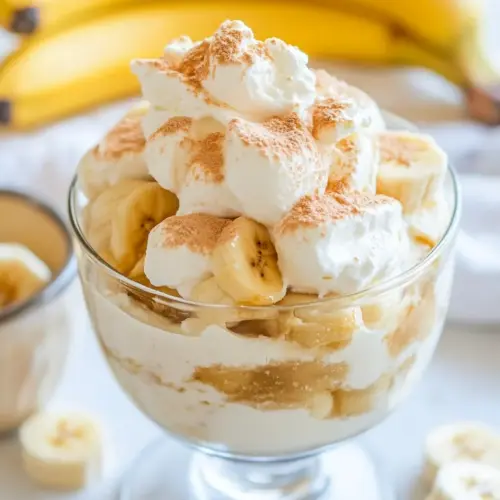
- Now it’s time to assemble your Homemade Banana Pudding. Take an 8×8-inch baking dish and arrange an even layer of 11 ounces Nilla Wafers at the bottom. These cookies will soak up all the delicious flavors.
- Slice 2 large bananas and place them over the cookies. Don’t be shy; the more banana, the better!
- Next, pour half of the pudding over the cookies and banana slices, smoothing it into an even layer.
- Repeat the process by adding more cookies and banana slices on top, followed by the remaining pudding. Smooth it out to create a beautiful finish.
- Once assembled, let it cool for about 15 minutes at room temperature. After it’s cooled, cover it with plastic wrap and refrigerate for at least 4 to 6 hours. This waiting period allows all the flavors to meld together.
- Before serving, top with 8 ounces whipped topping and crush any remaining cookies to sprinkle over the top. You can even add more banana slices for garnish if you like!
Things Worth Knowing
Things Worth Knowing
- Use a double boiler: This method helps to control the heat, ensuring the pudding cooks evenly and reduces the risk of burning.
- Banana ripeness matters: Choose ripe bananas for the best flavor. They should be slightly speckled but not overly brown.
- Chill time is essential: Allowing the pudding to set in the refrigerator enhances its texture and flavor.
- Presentation tips: For an elegant touch, use a piping bag to add the whipped topping on top.
- Perfect for gatherings: Making this dessert ahead of time reduces stress when hosting, letting you enjoy the occasion.
Ways to Customize
There are countless ways to elevate your Homemade Banana Pudding experience. Here are some ideas to make it uniquely yours:
- Add chocolate: Layer chocolate pudding with the banana pudding for a delicious twist.
- Caramel drizzle: Pour warm caramel sauce over the top before adding the whipped topping for extra sweetness.
- Crunchy toppings: Add chopped nuts or crushed graham crackers as a topping for added texture.
- Fruit variations: Swap out bananas for other fruits like strawberries or peaches for a new flavor profile.
- Use flavored wafers: Try using chocolate or lemon-flavored wafers to change the base flavor.
Serving Options for Homemade Banana Pudding
When it comes to serving Homemade Banana Pudding, there are plenty of delightful options to consider. Here’s how you can present this treat:
- Family gatherings: This pudding is perfect for family dinners, where it can be the star dessert.
- Picnics: Pack it in individual cups for an easy dessert to take along.
- Seasonal parties: Perfect for summer barbecues or holiday get-togethers.
- Storage tips: Store leftovers in an airtight container in the refrigerator for up to 4 days.
- Garnishing: For a decorative touch, use mint leaves or extra banana slices when serving.
FAQ
Conclusion
Homemade Banana Pudding is a timeless dessert that brings joy and nostalgia to any table. With its creamy layers, sweet bananas, and a crunchy finish, it’s a dish that transcends generations. I encourage you to bring this delightful recipe into your own kitchen and share it with loved ones. You won’t just be making a dessert; you’ll be creating cherished memories together.
Homemade Banana Pudding
Equipment
- Kitchen Scale (optional)
- 8×8-inch Baking Pan
Ingredients
- ½ cup granulated sugar
- ⅓ cup cornstarch
- 2½ cups whole milk
- ½ teaspoon kosher salt
- 3 egg yolks egg yolks
- 2 teaspoons pure vanilla extract
- 3 tablespoons salted butter
- 4 drops yellow food coloring
- 11 ounces Nilla Wafers
- 2 large bananas
- 8 ounces whipped topping
Instructions
- Start by combining ½ cup granulated sugar, ⅓ cup cornstarch, 2½ cups whole milk, and ½ teaspoon kosher salt in a double boiler or a heatproof bowl set over a saucepan. Place it over medium heat. Stir continuously until the mixture begins to thicken, which should take around 10 to 15 minutes. Keep an eye on it— the goal is a smooth, thick consistency.
- While the pudding thickens, place 3 egg yolks in a separate bowl. After the pudding has thickened, take about ½ cup of the thickened mixture and whisk it into the egg yolks to temper them. This step is crucial as it prevents the eggs from scrambling when added to the hot pudding.
- Once the egg yolks are tempered, add them back into the pudding mixture. Continue whisking until it thickens further, about 3 to 5 minutes. It might look slightly thinner at this point, but don’t worry—it will thicken more in the refrigerator. Remove from heat.
- Next, whisk in 2 teaspoons pure vanilla extract, 3 tablespoons salted butter, and 4 drops of yellow food coloring (if using). Make sure the butter melts completely, blending everything into a creamy dream.
- Now it’s time to assemble your Homemade Banana Pudding. Take an 8×8-inch baking dish and arrange an even layer of 11 ounces Nilla Wafers at the bottom. These cookies will soak up all the delicious flavors.
- Slice 2 large bananas and place them over the cookies. Don’t be shy; the more banana, the better!
- Next, pour half of the pudding over the cookies and banana slices, smoothing it into an even layer.
- Repeat the process by adding more cookies and banana slices on top, followed by the remaining pudding. Smooth it out to create a beautiful finish.
- Once assembled, let it cool for about 15 minutes at room temperature. After it’s cooled, cover it with plastic wrap and refrigerate for at least 4 to 6 hours. This waiting period allows all the flavors to meld together.
- Before serving, top with 8 ounces whipped topping and crush any remaining cookies to sprinkle over the top. You can even add more banana slices for garnish if you like!