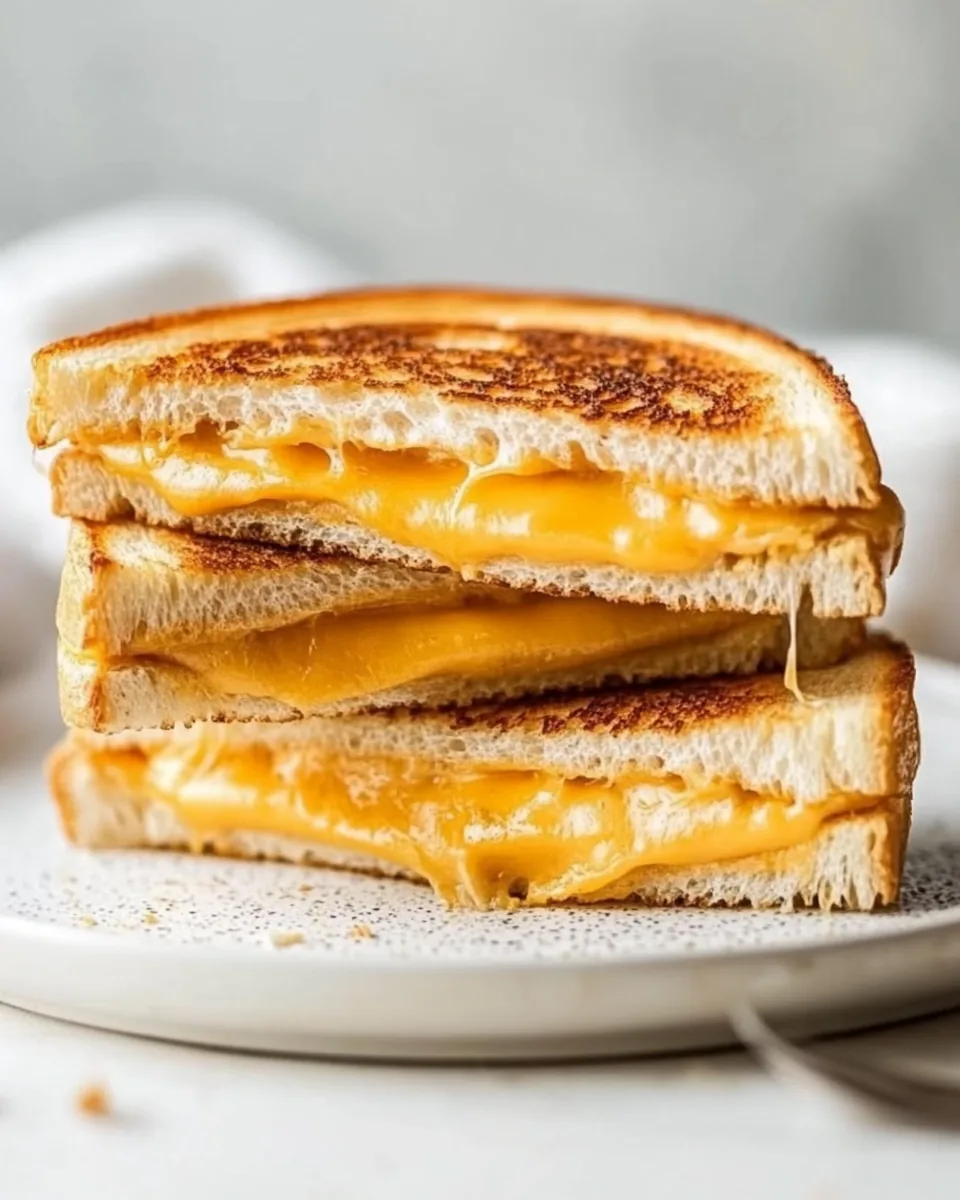
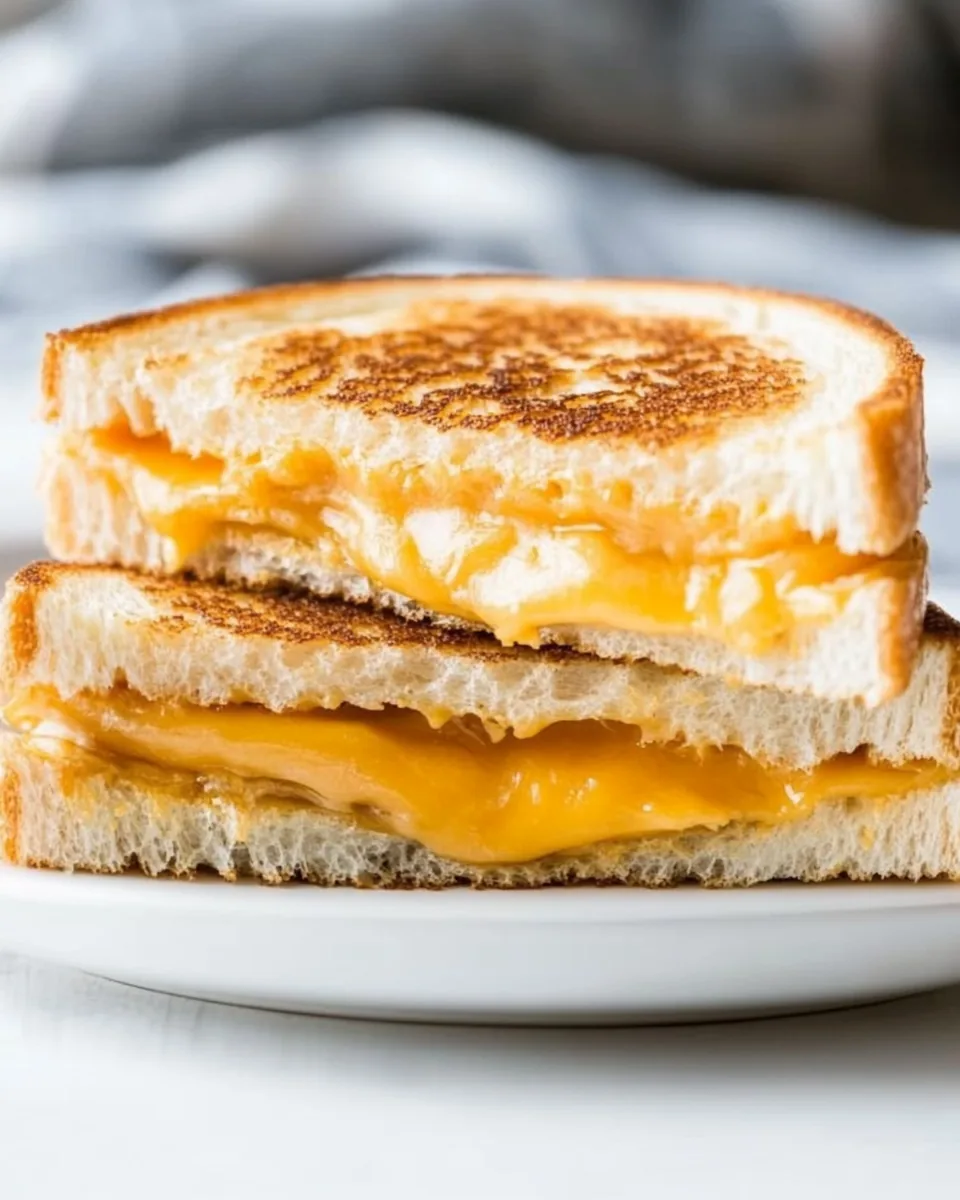
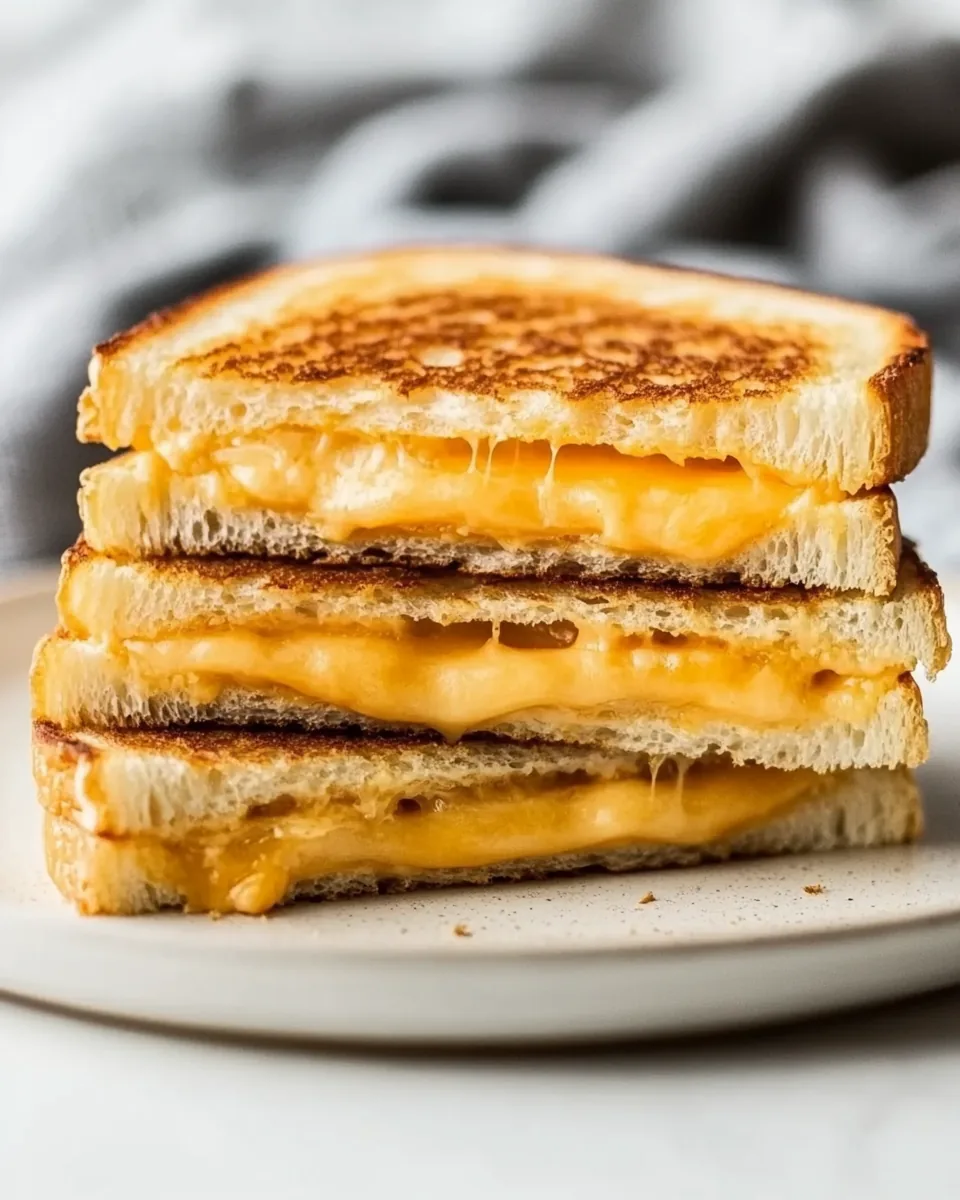
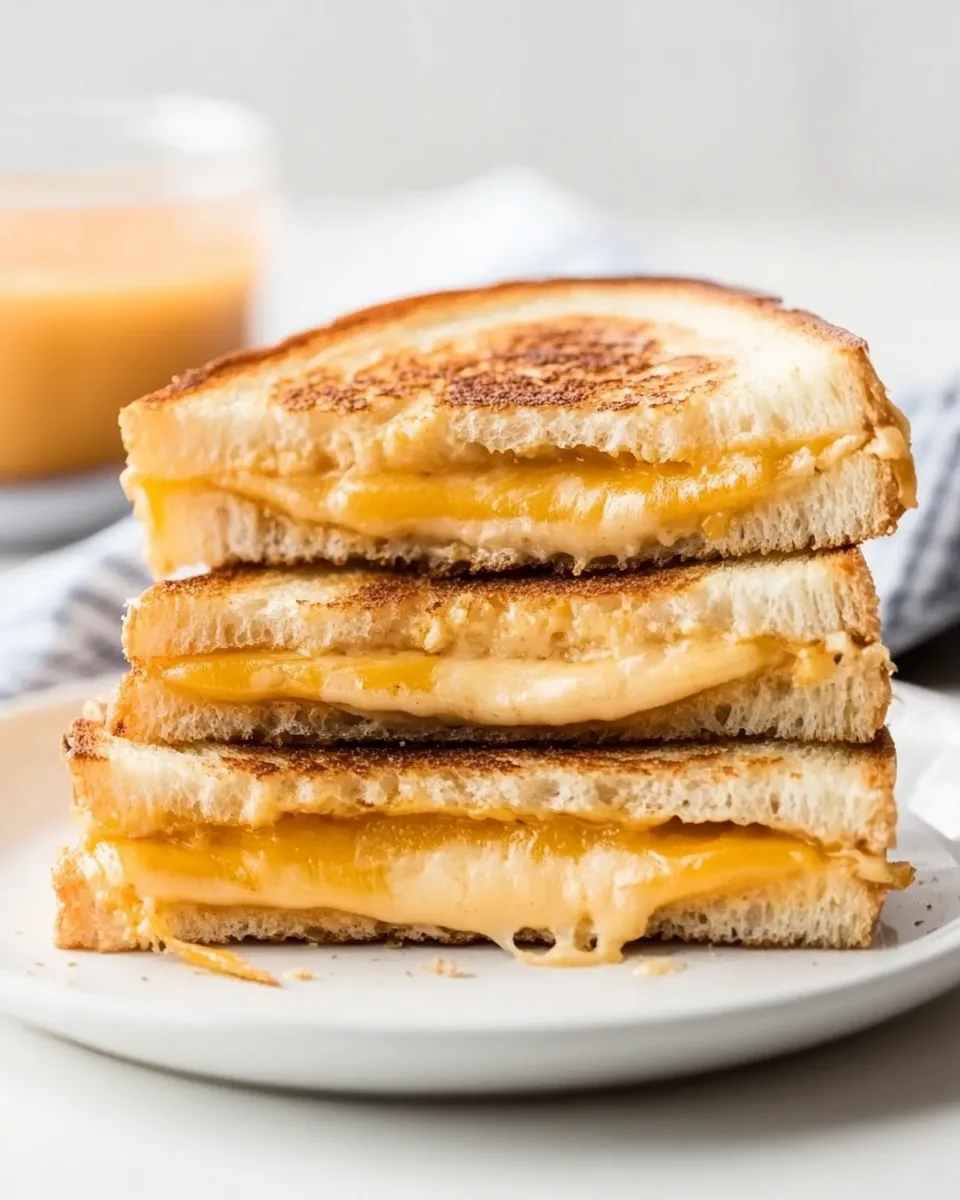
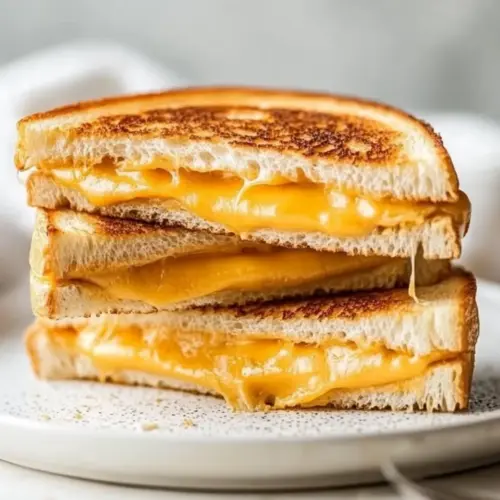
Keto Grilled Cheese
There’s a special kind of warmth that comes from biting into a perfectly crisp and cheesy sandwich, and that’s exactly what you get with Keto Grilled Cheese. This dish has a way of making you feel at home, whether it’s a rainy day, a cozy evening with a good book, or a simple lunch that reminds you of childhood favorites. I vividly remember afternoons spent in the kitchen with my family, the aroma of melting cheese wafting through the air as we eagerly awaited the first bite. The best part? It’s totally guilt-free and fits right into your keto lifestyle!
Recipe Snapshot
7 mins
2 mins
5 mins
Medium
450 kcal
18 g
Gluten-Free, Low FODMAP
36 g
Chef’s Knife, Frying Pan, Grater
The Charm of This Keto Grilled Cheese
It’s Comfort Food Redefined
There’s something so satisfying about a grilled cheese sandwich, especially when it’s made low-carb. The beauty of Keto Grilled Cheese is that it brings back those nostalgic flavors without the heavy carbs weighing you down. You can relish the gooey, melty goodness of cheese nestled between crispy slices of keto bread. This dish perfectly marries comfort and health, making your taste buds dance.
Quick and Easy to Make
When life gets busy, having a simple yet delicious recipe like Keto Grilled Cheese is a lifesaver. This sandwich comes together in no time, requiring just a handful of ingredients and minimal prep. You can whip it up in a flash, making it an ideal choice for a quick lunch or dinner when you need something comforting but don’t have hours to spare.
Perfect for Meal Prepping
If you love to meal prep, you’ll adore this recipe! You can make several sandwiches in advance and refrigerate them for up to five days. Just pop them onto a hot pan when you’re ready to enjoy, and you’ll have a nutritious meal ready in minutes. It’s a great way to keep your meal plan varied and interesting while sticking to your dietary goals.
Customizable to Your Taste
The best part about Keto Grilled Cheese is its versatility. Feel free to experiment with different cheeses or add in your favorite low-carb toppings. Whether you fancy adding some sliced avocado, tomatoes, or even some cooked chicken, the possibilities are endless. You can also switch up the bread type, as long as it fits within your keto parameters.
A Family Hit
Kids and adults alike love this sandwich! It’s a fantastic way to introduce low-carb meals to your family without them even noticing. Everyone will be reaching for seconds, and you’ll feel proud knowing you’re serving a dish that aligns with your health goals.
What You’ll Need for Keto Grilled Cheese
The ingredients for Keto Grilled Cheese are straightforward yet essential for achieving that perfect flavor and texture. You’ll find that each ingredient has a role to play, from the crispy bread to the rich, melty cheese. Let’s dive into the key players:
- Keto Bread: The foundation of your sandwich. You can choose between homemade or store-bought options. Both will give you that satisfying crunch while keeping it low-carb.
- Butter: Essential for that crispy golden exterior. It adds flavor and richness, elevating your sandwich to something extraordinary.
- Tasty Cheese: Use your favorite cheese for maximum flavor. A mix of cheeses can also add depth to your sandwich.
- Freshly Grated Mozzarella Cheese: This melting cheese is the star that brings everything together. It ensures a gooey, indulgent experience.
- Flaky Sea Salt: A sprinkle of salt at the end enhances the flavors beautifully. It’s the little touch that makes a big difference!
Making This Keto Grilled Cheese
Creating Keto Grilled Cheese is a delightful process that comes together quickly. The steps are simple, but the joy it brings is immense. Follow along as we journey through making this delicious sandwich:
Start by placing the slices of keto bread on a flat surface. Lay them out carefully so they’re ready for the next steps.
Take a tablespoon of butter and spread it evenly on one side of each slice of bread. This will create that crispy, golden crust you crave.
Now, flip the slices over to expose the non-buttered side. On one of these sides, layer your tasty cheese slices generously. You want to make sure it’s filled with flavor!
Sprinkle a 1/4 cup of freshly grated mozzarella cheese right on top of the other cheese. This will melt beautifully and give you that stretchy, gooey finish we all love.
Place the other slice of keto bread on top, non-buttered side down, to create your sandwich. Press it gently to ensure everything is held together.
Lightly grease a non-stick pan and set it over medium heat. Allow it to warm up so it’s ready for your sandwich.
Once the pan is hot, carefully add your sandwich onto the surface. Let it cook for about 2 to 3 minutes. You want the bread to turn a beautiful golden brown.
After the first side is beautifully crisped, it’s time to flip! Gently turn the sandwich over and allow it to cook for another 2 minutes. Press down slightly with a spatula, and if you see the cheese starting to ooze out, you know it’s done.
Remove the Keto Grilled Cheese from the pan and sprinkle it with a pinch of flaky sea salt for that extra flavor boost.
Lastly, slice the sandwich in half and serve it warm. Enjoy the wonderful melty goodness!
Things Worth Knowing
- Choose the Right Bread: Make sure to select keto-friendly bread to keep the sandwich low-carb. Look for options made from almond flour or coconut flour.
- Monitor Heat: Cooking on medium heat is crucial. Too high, and the outside will burn before the cheese melts. Too low, and you won’t get that nice crisp.
- Use Fresh Cheese: Grating your cheese fresh really enhances the melt. Pre-packaged cheese often contains anti-caking agents that can affect the texture.
- Experiment with Fillings: Don’t hesitate to add extras like herbs, spices, or veggies for a personal touch. Think fresh basil or a slice of avocado!
Recipe Tips about Keto Grilled Cheese
When diving into the world of Keto Grilled Cheese, a few tips can elevate your sandwich to the next level. Here are some handy pointers to consider:
- Storage: If you have leftovers, store them in an airtight container in the refrigerator for up to three days. To reheat, use a pan to regain crispiness.
- Freezing: You can freeze ungrilled sandwiches for up to two months. Wrap them tightly in parchment paper and then in a ziplock bag. Thaw them overnight before grilling.
- Pairing: This grilled cheese is fantastic with a side of low-carb tomato soup or a fresh salad. It adds to the comfort factor significantly!
- Variations: Consider adding herbs like basil or rosemary into your cheese layers for a gourmet touch. Experiment with different cheese combinations for unique flavors.
- Cookware: A non-stick skillet is ideal for making this sandwich, but a cast-iron skillet can also give great results with an even better crust.
Side Dish Ideas for Keto Grilled Cheese
If you’re planning to serve Keto Grilled Cheese, complementing side dishes can enhance the meal. Here are some ideas:
- Low-Carb Tomato Soup: This classic pairing is comforting and wonderfully satisfying. A bowl of creamy tomato soup alongside your sandwich is pure bliss.
- Fresh Garden Salad: A light salad dressed with olive oil and vinegar balances the richness of the sandwich. Consider adding some avocado for creaminess.
- Pickles: A crunchy pickle on the side adds a delightful contrast to the warm, gooey sandwich. It’s a classic combination!
- Roasted Vegetables: Serve with some roasted broccoli or asparagus for added nutrition. The flavors of roasted veggies pair nicely with the richness of the sandwich.
- Cauliflower Rice: For a low-carb alternative to traditional sides, cauliflower rice seasoned with herbs makes a great accompaniment.
- Olive Tapenade: For a gourmet twist, serve a small dish of olive tapenade alongside for dipping. The salty flavors enhance the sandwich perfectly.
FAQ
Conclusion
Keto Grilled Cheese is truly a delightful and comforting dish that brings back fond memories while fitting into your healthy lifestyle. With its perfect balance of crispy bread and gooey cheese, it’s hard to believe you can enjoy such indulgence without the carbs. I encourage you to give it a try; you won’t be disappointed. It’s time to savor this delicious treat!
Keto Grilled Cheese
Equipment
- Chef's Knife
- Frying Pan
- Grater
Ingredients
- 2 slices keto bread See notes
- 1 tablespoon butter
- 1 slice tasty cheese
- 1/4 cup mozzarella cheese freshly grated
- 1/8 teaspoon salt flaky sea salt
Instructions
- Start by placing the slices of keto bread on a flat surface. Lay them out carefully so they’re ready for the next steps.
- Take a tablespoon of butter and spread it evenly on one side of each slice of bread. This will create that crispy, golden crust you crave.
- Now, flip the slices over to expose the non-buttered side. On one of these sides, layer your tasty cheese slices generously. You want to make sure it’s filled with flavor!
- Sprinkle a 1/4 cup of freshly grated mozzarella cheese right on top of the other cheese. This will melt beautifully and give you that stretchy, gooey finish we all love.
- Place the other slice of keto bread on top, non-buttered side down, to create your sandwich. Press it gently to ensure everything is held together.
- Lightly grease a non-stick pan and set it over medium heat. Allow it to warm up so it’s ready for your sandwich.
- Once the pan is hot, carefully add your sandwich onto the surface. Let it cook for about 2 to 3 minutes. You want the bread to turn a beautiful golden brown.
- After the first side is beautifully crisped, it’s time to flip! Gently turn the sandwich over and allow it to cook for another 2 minutes. Press down slightly with a spatula, and if you see the cheese starting to ooze out, you know it’s done.
- Remove the Keto Grilled Cheese from the pan and sprinkle it with a pinch of flaky sea salt for that extra flavor boost.
- Lastly, slice the sandwich in half and serve it warm. Enjoy the wonderful melty goodness!
Notes
- Tip 1: Either homemade keto bread or a packaged keto white bread (like Thinslims bread).
- Tip 2: You can prepare up to 5 days’ worth of sandwiches in advance (pre-grilling). Simply prepare them as instructed and place them all on a plate or tray and cover with plastic or saran wrap. When ready to grill, simply remove the sandwich and place it on a greased non-stick pan and cook them as instructed.
- Tip 3: Wrap the prepared non-grilled sandwiches in parchment paper then place them in individual ziplock bags and store them in the freezer for up to 2 months. Thaw them overnight in the refrigerator before grilling.