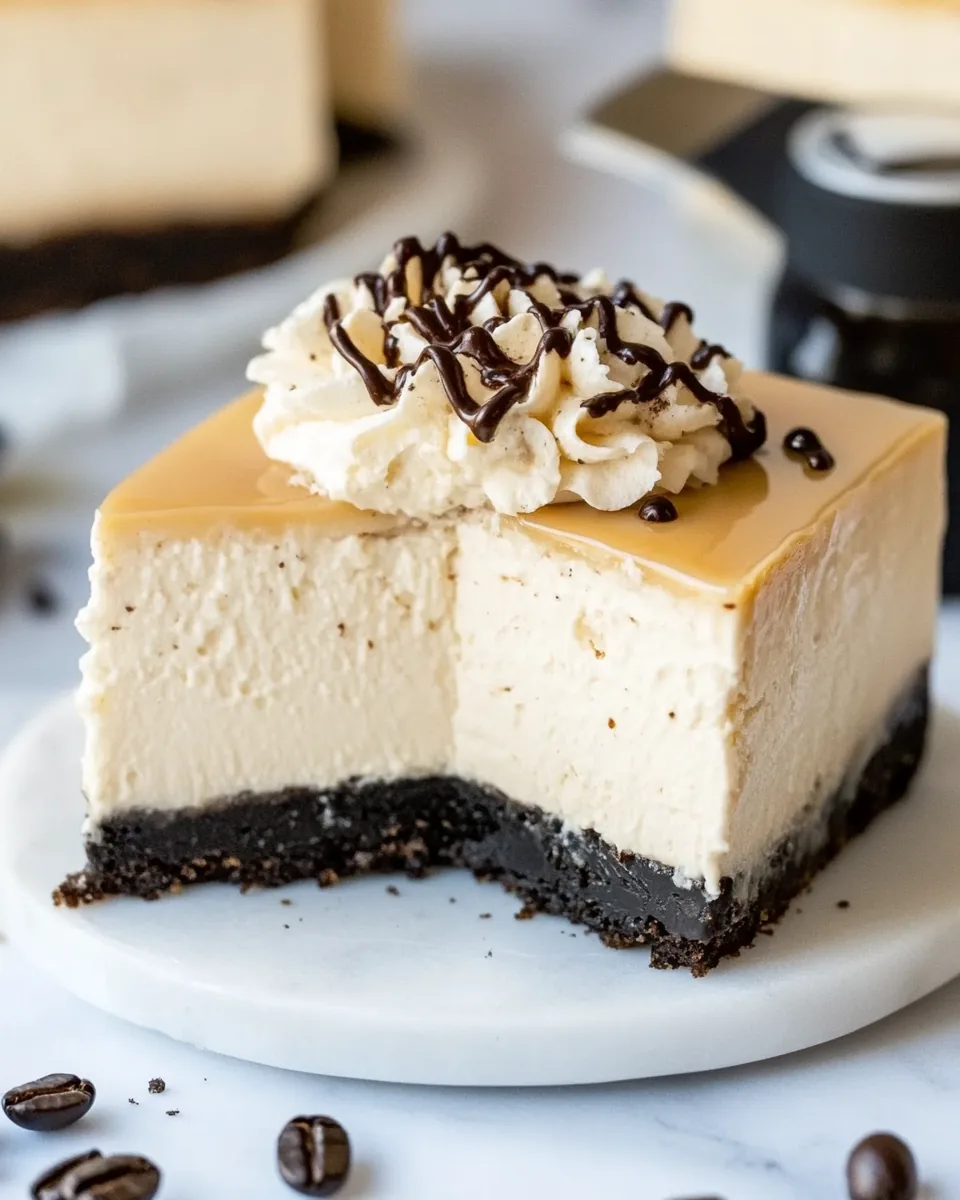
Espresso Cheesecake
The moment I first tasted Espresso Cheesecake, it was like a delicious dream come true. Picture a rich, creamy cheesecake infused with the bold flavor of espresso, sitting atop a perfectly crunchy Oreo crust. It was at a cozy café, nestled in my favorite neighborhood, where this dessert caught my eye. I knew I had to recreate it at home! The way the sweetness of the cheesecake pairs with the bitterness of espresso is pure magic, and it instantly became a family favorite. Every time I make it, it brings back those warm memories of laughter and indulgence with loved ones. Now, I’m excited to share my take on this delectable Espresso Cheesecake with you, so you can enjoy every luscious bite as much as I do.
Recipe Snapshot
1 hr 15 mins
15 mins
60 mins
Medium
400 kcal
5 g
Gluten-Free, Low FODMAP
25 g
Frying Pan, Whisk, Food Processor, Oven, Large Pot, Chef’s Knife, Mixing Bowl, Baking Sheet
Why This Espresso Cheesecake Is So Good
It’s a Coffee Lover’s Dream
If you are anything like me and have a penchant for coffee, then this cheesecake is going to be your new obsession. The addition of espresso to the cheesecake batter enhances its flavor profile, elevating it from your ordinary dessert to a rich, coffee-infused indulgence. This isn’t just a dessert; it’s an experience!
Perfectly Balanced Flavors
The combination of the sweet, creamy filling and the slightly bitter espresso creates a delightful balance. Each bite melts in your mouth, delivering a smooth texture that complements the crunchy Oreo crust. It’s an incredible contrast that keeps you coming back for more.
Impressive Yet Simple
Do you want to impress your guests without spending hours in the kitchen? Then Espresso Cheesecake is your go-to recipe. It may seem fancy, but the steps are straightforward, making it accessible for both novice and experienced bakers. You’ll feel like a professional chef as you serve this stunning dessert.
Make Ahead Convenience
One of my favorite things about this cheesecake is that it can be made a day in advance. This makes it an ideal choice for parties or gatherings where you want to minimize stress. Prepare it the night before, and let it chill in the fridge overnight. The flavors meld beautifully, and it’s ready to serve when you are.
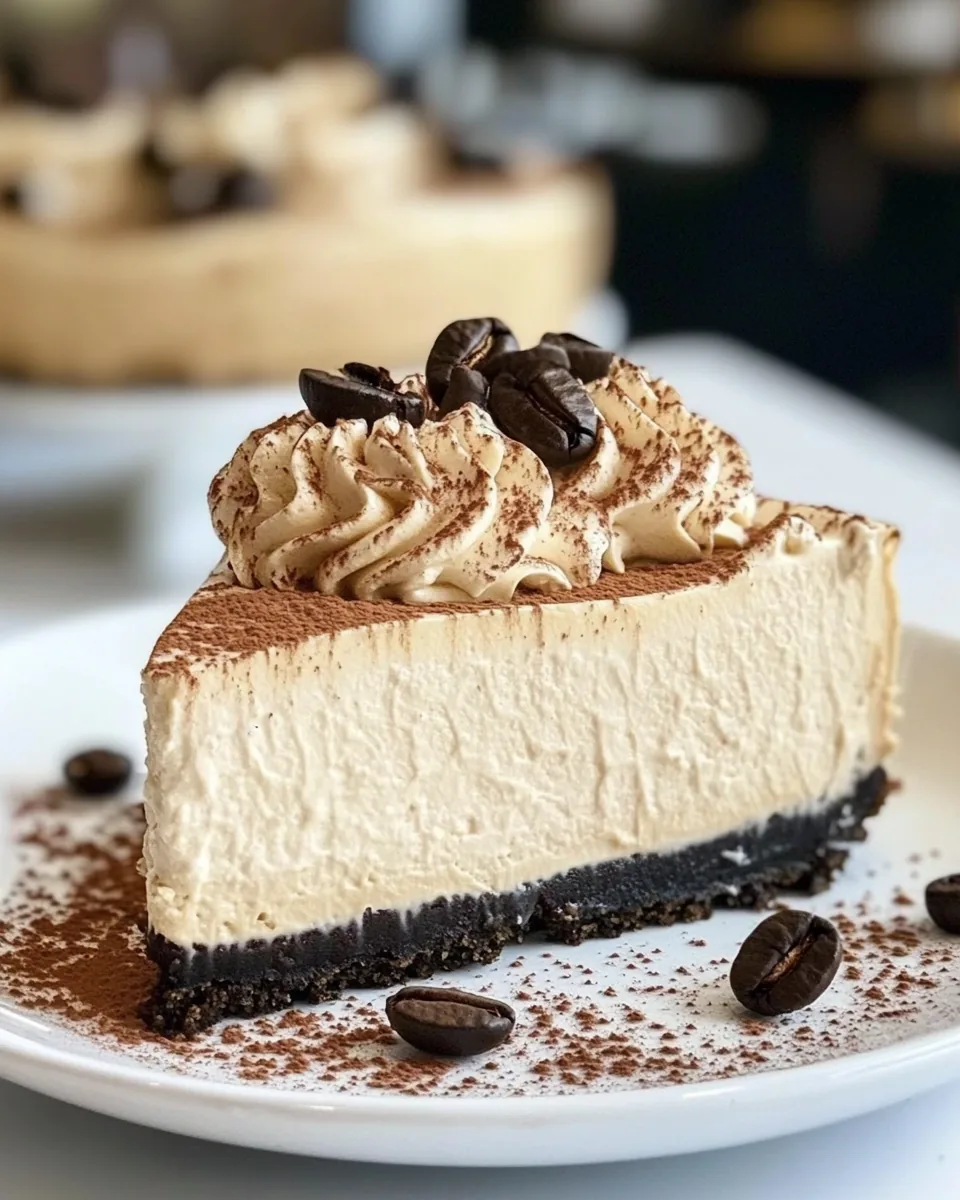
Versatile Toppings
Another reason to love this Espresso Cheesecake is the variety of toppings you can use. Whether you prefer a luscious chocolate ganache, whipped cream, or even a sprinkle of espresso beans, the options are endless. You can customize it to suit your taste or the occasion!
Everyone Will Love It
This cheesecake is not just for coffee lovers; it appeals to anyone who enjoys a great dessert. It’s creamy, rich, and simply irresistible. Serve it at your next gathering, and you’ll see how quickly it disappears from the dessert table!
Shopping List for Espresso Cheesecake
When it comes to making Espresso Cheesecake, the ingredients are simple yet key to achieving that perfect balance of flavors. Each ingredient plays a role in creating a rich and flavorful dessert that will impress. Let’s take a look at the essential players:
- 2 cups OREO cookie crumbs (about 20 cookies, not double stuffed) – The base of your cheesecake, providing a crunchy texture that contrasts beautifully with the creamy filling.
- 6 tablespoons butter, melted – This holds the crust together and adds richness.
- ¼ teaspoon salt – Enhances the sweetness and balances the flavors.
- 24 ounces cream cheese, softened (3 packages) – The star of the cheesecake, giving it that rich, creamy texture.
- ¾ cup granulated sugar – Sweetens the filling to perfection.
- 3 tablespoons flour – Helps stabilize the cheesecake.
- ¼ cup espresso or strong coffee, cooled to room temperature – Infuses the cheesecake with a robust coffee flavor.
- ½ cup heavy whipping cream – Adds creaminess and richness.
- 1 teaspoon vanilla extract – A flavor enhancer that complements the espresso.
- 3 large eggs, room temperature – Binds the filling together and helps it set.
- ¼ cup heavy whipping cream (for ganache) – Essential for making a decadent ganache topping.
- 4 ounces bittersweet or dark chocolate, roughly chopped – The perfect chocolate for a rich ganache.
- 4 ounces cream cheese, softened (for frosting) – Adds creaminess and richness to the frosting.
- 4 tablespoons butter, softened (for frosting) – Provides a rich flavor in the frosting.
- ½ teaspoon vanilla extract (for frosting) – Flavors the frosting.
- ¾ to 1 cup powdered sugar – Sweetens the frosting.
- espresso beans (optional) – A delightful garnish for coffee lovers.
Instructions for Espresso Cheesecake
Making Espresso Cheesecake is a delightful experience that rewards you with a rich dessert everyone will love. The process might seem a bit lengthy, but each step is essential for a perfectly creamy cheesecake.
- Preheat your oven to 350°F (175°C). Prepare an 8-inch springform pan by applying a generous layer of non-stick spray. This will ensure easy removal after baking.
- In a food processor, add approximately 20 Oreo cookies. Pulse them until you achieve a fine crumb consistency. This should yield about 2 cups of OREO cookie crumbs. Then, add the melted butter and salt. Pulse again until everything is well combined.
- Pour the crust mixture into the prepared springform pan. Using the bottom of a measuring cup, pack the crumbs down firmly, creating a crust that reaches about one inch up the sides of the pan. This will serve as a sturdy base for your cheesecake.
- Place the crust in the preheated oven and bake for 10 minutes. Once done, allow it to cool while you prepare the cheesecake filling.
- In the bowl of a stand mixer (or using a hand mixer), add the cream cheese. Beat for at least 5 minutes until it’s smooth and creamy, scraping the sides and bottom of the bowl as needed. This step is crucial for achieving that luscious texture.
- Add in the granulated sugar and flour, mixing until combined. Next, slowly pour in the espresso, and mix until just combined. Make sure to scrape the sides of the bowl again.
- Now it’s time to add the heavy whipping cream and vanilla extract. Beat for an additional 1 to 2 minutes, ensuring everything is well blended and smooth.
- Slowly add in the eggs, one at a time, mixing on low speed until just combined after each addition. Be cautious not to overmix, as this can lead to cracks in your cheesecake.
- Pour the cheesecake filling over the cooled OREO crust. Gently tap the pan on the counter 10 to 15 times to release any air bubbles trapped in the batter.
- Return the cheesecake to the oven and bake for 15 minutes. Then, without opening the oven door, reduce the temperature to 200°F (93°C) and continue baking for another 55 to 60 minutes. The edges should be set, while the center should still jiggle slightly.
- When the baking time is up, turn off the oven and leave the cheesecake inside for 30 minutes. After that, crack the oven door slightly and let it cool for an additional 15 minutes. This gradual cooling helps prevent cracking.
- Remove the cheesecake from the oven and allow it to cool completely on a wire rack. Once cooled, place it in the refrigerator for at least 8 hours, or overnight, to set fully.
- For the ganache topping, bring the heavy cream to a boil, either on the stovetop or in the microwave. Carefully pour it over the chopped chocolate, allowing it to sit for 1 to 2 minutes. Whisk until smooth.
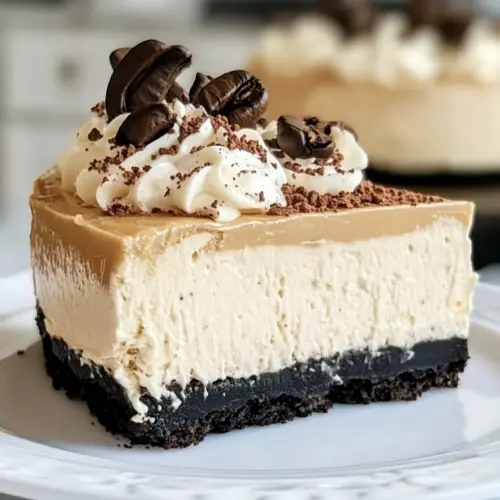
- Carefully pour the ganache over the chilled cheesecake and smooth it out. For an extra touch, prepare the cream cheese frosting by mixing the softened cream cheese and butter in a bowl using a hand mixer until light and fluffy. Add the vanilla extract and mix again until just combined. Gradually add in the powdered sugar and mix until fully integrated. Transfer the frosting to a piping bag and pipe around the edge of the cheesecake for a beautiful finish.
- Finally, garnish with chocolate shavings or espresso beans if desired, and slice to serve. Enjoy every delicious bite!
Things Worth Knowing
- Let it Chill: It’s crucial to refrigerate the cheesecake for at least 8 hours. This allows the flavors to meld and the texture to set properly.
- Use Room Temperature Ingredients: Make sure your cream cheese and eggs are at room temperature. This helps create a smoother batter and ensures even mixing.
- Don’t Overmix: When adding the eggs, mix just until combined. Overmixing can incorporate too much air, leading to cracks.
- Water Bath Option: For an ultra-creamy texture, consider baking your cheesecake in a water bath. This provides a gentle heat and prevents the cheesecake from cracking.
Make It Your Own
Creating your own version of Espresso Cheesecake is easy with these helpful tips. Personalizing your dessert can make it even more special. Here are some ideas to get you started:
- Storage: Store any leftover cheesecake tightly covered in an airtight container in the refrigerator for up to 5 days. It makes for a delicious snack the following days!
- Freezing: If you’d like to make this dessert in advance, you can freeze the cheesecake without the ganache and other toppings. Wrap it tightly in plastic wrap and then in foil before placing it in a freezer-safe container. Thaw in the refrigerator overnight before serving.
- Variations: Try swapping out the OREO cookie crumbs for another cookie variety, such as chocolate graham crackers, to give your cheesecake a different flavor twist.
- Mini Cheesecakes: For a fun twist, consider making mini versions of this cheesecake using a muffin tin. Just adjust the baking time accordingly!
- Flavor Boosts: Feel free to add a tablespoon of instant coffee powder into the cheesecake batter for an even stronger coffee flavor.
Serving Suggestions
When it comes to serving your Espresso Cheesecake, the possibilities are endless! Here are some ideas to elevate your dessert presentation:
- Pair with Fresh Berries: Fresh raspberries or strawberries complement the richness of the cheesecake beautifully. Their tartness provides a nice contrast.
- Serve with Coffee: Pair your cheesecake with a cup of freshly brewed coffee or espresso. It makes for a delightful coffee-and-dessert experience.
- Perfect for Celebrations: This cheesecake is perfect for special occasions like birthdays, anniversaries, or holiday gatherings. It’s sure to impress your guests!
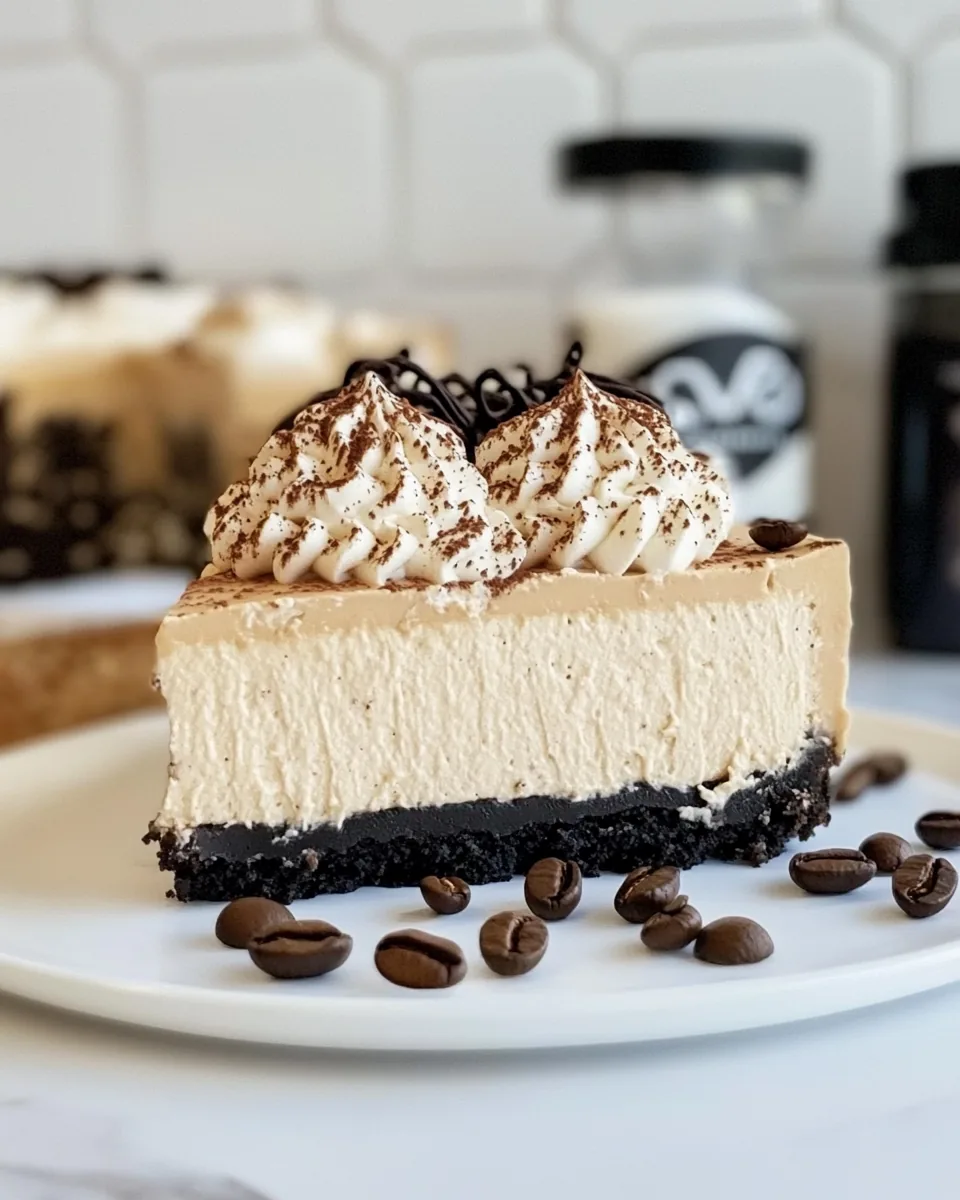
- Garnish Generously: Don’t hold back on the toppings! Add whipped cream, chocolate shavings, or a sprinkle of cocoa powder for an artistic touch.
- Storage Tips: If you’re not serving all at once, slice the cheesecake and store individual pieces in airtight containers for easy grab-and-go treats.
FAQ
Conclusion
This Espresso Cheesecake is a show-stopping dessert that combines rich flavors and a creamy texture to create something truly special. Whether you’re celebrating a special occasion or simply craving something sweet, this cheesecake is the perfect choice. I hope you give it a try and enjoy it as much as I do!
Espresso Cheesecake
Equipment
- Frying Pan
- Whisk
- Food Processor
- Oven
- Large Pot
- Chef's Knife
- Mixing Bowl
- Baking Sheet
Ingredients
- 2 cups OREO cookie crumbs (about 20 cookies, not double stuffed)
- 6 tablespoons butter melted
- ¼ teaspoon salt
- 24 ounces cream cheese softened (3 packages)
- ¾ cup granulated sugar
- 3 tablespoons flour
- ¼ cup espresso or strong coffee, cooled to room temperature
- ½ cup heavy whipping cream
- 1 teaspoon vanilla extract
- 3 large eggs room temperature
- ¼ cup heavy whipping cream
- 4 ounces bittersweet or dark chocolate roughly chopped (bars are best to use BUT you can use high quality chocolate chips)
- 4 ounces cream cheese softened
- 4 tablespoons butter softened
- ½ teaspoon vanilla extract
- ¾ to 1 cup powdered sugar
- espresso beans optional
Instructions
- Preheat your oven to 350°F (175°C). Prepare an 8-inch springform pan by applying a generous layer of non-stick spray. This will ensure easy removal after baking.
- In a food processor, add approximately 20 Oreo cookies. Pulse them until you achieve a fine crumb consistency. This should yield about 2 cups of OREO cookie crumbs. Then, add the melted butter and salt. Pulse again until everything is well combined.
- Pour the crust mixture into the prepared springform pan. Using the bottom of a measuring cup, pack the crumbs down firmly, creating a crust that reaches about one inch up the sides of the pan. This will serve as a sturdy base for your cheesecake.
- Place the crust in the preheated oven and bake for 10 minutes. Once done, allow it to cool while you prepare the cheesecake filling.
- In the bowl of a stand mixer (or using a hand mixer), add the cream cheese. Beat for at least 5 minutes until it’s smooth and creamy, scraping the sides and bottom of the bowl as needed. This step is crucial for achieving that luscious texture.
- Add in the granulated sugar and flour, mixing until combined. Next, slowly pour in the espresso, and mix until just combined. Make sure to scrape the sides of the bowl again.
- Now it's time to add the heavy whipping cream and vanilla extract. Beat for an additional 1 to 2 minutes, ensuring everything is well blended and smooth.
- Slowly add in the eggs, one at a time, mixing on low speed until just combined after each addition. Be cautious not to overmix, as this can lead to cracks in your cheesecake.
- Pour the cheesecake filling over the cooled OREO crust. Gently tap the pan on the counter 10 to 15 times to release any air bubbles trapped in the batter.
- Return the cheesecake to the oven and bake for 15 minutes. Then, without opening the oven door, reduce the temperature to 200°F (93°C) and continue baking for another 55 to 60 minutes. The edges should be set, while the center should still jiggle slightly.
- When the baking time is up, turn off the oven and leave the cheesecake inside for 30 minutes. After that, crack the oven door slightly and let it cool for an additional 15 minutes. This gradual cooling helps prevent cracking.
- Remove the cheesecake from the oven and allow it to cool completely on a wire rack. Once cooled, place it in the refrigerator for at least 8 hours, or overnight, to set fully.
- For the ganache topping, bring the heavy cream to a boil, either on the stovetop or in the microwave. Carefully pour it over the chopped chocolate, allowing it to sit for 1 to 2 minutes. Whisk until smooth.
- Carefully pour the ganache over the chilled cheesecake and smooth it out. For an extra touch, prepare the cream cheese frosting by mixing the softened cream cheese and butter in a bowl using a hand mixer until light and fluffy. Add the vanilla extract and mix again until just combined. Gradually add in the powdered sugar and mix until fully integrated. Transfer the frosting to a piping bag and pipe around the edge of the cheesecake for a beautiful finish.
- Finally, garnish with chocolate shavings or espresso beans if desired, and slice to serve. Enjoy every delicious bite!
Notes
- Storage: Store any leftover cheesecake tightly covered in an airtight container in the refrigerator for up to 5 days. It makes for a delicious snack the following days!
- Freezing: If you'd like to make this dessert in advance, you can freeze the cheesecake without the ganache and other toppings. Wrap it tightly in plastic wrap and then in foil before placing it in a freezer-safe container. Thaw in the refrigerator overnight before serving.
- Variations: Try swapping out the OREO cookie crumbs for another cookie variety, such as chocolate graham crackers, to give your cheesecake a different flavor twist.
- Mini Cheesecakes: For a fun twist, consider making mini versions of this cheesecake using a muffin tin. Just adjust the baking time accordingly!
- Flavor Boosts: Feel free to add a tablespoon of instant coffee powder into the cheesecake batter for an even stronger coffee flavor.