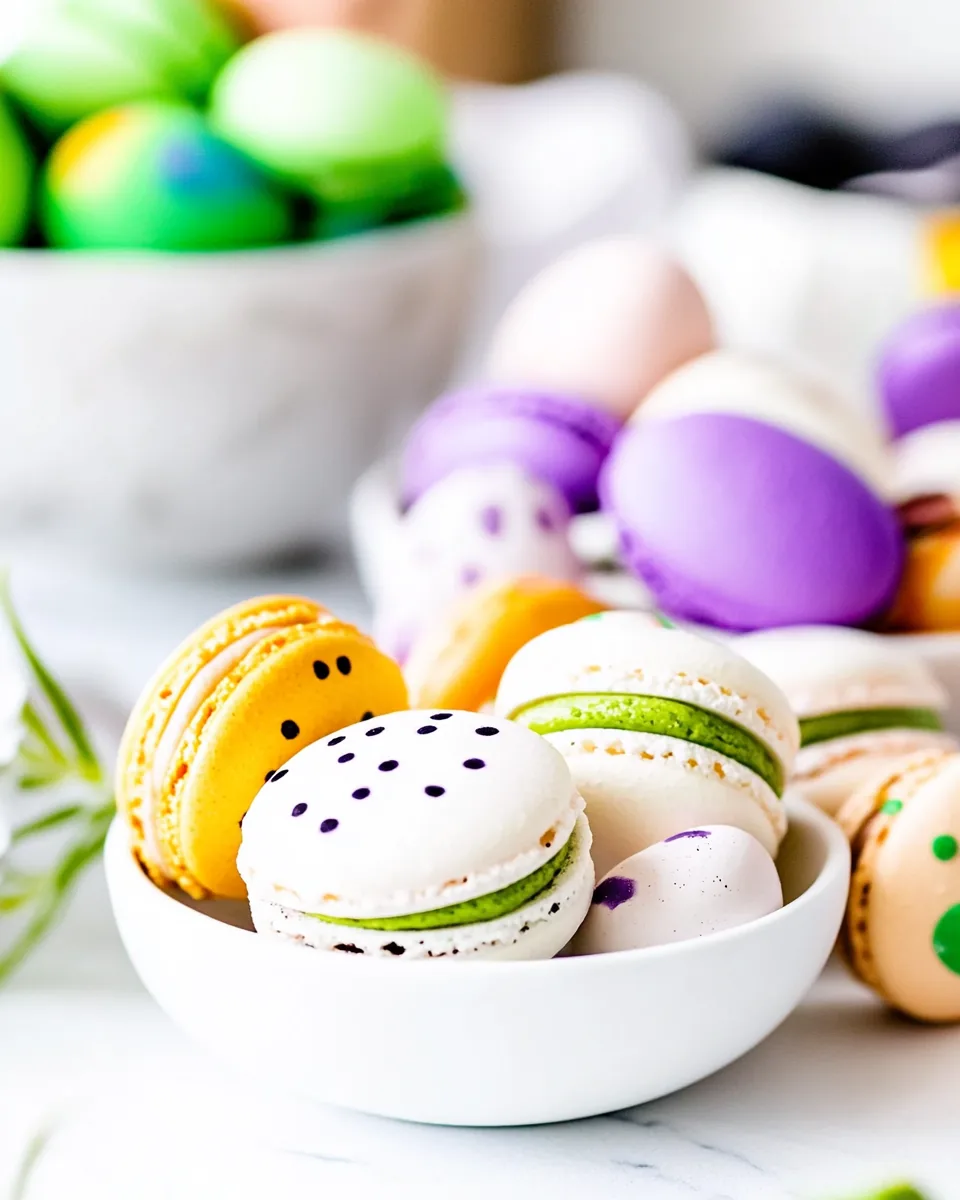
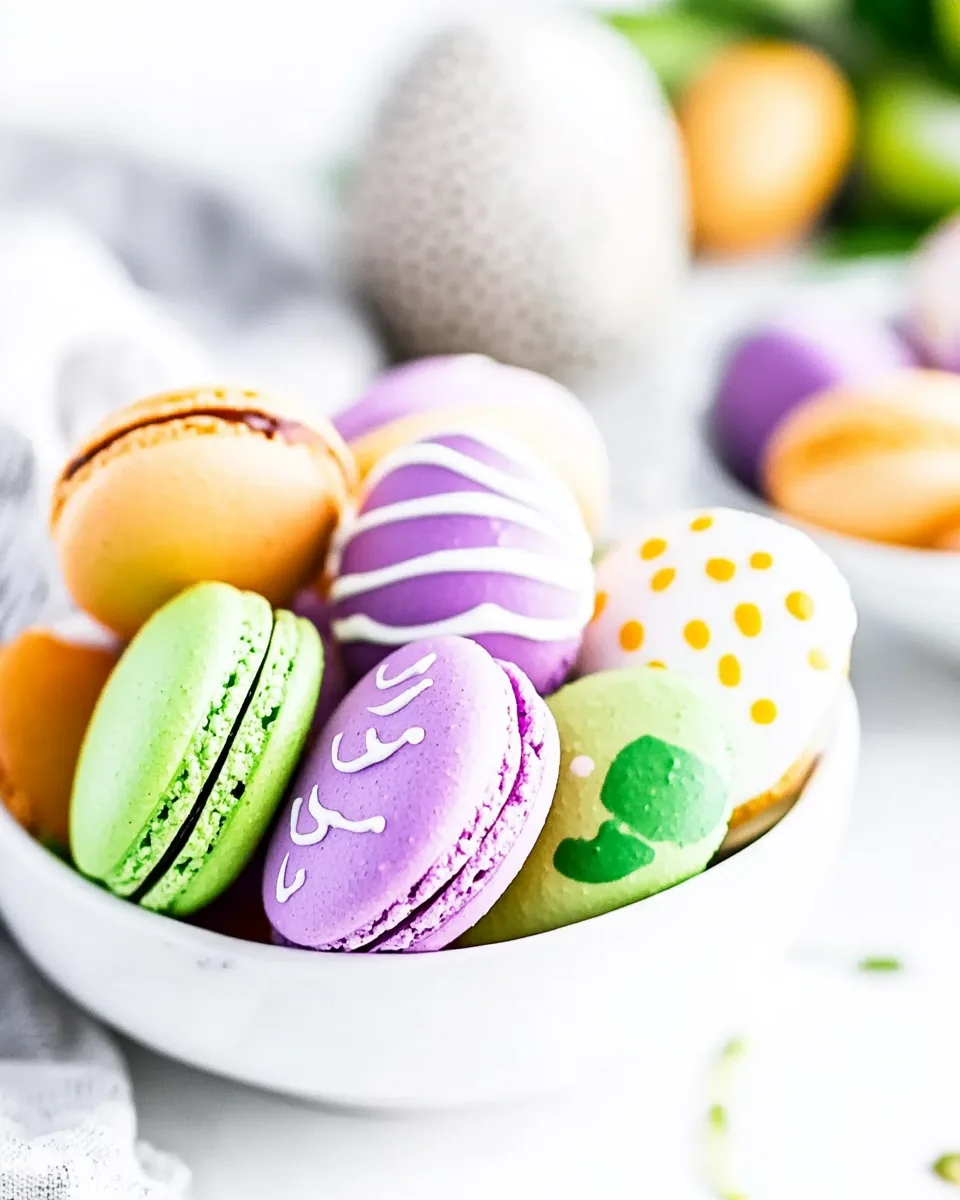
Easter Macarons
When I think of Easter, the first thing that comes to mind is a lovely batch of Easter Macarons. It’s a sweet time of year, filled with vibrant colors and the promise of spring. I remember the first time I tried making these delicate treats; the kitchen was filled with laughter and a sprinkle of flour everywhere! The challenge of mastering the perfect macaron shell brought excitement, and watching them rise in the oven was like a magic trick. With their signature crisp outside and chewy inside, paired with a rich filling, Easter Macarons have become a staple at our family celebrations. They’re not just a treat; they’re a beautiful centerpiece that adds charm to our festive table. Whether you’re gifting them or sharing them around the table, these macarons always bring a smile. What’s even better is that they’re surprisingly easy to create, and customizing them for Easter makes them that much more special.
Recipe Snapshot
32 mins
20 mins
12 mins
Hard
120 kcal
2 g
Keto, Paleo, Vegan
6 g
Frying Pan, Whisk, Food Processor, Oven, Mixing Bowl, Baking Sheet
Why This Easter Macarons Works
Perfect for Any Occasion
There’s a certain joy in creating something so beautiful. Easter Macarons aren’t just for Easter; they can be enjoyed any time of the year! Their delightful appearance and delicious taste make them perfect for birthdays, bridal showers, or any festive gathering.
Customizable and Fun
What I love most about these macarons is the ability to customize them. You can choose your favorite colors and flavors to make them unique. Feel free to use natural dyes or gel food coloring to create stunning designs that will impress your guests.
Impressive Yet Simple
Despite their fancy appearance, Easter Macarons are incredibly straightforward to make. Once you get the hang of the technique, it’s all about the timing and temperature. You’ll feel like a professional pastry chef in your own kitchen!
Family Bonding
Making macarons is a wonderful way to bond with family and friends. I often invite my nieces over, and we have a blast whipping up the batter and getting creative with the decorating. It’s an experience filled with giggles and the joy of creating together.
Perfectly Delicious
Let’s not forget the taste! The balance of crunchy outside and soft, flavorful filling is simply irresistible. I often find myself sneaking one or two from the cooling rack before they even make it to the table. Trust me; once you taste them, you’ll see why they’re a favorite!
Recipe Ingredients for Easter Macarons
The ingredients for Easter Macarons are simple yet essential to the final product. Each component plays a crucial role in achieving the perfect texture and flavor. The key players like egg whites create the lightness, while almond flour gives that lovely nutty taste. Together, these ingredients blend into a heavenly treat that you won’t be able to resist.
- 90 grams egg whites – The star of the macaron, providing structure and lightness.
- 90 grams granulated sugar – Adds sweetness and helps stabilize the egg whites.
- 95 grams powdered sugar – Gives a smooth texture and sweetness to the shells.
- 95 grams almond flour – Provides a lovely nutty flavor and texture.
- 8 tablespoons salted butter – Used for the rich filling, adding creaminess.
- 2 ¼ cups powdered sugar – For the filling, ensuring it’s sweet and fluffy.
- 1 teaspoon vanilla extract – Enhances the flavor of the buttercream filling.
Step by Step Guide for Easter Macarons
Creating Easter Macarons is a journey of patience and precision. Each step is crucial, but don’t worry; I’ll guide you through it! Let’s roll up our sleeves and dive into the process of making these delightful treats.
- Start by preparing your baking sheets. Line two half-sheet baking sheets with silicone baking mats or parchment paper. If you’re using parchment, make sure it lies flat, or you may end up with lopsided macarons. A little tape can help keep it in place temporarily.
- Next, fill a small saucepan halfway with water and bring it to a gentle simmer over medium heat. Place a heatproof bowl over the pan, ensuring it doesn’t touch the water.
- Add the egg whites and granulated sugar into the bowl. Whisk constantly until the sugar completely dissolves, which should take about 2 to 3 minutes. Test by rubbing the mixture between your fingers; it should feel smooth.
- Once dissolved, transfer the mixture to a stand mixer fitted with a whisk attachment. Beat on medium-high speed for about 5 minutes until it forms stiff peaks. The mixture should be glossy and hold its shape.
- Sift the powdered sugar and almond flour together into the meringue. This helps to incorporate the dry ingredients without deflating the egg whites.
- Gently fold the dry ingredients into the meringue using a spatula. Scrape the bowl’s sides as you fold, being careful not to deflate the mixture too much.
- Once combined, add any gel food coloring if desired. Continue folding but begin to gently smush the batter against the bowl’s sides in a circular motion to achieve the right consistency. This process will usually take about 5 smushes and folds.
- Test the batter by drawing a figure eight with it. If it flows smoothly and maintains shape, it’s ready to transfer to a piping bag fitted with a round tip.
- Pipe 1” circles or egg shapes onto the prepared baking sheets, spacing them about 2” apart. After piping, tap the tray firmly on the counter to release any air bubbles.
- Let the macarons rest for about 30 minutes until their tops feel dry to the touch, which allows them to develop a skin. Meanwhile, preheat your oven to 325°F.
- Bake each sheet for 12 to 15 minutes, rotating halfway through if needed. The macarons should be firm and not jiggle when moved. Allow them to cool before removing them from the trays.
- While the shells cool, prepare the buttercream filling. In a stand mixer, beat the butter for about 2 minutes until light and fluffy. Gradually add the powdered sugar and mix until combined. Add the vanilla extract and mix thoroughly. If it feels too thick, add a tablespoon of cream or milk.
- Once the shells have cooled, pair them up and pipe a dollop of the buttercream on one shell, placing another on top. Press gently to spread the filling.
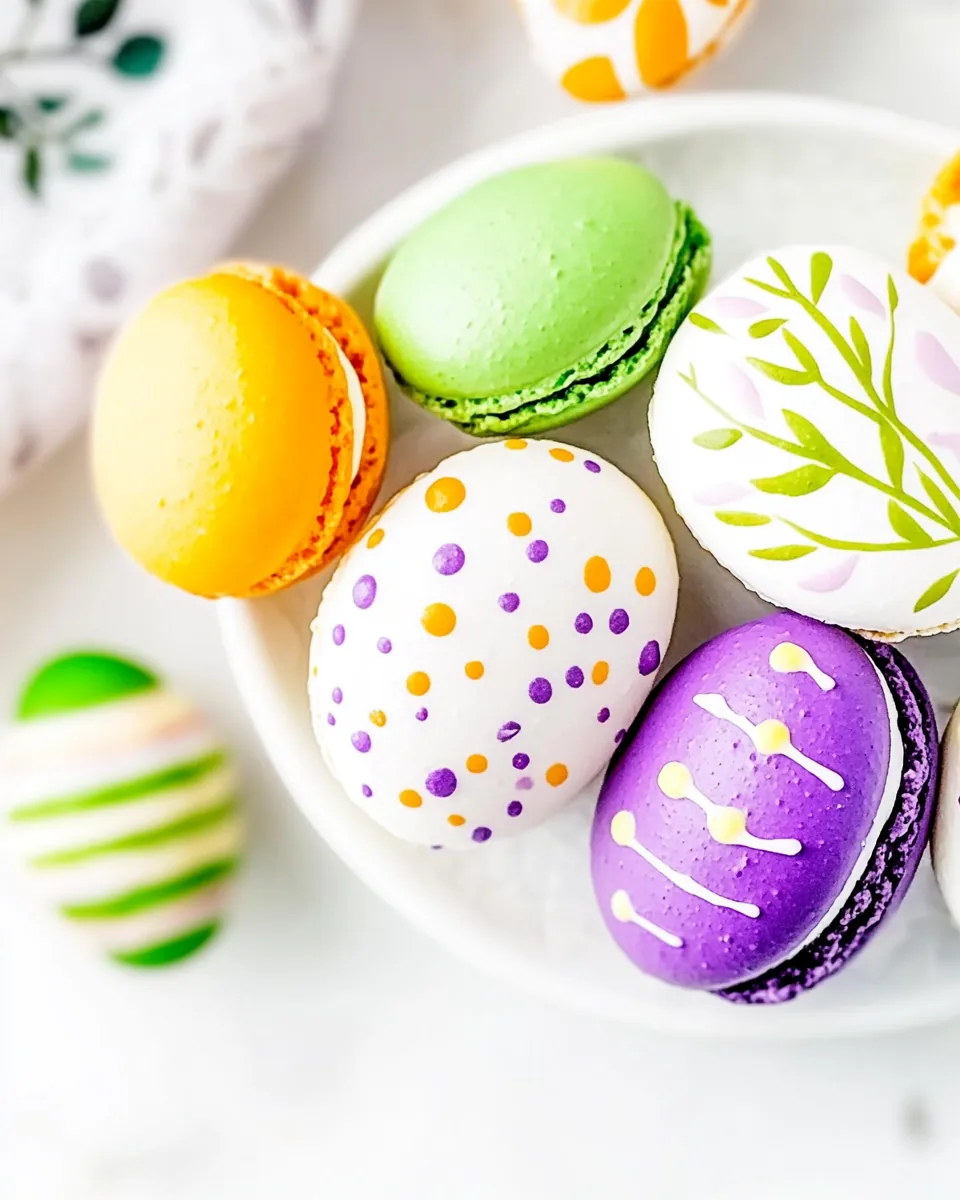
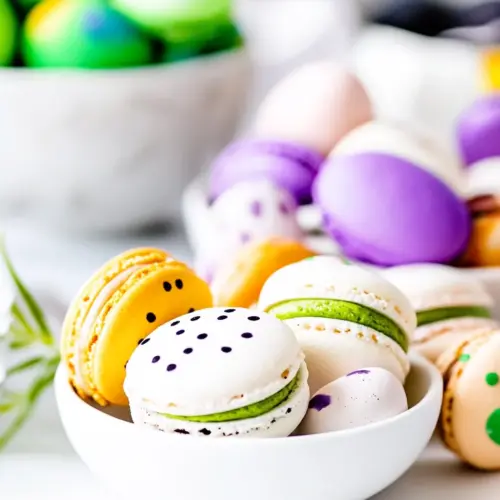
- To decorate, use food markers or white chocolate. For speckled eggs, mix water with gel food coloring and splatter it onto the macarons carefully.
- Store the macarons in an airtight container in the fridge to age overnight for the best flavor and texture. Bring them to room temperature before serving.
Things Worth Knowing
- Resting the shells: Allowing the piped macarons to rest before baking is crucial for developing a skin, which helps them rise properly in the oven.
- Egg whites: Make sure your egg whites are at room temperature for better volume. Fresh eggs work best for whipping.
- Folding technique: Use a gentle folding technique to incorporate the dry ingredients; overmixing can deflate the meringue.
- Oven temperature: Every oven is different. Consider using an oven thermometer to ensure accurate baking temperatures.
Customization Ideas

There’s so much fun to be had when customizing your Easter Macarons. Here are some fantastic ideas to get your creativity flowing!
- Flavor Variations: Experiment with different flavors for the filling! You can make chocolate, raspberry, or even lemon buttercream.
- Color Themes: Use a variety of colors to match your theme. Pastel colors are perfect for Easter, but you can go bold for other occasions.
- Shape Shifting: Instead of circles, try oval shapes for Easter eggs. Use a template if needed for uniformity.
- Decorative Toppings: Add sprinkles or edible glitter on top of the buttercream filling for an extra touch of festivity.
- Storage: Store them in an airtight container in the refrigerator for up to four days. They can also be frozen for longer storage.
- Pairing Suggestions: Pair your macarons with a nice cup of tea or coffee for an excellent afternoon treat.
Side Dish Ideas for Easter Macarons
When it comes to serving Easter Macarons, the possibilities are endless! Here are some ideas to make your presentation even more special:
- Tea Parties: These macarons are perfect for an afternoon tea party—serve them alongside various teas and other sweet treats.
- Brunch Buffets: Incorporate macarons into your brunch spread with fruit, pastries, and coffee for a festive touch.
- Picnics: They make a lovely addition to outdoor gatherings, pairing beautifully with fresh fruits and drinks.
- Gift Giving: Package them in cute boxes as gifts for friends and family. They make charming and thoughtful presents.
- Seasonal Displays: Arrange them in a decorative tiered stand for an eye-catching centerpiece at your holiday table.
- Special Occasions: Bring them out for birthdays, anniversaries, or any festive celebration to impress your guests.
FAQ
Conclusion
The beauty of Easter Macarons lies in their delicate balance of flavors and textures. With a bit of practice, you can create these stunning treats that are sure to impress at any gathering. Don’t hesitate to dive in and try this recipe; the joy of making and sharing these delightful desserts is truly rewarding. So, gather your ingredients, invite some friends, and enjoy the sweet experience of creating these macarons together!
Easter Macarons
Equipment
- Frying Pan
- Whisk
- Food Processor
- Oven
- Mixing Bowl
- Baking Sheet
Ingredients
- 90 grams egg whites
- 90 grams granulated sugar
- 95 grams powdered sugar
- 95 grams almond flour
- 8 tablespoons salted butter
- 2 ¼ cups powdered sugar
- 1 teaspoon vanilla extract
Instructions
- Line two half sheet baking sheets with silicone baking mats or parchment paper. If you wish to use parchment, make sure the parchment lays perfectly flat so you don’t end up with lopsided macarons. You can tape the parchment temporarily to help keep it secure while piping and then remove the tape before baking.
- Fill a small saucepan halfway with water and set it over medium heat. Then, place a heatproof bowl over the pan, making sure it doesn’t touch the water.
- Add the egg whites and granulated sugar to the bowl and whisk constantly until the sugar has completely dissolved. This will take about 2 to 3 minutes. Test to make sure the sugar is dissolved by rubbing the mixture between your fingers. If it’s smooth, it’s ready to go. If the mixture feels grainy or sandy, keep whisking for another minute or so and then try again.
- Transfer the egg white mixture to a clean, dry bowl of a stand mixer fitted with the whisk attachment. Beat on medium high until the mixture forms stiff peaks, about 5 minutes.
- Sift the powdered sugar and almond flour into the egg whites.
- Gently fold the mixture together, making sure to scrape down the sides of the bowl as you fold. Take your time and be careful that you are not deflating the egg whites just yet.
- Gently fold the dry ingredients into the egg whites, making sure not to deflate the egg whites. Make sure to scrape the sides of the bowl as you fold.
- Once all of the dry ingredients have been incorporated into the egg whites, add thegel food coloring, if using. Continue folding the meringue but this time begin gently smushing the batter against the sides of the bowl in a circular motion, then scrape down the sides of the bowl and fold it all back together. Repeat this deflating process until the batter flows smoothly off the spatula. On average this takes about 5 smush and folds but will be dependent on how much you deflate the egg whites each time.
- You can test the batter’s consistency by slowly drawing a figure 8 with the batter. If the you can make an “8” with the batter flowing off the spatula in a constant stream, it’s ready! If it breaks or falls in clumps, smush and fold a few more times until the desired consistency is achieved.
- When the meringue flows smoothly, transfer the mixture to a piping bag fitted with an open round tip. A#12 piping tipor #10 tip works perfectly.
- Pipe 1” circles or egg shapes about 2” apart holding the piping bag perpendicular to the surface. Using asilicon macaron matwill help with this step. Once you’ve finished piping one tray, tap the tray firmly on the counter or drop straight down onto the counter five or six times to release any air bubbles. Repeat for the second tray. The shells will flatten slightly.
- Let the shells rest for about 30 minutes or until the tops feel dry to the touch (this is called developing a skin). This can take up to an hour.
- While the shells rest, preheat your oven to 325°F (you can check the oven temperature using an oven thermometer – this is especially helpful if you think your oven runs a little hot).
- Bake the shells one baking sheet at a time for 12 to 15 minutes, rotating the baking sheet halfway through if necessary. The shells are done when they don’t move or jiggle about when the baking sheets are moved. Allow the macarons to cool before removing them from the tray.
- In the bowl of a stand mixer, beat butter until it has lightened in color, about 2 minutes.
- Reduce the speed to low and slowly add the powdered sugar. Add the vanilla extract and mix until combined. If the buttercream seems too thick, beat in a tablespoon of heavy cream or milk.
- Transfer the mixture to a piping bag fitting with a piping tip of your choosing and set aside.
- Place the macarons in similar sized pairs. Pipe a small dollop of filling on one macaron and place another on top. Press gently, just until the filling reaches the edges.
- To decorate the macarons, usefood markersor white chocolate to draw on the macarons. To make the speckled egg macarons, combine 1 teaspoon of water with a few drops of blackgel food coloringand use a pastry brush to splatter the food dye on the macarons.Be very careful not to get the food color on any surfaces, clothes, etc. It stains! Make sure to protect all surfaces!
- Place the macarons in an airtight container in the fridge to age overnight. Bring to room temperature before serving.
- Place the macarons in an airtight container in the refrigerator to age overnight. Bring to room temperature before serving. Store in the fridge for up to four days.
Notes
- Hold piping bag: Hold the piping bag perpendicular to the baking sheet while piping. Holding it at an angle can result in lopsided macarons.
- Aging: Aging the macarons overnight is optional but helps to soften the shell and create that perfect crisp and chewy macaron texture that macarons are known for.
- Coloring: To color the Easter Egg macarons, I divided the batter into thirds. One third I colored purplish pink (one drop of purple, one drop of pink), one third I colored green (one drop of royal blue and one drop of yellow) and the remaining third I kept white. You can, of course color these macarons with any colors you wish – just make sure to usegel food coloring!