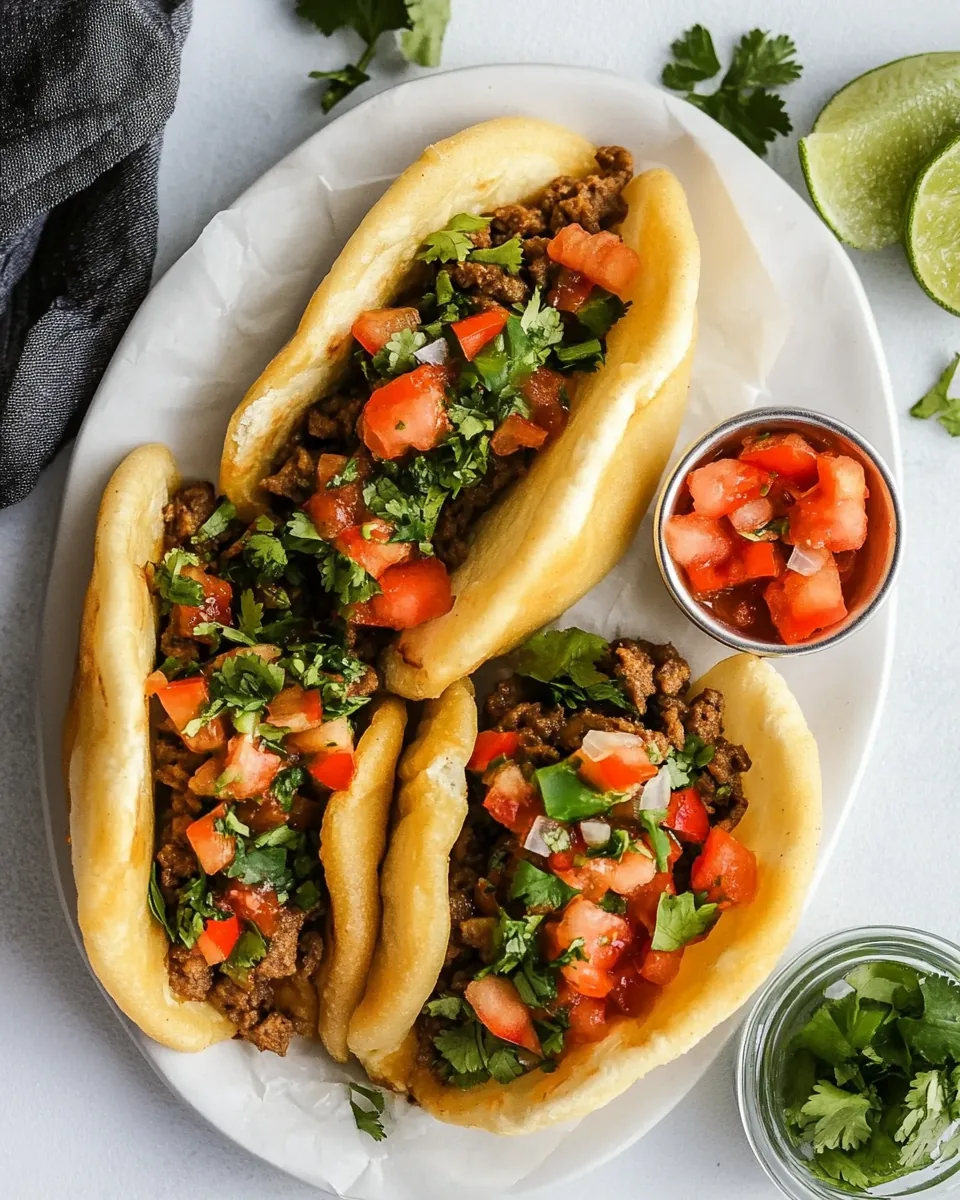
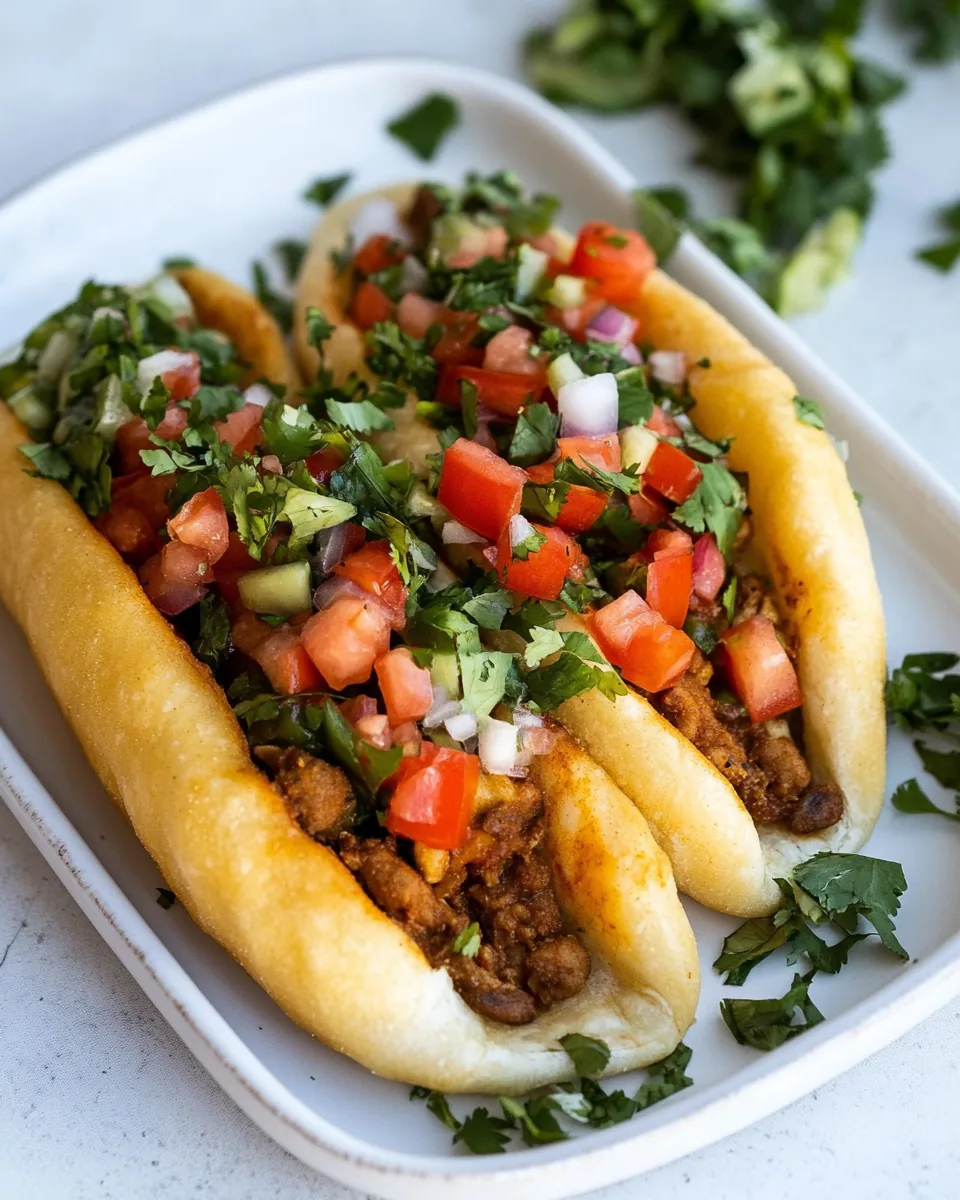
Chalupas
There’s something incredibly satisfying about making Chalupas. When I first encountered this dish, I was instantly captivated by the crispy, golden-brown shells and the vibrant toppings that beckoned from every angle. Picture a gathering of friends, laughter echoing across the kitchen, and the aroma of spices filling the air. As we all dove into the preparation, the excitement grew. Each person had their own unique way of layering their chalupa, from the perfectly seasoned meat to the fresh pico de gallo. Making Chalupas isn’t just about the food; it’s about bringing people together, sharing stories, and creating memories. The anticipation of taking that first bite, where the crunch of the shell meets the savory filling, is a moment I cherish every time. You can customize each chalupa to your liking, making them perfect for any occasion, whether it’s a casual dinner or a festive gathering.
Recipe Snapshot
40 mins
20 mins
20 mins
Medium
350 kcal
13 g
Gluten-Free
15 g
Skillet, Whisk, Wooden Spoon, Cutting Board, Mixing Bowl
Why Try This Chalupas
Versatility at Its Best
One of the reasons I adore Chalupas is their versatility. You can fill them with your favorite ingredients, from seasoned meats to vibrant vegetables. This adaptability allows everyone to create their own masterpiece, making it a hit at parties.
Crispy Perfection
The crispy shells are what truly make Chalupas special. When you fry them just right, they puff up beautifully, creating a crunchy texture that perfectly contrasts with the hearty fillings inside. It’s a delightful experience to bite into that crunch!
Fresh and Flavorful Toppings
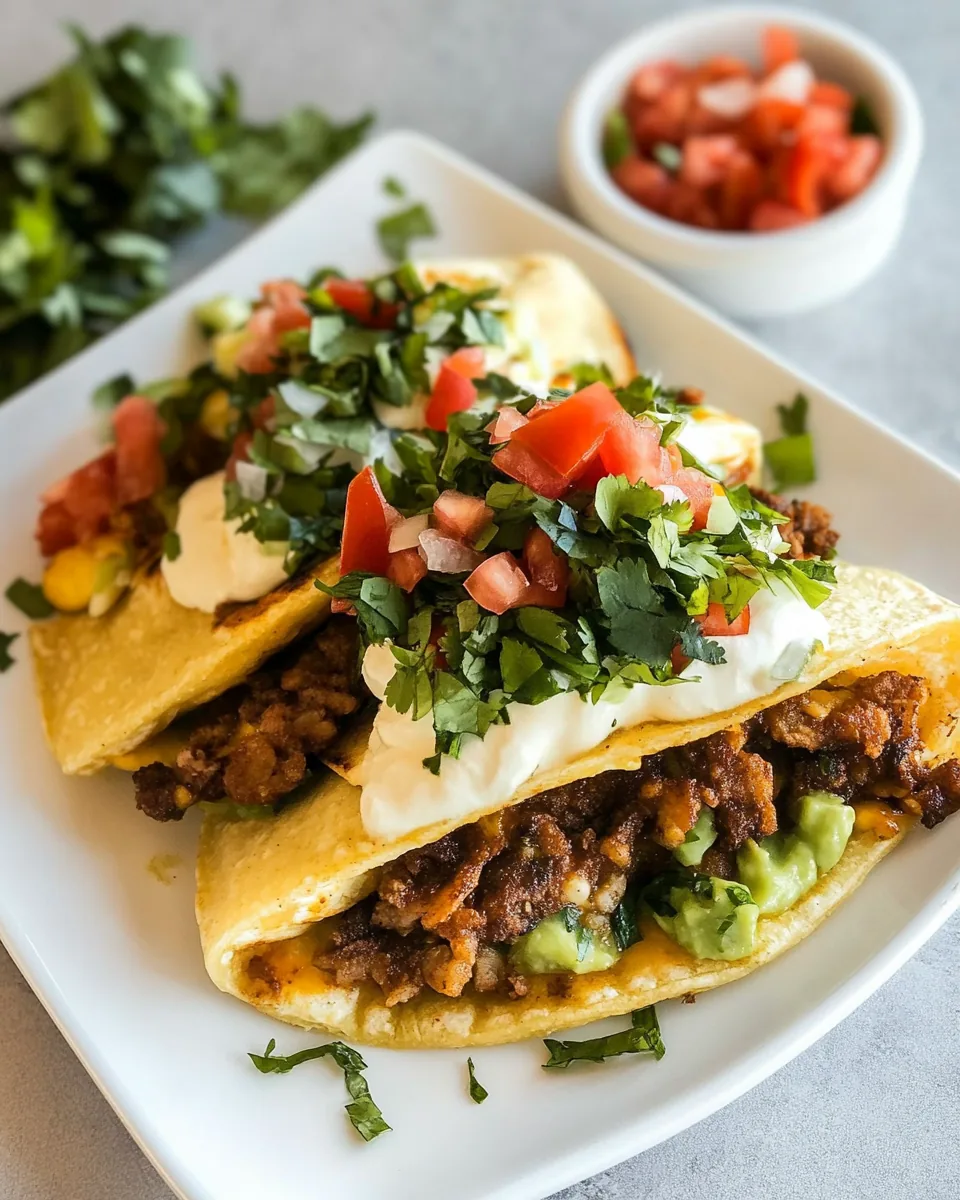
I love how toppings can elevate Chalupas. From fresh pico de gallo to creamy avocado, these add flavor and color, making each chalupa not just a meal but a work of art on a plate.
A Family Tradition
For many, including me, making Chalupas is a cherished family tradition. We gather in the kitchen and share laughter, stories, and, of course, the joy of cooking together. It’s a bonding experience that turns a simple meal into an unforgettable feast.
Perfect for Any Occasion
Whether it’s a casual weeknight dinner or a celebration with friends, Chalupas fit the bill. They’re easy to make and can serve as a fun interactive meal where everyone can participate in the assembly.
Quick and Easy to Prepare
Even on busy days, Chalupas are relatively quick to prepare. With just a handful of ingredients, you can whip them up in no time, ensuring that you can enjoy a delicious home-cooked meal even during hectic evenings.
Ingredients You’ll Need for Chalupas
When it comes to Chalupas, the ingredients are simple yet incredibly flavorful. Each component plays a vital role in achieving that perfect balance of taste and texture. The combination of fresh produce and hearty meats creates a filling that is both satisfying and delicious.
- 3 cups all-purpose flour: This is the base of our chalupa shells, providing the necessary structure and texture.
- 2 tablespoons baking powder: This ingredient helps the dough rise, ensuring our shells are light and crispy.
- 1 teaspoon salt: A key ingredient for flavor, enhancing every bite.
- 2 cups whole milk (warm): Adds moisture to the dough, making it soft and pliable.
- 2 cups vegetable oil (for frying): Essential for frying, creating that golden, crispy exterior.
- 1 pound ground beef: The heart of our filling, rich in flavor and satisfying.
- ½ white onion (finely diced): Adds sweetness and depth to the meat mixture.
- 2 tablespoons taco seasoning: A blend of spices that gives the meat a robust flavor.
- ¼ cup water: Helps to create a moist filling.
- Pico de Gallo: A fresh topping that brings brightness and crunch to each chalupa.
- Shredded cheddar cheese: Melts beautifully and adds richness.
- Diced avocado: Creamy and nutritious, it enhances the overall texture.
- Lettuce: For a crisp finish to the chalupa.
- Sour cream: Balances the flavors with its tangy creaminess.
Putting Together Chalupas
Creating Chalupas is a fun and engaging process. From mixing the dough to frying the shells, each step builds anticipation for the delicious meal ahead. Let’s dive into the detailed process of bringing these tasty treats to life!
- In the bowl of a stand mixer, add 3 cups all-purpose flour, 2 tablespoons baking powder, and 1 teaspoon salt. Whisk by hand to combine. The mixture should be dry and well-blended. This is the foundation of our chalupa shells, so make sure it’s well mixed!
- Pour half of the 2 cups of warm whole milk into the bowl, and using a dough hook, mix on medium speed while gradually adding the remaining milk until all has been incorporated. You’ll notice the dough starting to come together and become smooth. This step is crucial for achieving the right texture!
- Once everything has come together and the dough is smooth, remove it from the mixing bowl and place it in a lightly oiled bowl. Cover and let it rest for 45 minutes to an hour. This resting period allows the gluten to relax, making the dough easier to roll out.
- After the dough has rested, divide it into 2-inch rounds. Place the rounds on a floured surface and roll them out about ⅛ to ¼ inch thick. You can either roll them with a rolling pin or flatten and stretch them using your hands. This step requires a bit of care to ensure they are not too thick.
- In a skillet, heat 2 cups of vegetable oil over medium-high heat. When the oil is hot, begin frying the chalupa wraps one at a time by carefully placing them in the oil. Fry for about 2 to 3 minutes per side until they are golden brown and puffed up. Keep an eye on them to avoid burning!
- Once fried, remove the wraps from the oil and place them on a paper towel-lined plate to soak up any excess oil. This ensures they remain crispy and not greasy. Let them rest for a moment before filling.
- In a separate large skillet over medium-high heat, add 1 pound of ground beef along with ½ finely diced white onion. Cook the meat until it’s nearly completely browned, about 5 to 8 minutes. You want to ensure your beef is fully cooked and browned for the best flavor.
- Add in ¼ cup of water and 2 tablespoons of taco seasoning. Stir to coat all the meat entirely. Continue to cook until the beef is fully cooked and all the water has evaporated, creating a moist filling packed with flavor.
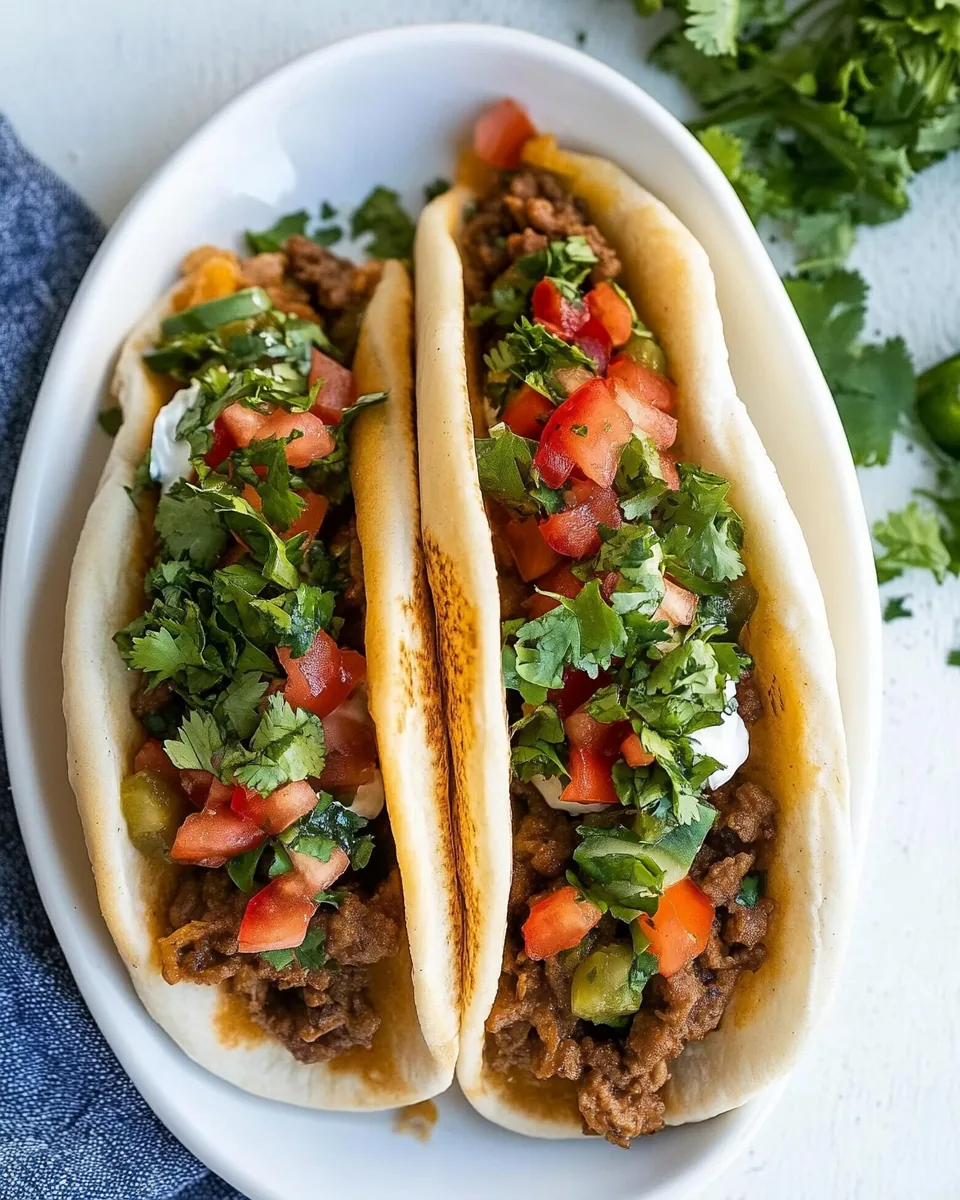
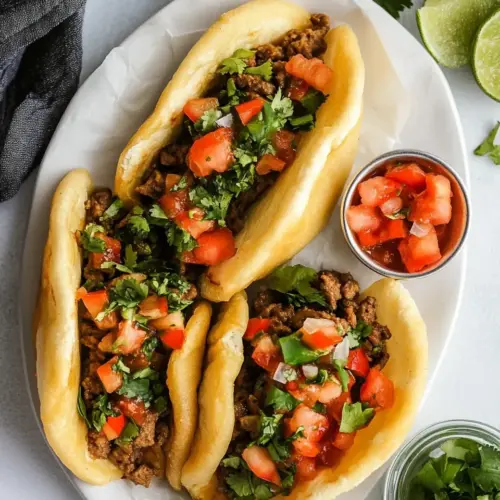
- Now comes the fun part! Fill each chalupa wrap with a generous serving of the seasoned meat, followed by Pico de Gallo, shredded cheddar cheese, diced avocado, lettuce, and sour cream. Each bite should be a delightful combination of flavors and textures!
- Serve fresh and enjoy your creation! The joy of making Chalupas lies in the customizable toppings, so encourage everyone to personalize their own.
Things Worth Knowing
- Resting the dough: Letting the dough rest is crucial as it allows the gluten to relax, making it easier to roll out and resulting in a tender shell.
- Oil temperature: Make sure the oil is hot enough before frying. If it’s too cold, the chalupas will absorb excess oil and become greasy.
- Frying technique: Frying one chalupa at a time allows you to keep an eye on it, ensuring it puffs up perfectly and doesn’t burn.
- Flavorful fillings: Don’t be afraid to mix up the fillings! Experiment with different meats, beans, or even vegetables to create unique variations of Chalupas.
Variations to Try
Exploring variations of Chalupas can be a delightful culinary adventure. Here are some creative spins you could try to make this dish even more exciting!
- Make it vegetarian: Substitute ground beef with black beans or lentils for a hearty, plant-based option that’s just as flavorful.
- Add spice: For those who enjoy a kick, consider adding jalapeños or a spicy salsa to the toppings for an extra layer of heat.
- Switch up the protein: Try using shredded chicken or turkey instead of ground beef for a different twist on the classic filling.
- Experiment with cheeses: Instead of cheddar, use Monterey Jack or crumbled queso fresco for a different flavor profile that complements the dish.
- Try different toppings: Consider toppings like pickled onions, sliced radishes, or a drizzle of chipotle sauce for added flavor and presentation.
- Make breakfast chalupas: Fill them with scrambled eggs, cheese, and avocado for a delicious twist that’s perfect for brunch.
- Storage: Leftover chalupa shells can be stored in an airtight container for up to three days. Reheat them in the oven for a few minutes to regain their crispiness.
Serving This Chalupas
Serving Chalupas is all about creating a fun and interactive experience. Here are some great ideas on how to present them:
- Perfect for parties: Set up a chalupa bar with all the ingredients laid out. Guests can create their own custom chalupas, making it a perfect casual dining experience.
- Family-style meals: Bring everyone together by serving chalupas on a large platter. It encourages sharing and conversation around the table.
- Occasional gatherings: These are ideal for game nights or casual gatherings, where everyone can enjoy assembling their personalized chalupa.
- Seasonal ingredients: During summer, consider using seasonal toppings like fresh corn salsa or diced peaches to enhance the flavor profile of your chalupas.
- Leftovers: If you have leftover fillings, they can be repurposed for tacos, burritos, or even salads, ensuring nothing goes to waste.
- Perfect pairings: Serve with sides like Mexican rice or refried beans to round out the meal and make it even more satisfying.
- Storage tips: Store any leftover ingredients separately in airtight containers in the fridge for up to three days to maintain freshness.
FAQ
Conclusion
In summary, Chalupas are a fantastic dish that combines the perfect crunch of fried shells with an array of delicious toppings. They bring joy and warmth to any gathering, making them a beloved favorite for many. I encourage you to try making these delightful creations at home; they’re not only fun to assemble but also promise to be a hit with family and friends. Dive into this culinary adventure and enjoy every bite of your homemade Chalupas!
Chalupas
Equipment
- Skillet
- Whisk
- Wooden Spoon
- Cutting Board
- Mixing Bowl
Ingredients
- 3 cups All-purpose flour
- 2 tablespoons Baking powder
- 1 teaspoon Salt
- 2 cups Whole milk warm
- 2 cups Vegetable oil for frying
- 1 pound Ground beef
- ½ White onion finely diced
- 2 tablespoons Taco seasoning
- ¼ cup Water
- Pico de Gallo
- Shredded cheddar cheese
- Diced avocado
- Lettuce
- Sour cream
Instructions
- In the bowl of a stand mixer, add 3 cups all-purpose flour, 2 tablespoons baking powder, and 1 teaspoon salt. Whisk by hand to combine.
- Pour half of the 2 cups whole milk into the bowl, and using a dough hook, mix the dough on medium speed while gradually adding more of the milk until it has all been added.
- Once everything has come together and the dough is smooth, remove it from the mixing bowl and place it in a lightly oiled bowl. Cover and let the dough rest for 45 minutes to an hour.
- When the dough has rested, divide it into 2-inch rounds. Place the rounds on a floured surface and roll them all out about ⅛ to ¼ inch thick.
- Add 2 cups vegetable oil to a skillet and heat it up over medium-high heat. When the oil is ready, begin frying the chalupa wraps one wrap at a time by carefully placing them in the oil and frying for 2-3 minutes per side.
- The wraps should puff up and be a golden brown color. When they are done, remove them from the oil and place them on a paper towel-lined plate to soak up any excess oil.
- Allow the wraps to rest a little before filling.
- Heat a large skillet over medium-high heat. Place 1 pound ground beef into the skillet with ½ white onion finely diced and cook the meat until it is nearly entirely browned, about 5-8 minutes.
- Add in the ¼ cup water and 2 tablespoons taco seasoning, stir to coat all the meat entirely. Continue to cook until the beef has fully cooked and all the water has evaporated.
- Fill the chalupa wraps with a generous serving of meat, Pico de Gallo, Shredded cheddar cheese, Diced avocado, Lettuce, and Sour cream. Serve fresh!
Notes
- Storage: Leftover chalupa shells can be stored in an airtight container for up to three days. Reheat them in the oven for a few minutes to regain their crispiness.
- Freezing: Chalupa shells can be frozen for up to two months. Wrap them tightly before freezing.
- Pairing: Serve with sides like Mexican rice or refried beans to round out the meal.
- Variations: Try different toppings and fillings to customize your chalupas.