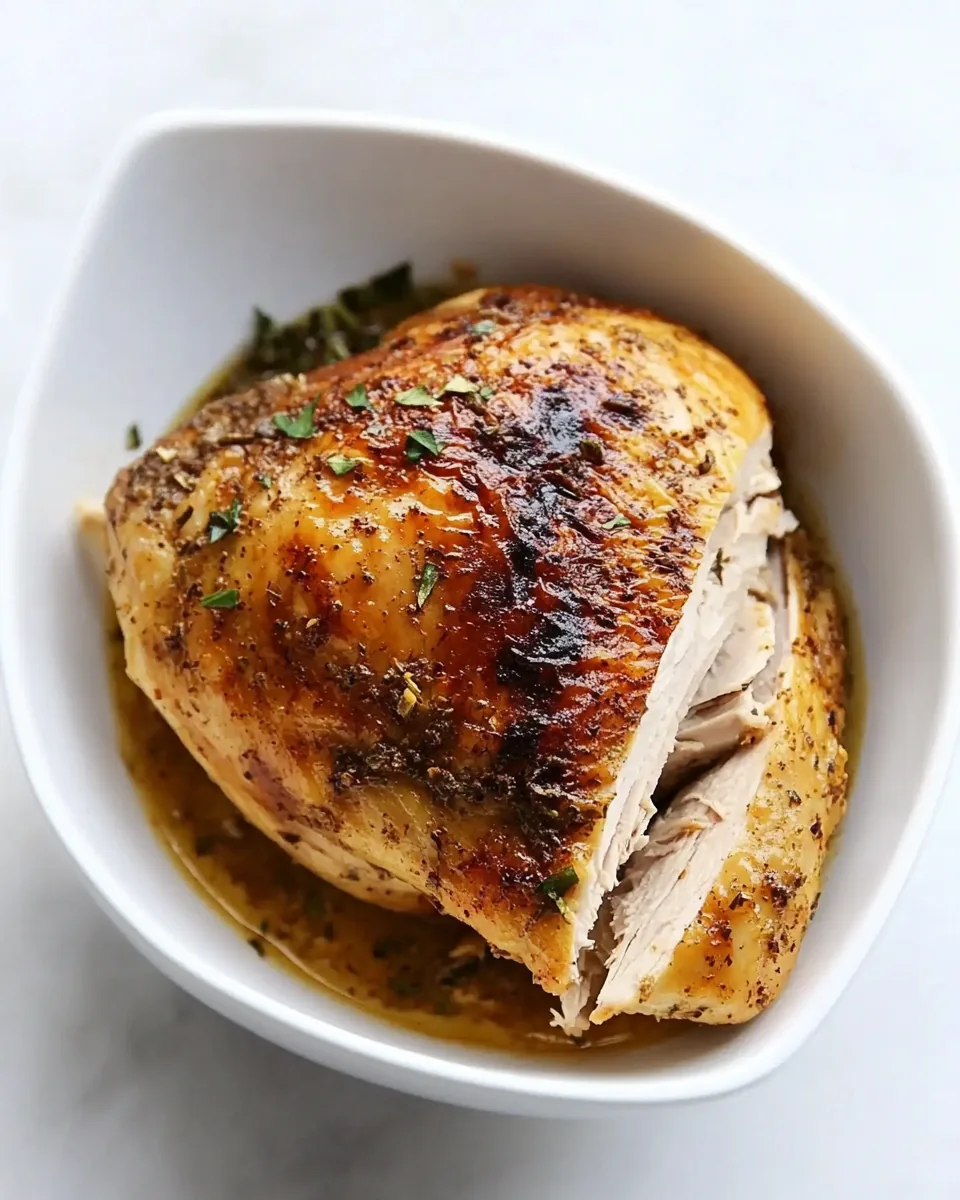
Pressure Cook Chicken
There’s something about the allure of a perfectly cooked chicken that draws me in every time. The recipe for Pressure Cook Chicken has become a staple in my kitchen, especially on those busy weeknights when I need a delicious meal without the fuss. I remember the first time I tried pressure cooking; it was a revelation! The chicken came out so tender and juicy, it was like a warm hug on a plate. I could hardly believe how quickly I could create a comforting dish that the whole family would love. With just a few ingredients and my trusty Instant Pot, I was able to whip up a meal that everyone at the table devoured, leaving nothing but empty plates and happy smiles.
As I gathered my ingredients, I felt a sense of excitement. Knowing that Pressure Cook Chicken would fill the house with aromatic spices made my heart flutter. It’s the kind of dish that brings everyone together, whether it’s a casual family dinner or a more festive gathering with friends. You’re not just cooking; you’re creating memories around the table. I can’t wait to share my tips and tricks with you on how to make this dish shine, so let’s dive in!
Recipe Snapshot
60 mins
0 mins
0 mins
Medium
300 kcal
46 g
Keto, Paleo, Whole30
12 g
Oven, Instant Pot, Chef’s Knife, Mixing Bowl, Wooden Spoon
What Makes This Pressure Cook Chicken Special
Quick Cooking Time
One of the first things I love about Pressure Cook Chicken is the speed. Traditional methods can often take over an hour, but with a pressure cooker, you can have perfectly cooked chicken in just a matter of minutes. This is a game changer for those of us with busy schedules!
Juicy and Tender Results
Cooking under pressure traps steam and moisture, which means your chicken will come out juicy and tender every time. I’ve tried other methods, but nothing quite compares to the succulent texture achieved through pressure cooking. It’s a culinary miracle!
Versatility
Another reason I adore this recipe is its versatility. You can easily customize the flavors based on what you have on hand or what you’re craving. Whether you prefer a simple seasoning of salt and pepper or a more complex flavor profile with herbs and spices, Pressure Cook Chicken can do it all.
Healthy Meal
This recipe also allows you to enjoy a hearty meal without feeling guilty. By using lean cuts of chicken, you’re serving up a dish that’s high in protein and low in fat, making it perfect for any diet. Plus, there’s no need for excess oils or fats when pressure cooking, which is a huge bonus!
Easy Clean-Up
Let’s be honest, the clean-up can sometimes be the worst part of cooking. But with Pressure Cook Chicken, you’ll only have one pot to wash! This makes it a favorite for weeknight dinners when I want to keep things simple.
Family Favorite
Last but not least, this recipe is a surefire hit with the family. Everyone loves tender chicken, and the flavors are easily adjustable to suit even the pickiest eaters. I can always count on this dish to bring smiles to the table.
Pressure Cook Chicken Shopping List
The ingredients for Pressure Cook Chicken are simple yet incredibly flavorful. Each component plays a vital role in creating a dish that’s both satisfying and wholesome. From the succulent chicken to the aromatic seasonings, they combine beautifully to elevate this meal.
- 1 cup of water: Essential for creating steam in the pressure cooker, ensuring the chicken stays moist and tender.
- ¾ teaspoon of fine sea salt: Enhances the flavor of the chicken and balances the spices.
- ¼ teaspoon of garlic powder: Adds a subtle depth of flavor that complements the chicken perfectly.
- ¼ teaspoon of paprika: Gives a hint of smokiness and a lovely color to the dish.
- ¼ teaspoon of ground black pepper: Adds a touch of heat and enhances the overall flavor profile.
- 1 ½ pounds of boneless skinless chicken breasts: The star of the show, providing lean protein and a juicy texture when cooked properly.
How to Make Pressure Cook Chicken
Making Pressure Cook Chicken is straightforward and can be done in just a few simple steps. You’ll love how quickly this dish comes together, making it a perfect option for a weeknight meal. Let’s get started!
Begin by pouring 1 cup of water into the bottom of your Instant Pot. This is crucial as it generates the steam needed for cooking. Next, place the handled trivet over the water. If you have the trivet that comes with your pressure cooker, it will work perfectly.
In a small bowl, mix together ¾ teaspoon of fine sea salt, ¼ teaspoon of garlic powder, ¼ teaspoon of paprika, and ¼ teaspoon of ground black pepper. This seasoning blend really brings out the flavor in the chicken.
Take the seasoned mixture and sprinkle half of it evenly over the top of the chicken breasts. Make sure to flip them over and season the other side too. You can adjust the seasoning to your taste—feel free to get creative!
Carefully arrange the seasoned chicken breasts on the trivet in a single layer. It’s important not to overcrowd them, as this will help them cook evenly.
Now, secure the lid on your Instant Pot and turn the steam release valve to the Sealing position. Select the Manual or Pressure Cook setting depending on your device. Set it to cook at high pressure for about 8 minutes. Remember, if your chicken breasts are thinner, you might need less time, while thicker ones could need up to 10 minutes.
When the cooking cycle is complete, allow the pressure to release naturally for about 5 minutes. After that, carefully turn the steam release valve to Venting to release any remaining pressure. You’ll know it’s safe to remove the lid when the floating valve drops.
To ensure the chicken is thoroughly cooked, use an instant-read thermometer to check the internal temperature. It should register at least 160ºF, but will likely reach 165ºF as it rests. If it’s below, simply secure the lid and cook for another minute or two before checking again.
Once the chicken is cooked, use tongs to transfer it to a cutting board. Let it rest for at least 5 minutes before slicing. This resting period allows the juices to redistribute, keeping the chicken succulent.
You can now use your perfectly cooked Pressure Cook Chicken right away, or store it in an airtight container in the fridge for 3 to 4 days. It’s wonderful in salads, wraps, or on its own with your favorite side!
Things Worth Knowing
- Cooking Time May Vary: Depending on the size and thickness of your chicken breasts, cooking times may need to be adjusted. Always check the internal temperature.
- Natural Pressure Release: Allowing the pressure to release naturally is crucial for maintaining the juiciness of the chicken.
- Don’t Overcrowd: Avoid stacking the chicken too high in the pot to ensure even cooking.
- Use Fresh Ingredients: Fresh spices and a good quality chicken can significantly enhance the overall flavor of your dish.
Making Adjustments
There are always ways to tweak a recipe to better suit your taste or specific dietary needs. Here are some adjustments you can make to enhance your Pressure Cook Chicken experience:
- Storage: Leftover chicken can be stored in an airtight container in the refrigerator for up to 4 days. Make sure it’s cooled before sealing it.
- Freezing: You can freeze leftovers. Just ensure they are well-sealed in a freezer bag, and they can last for up to 3 months.
- Pairing: Try serving this chicken with a side of roasted vegetables or a fresh salad for a balanced meal.
- Flavor Variations: Experiment with different spice blends like Italian herbs or even a touch of lemon zest for a refreshing twist.
- Cooking Frozen Chicken: If you’re in a hurry, you can cook frozen chicken by adding an extra few minutes to the cooking time. It requires about 12 minutes at high pressure.
Accompaniments for Pressure Cook Chicken
Serving Pressure Cook Chicken can be as versatile as the meal itself. Here are some delicious options to consider:
- Steamed Vegetables: Pair your chicken with steamed broccoli, carrots, or green beans for a nutritious side.
- Rice or Quinoa: These grains soak up the juices from the chicken, making each bite flavorful.
- Salads: A fresh garden salad with a vinaigrette dressing can add a nice crunch and balance to the meal.
- Pasta: Toss some cooked pasta with olive oil and herbs for a quick and satisfying side dish.
- Wraps: Use the chicken in wraps with your favorite greens and sauces for a satisfying lunch option.
- Soups: Shred the leftover chicken and add it to a hearty soup for a comforting dish.
- Occasions: This recipe is perfect for casual weeknight dinners, family gatherings, or even meal prep for the week ahead.
- Storage Tips: Remember to cool the chicken completely before refrigerating it, and use within 3-4 days for the best taste.
- Seasonal Pairings: In spring, consider fresh herbs, while in fall, add spices like cinnamon or nutmeg for a cozy twist.
FAQ
Conclusion
The Pressure Cook Chicken recipe encapsulates the essence of quick, delicious meals. With its juicy, tender flesh and the ease of cooking, it’s a staple that you can return to time and again. I encourage you to try this recipe tonight; it’s bound to become a favorite in your household, just as it has in mine. Enjoy the simplicity and the delightful flavors—happy cooking!
Pressure Cook Chicken
Equipment
- Oven
- Instant Pot
- Chef's Knife
- Mixing Bowl
- Wooden Spoon
Ingredients
- 1 cup water
- ¾ teaspoon fine sea salt
- ¼ teaspoon garlic powder
- ¼ teaspoon paprika
- ¼ teaspoon ground black pepper
- 1 ½ pounds boneless skinless chicken breasts roughly 8-10 ounces each/~1-inch thick
Instructions
- Begin by pouring 1 cup of water into the bottom of your Instant Pot. This is crucial as it generates the steam needed for cooking. Next, place the handled trivet over the water. If you have the trivet that comes with your pressure cooker, it will work perfectly.
- In a small bowl, mix together ¾ teaspoon of fine sea salt, ¼ teaspoon of garlic powder, ¼ teaspoon of paprika, and ¼ teaspoon of ground black pepper. This seasoning blend really brings out the flavor in the chicken.
- Take the seasoned mixture and sprinkle half of it evenly over the top of the chicken breasts. Make sure to flip them over and season the other side too. You can adjust the seasoning to your taste—feel free to get creative!
- Carefully arrange the seasoned chicken breasts on the trivet in a single layer. It’s important not to overcrowd them, as this will help them cook evenly.
- Now, secure the lid on your Instant Pot and turn the steam release valve to the Sealing position. Select the Manual or Pressure Cook setting depending on your device. Set it to cook at high pressure for about 8 minutes. Remember, if your chicken breasts are thinner, you might need less time, while thicker ones could need up to 10 minutes.
- When the cooking cycle is complete, allow the pressure to release naturally for about 5 minutes. After that, carefully turn the steam release valve to Venting to release any remaining pressure. You’ll know it’s safe to remove the lid when the floating valve drops.
- To ensure the chicken is thoroughly cooked, use an instant-read thermometer to check the internal temperature. It should register at least 160ºF, but will likely reach 165ºF as it rests. If it’s below, simply secure the lid and cook for another minute or two before checking again.
- Once the chicken is cooked, use tongs to transfer it to a cutting board. Let it rest for at least 5 minutes before slicing. This resting period allows the juices to redistribute, keeping the chicken succulent.
- You can now use your perfectly cooked Pressure Cook Chicken right away, or store it in an airtight container in the fridge for 3 to 4 days. It’s wonderful in salads, wraps, or on its own with your favorite side!
Notes
- Tip 1: Leftover chicken can be stored in an airtight container in the refrigerator for up to 4 days. Make sure it's cooled before sealing it.
- Tip 2: You can freeze leftovers. Just ensure they are well-sealed in a freezer bag, and they can last for up to 3 months.
- Tip 3: Try serving this chicken with a side of roasted vegetables or a fresh salad for a balanced meal.
- Tip 4: Experiment with different spice blends like Italian herbs or even a touch of lemon zest for a refreshing twist.
- Tip 5: If you're in a hurry, you can cook frozen chicken by adding an extra few minutes to the cooking time. It requires about 12 minutes at high pressure.