Molten Chocolate Lava Cake
There’s something magical about the moment you cut into a warm Molten Chocolate Lava Cake, isn’t there? The rich, gooey center flows out like a chocolate river, creating a delightful contrast with the soft exterior. I remember the first time I made this dessert; it was for a special dinner with friends. We laughed together, eagerly anticipating that first bite, and when we did, the room filled with oohs and aahs! It’s the kind of dessert that makes you feel like a gourmet chef without requiring hours in the kitchen. Over the years, I’ve perfected my technique, and now, I want to share the joy of this indulgent treat with you! Whether it’s a romantic dinner, a birthday celebration, or just a casual weeknight treat, the Molten Chocolate Lava Cake is sure to impress.
Recipe Snapshot
24 mins
15 mins
9 mins
Medium
380 kcal
6 g
Gluten-Free, Low FODMAP
22 g
Whisk, Oven, Saucepan, Chef’s Knife, Mixing Bowl, Wooden Spoon, Baking Sheet
What We Adore About This Molten Chocolate Lava Cake
Perfect for Any Occasion
One of the things I adore about the Molten Chocolate Lava Cake is its versatility. It fits the bill for any occasion—from fancy dinner parties to cozy family gatherings. You can serve it with a dollop of whipped cream or a scoop of ice cream, making it customizable for everyone’s tastes.
Impressive Presentation
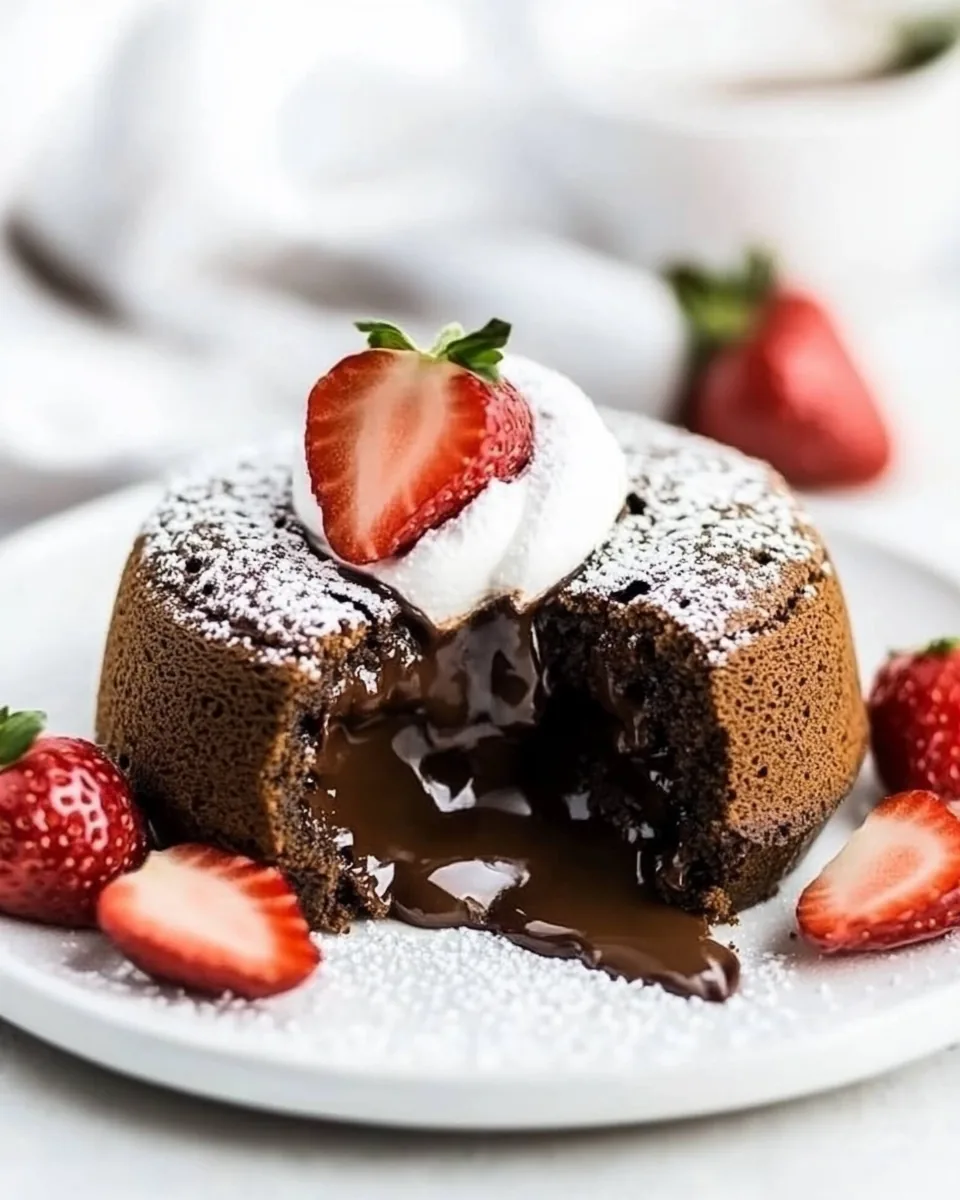
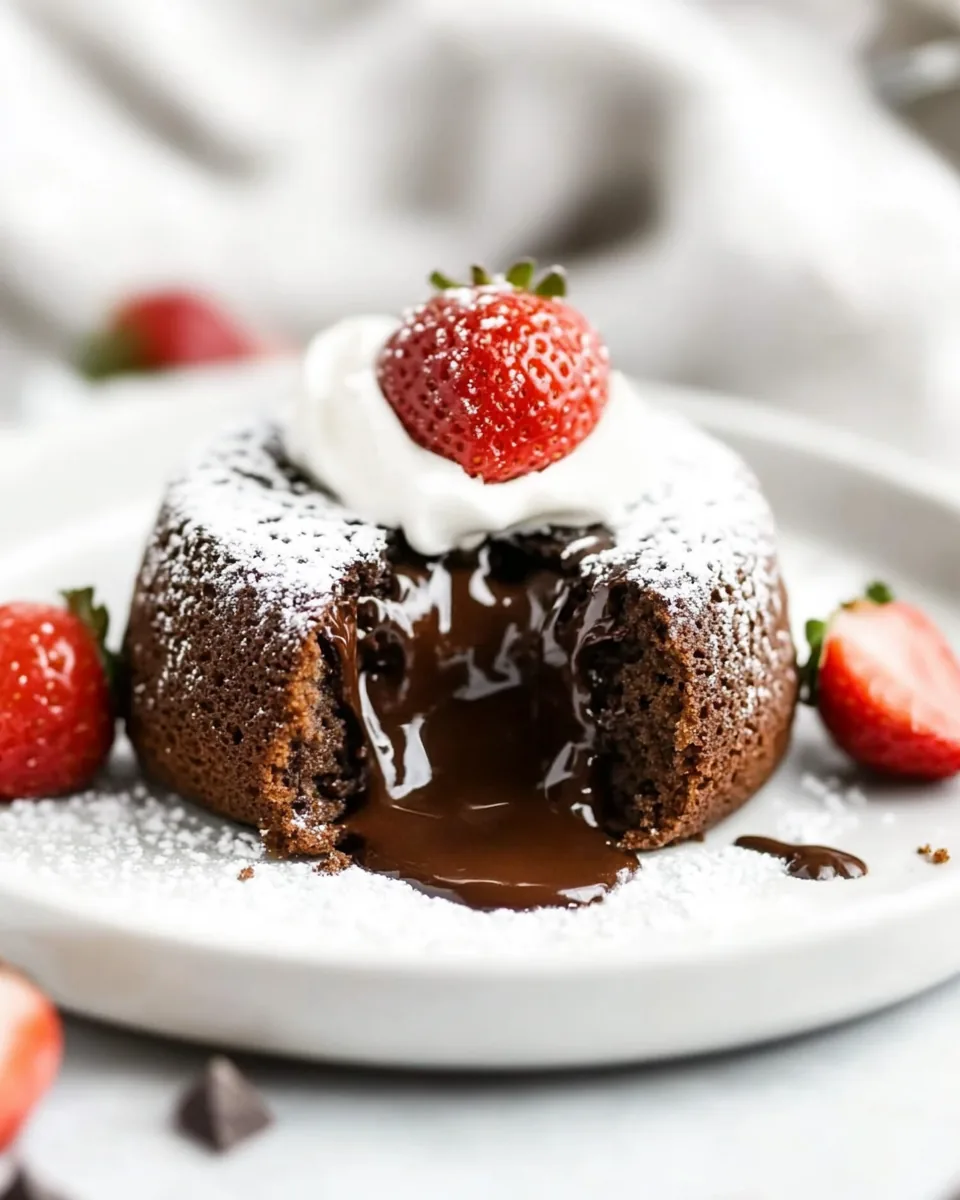
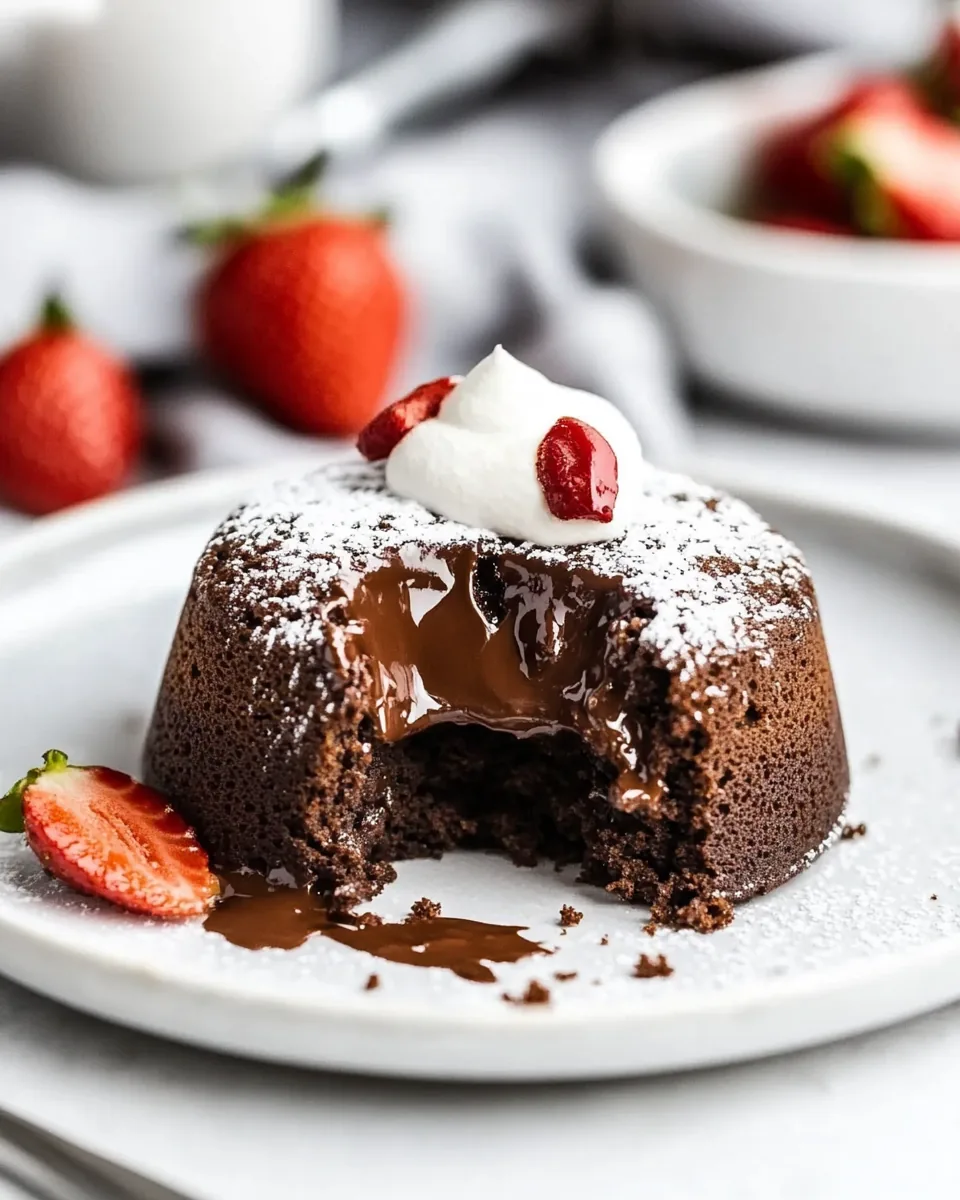
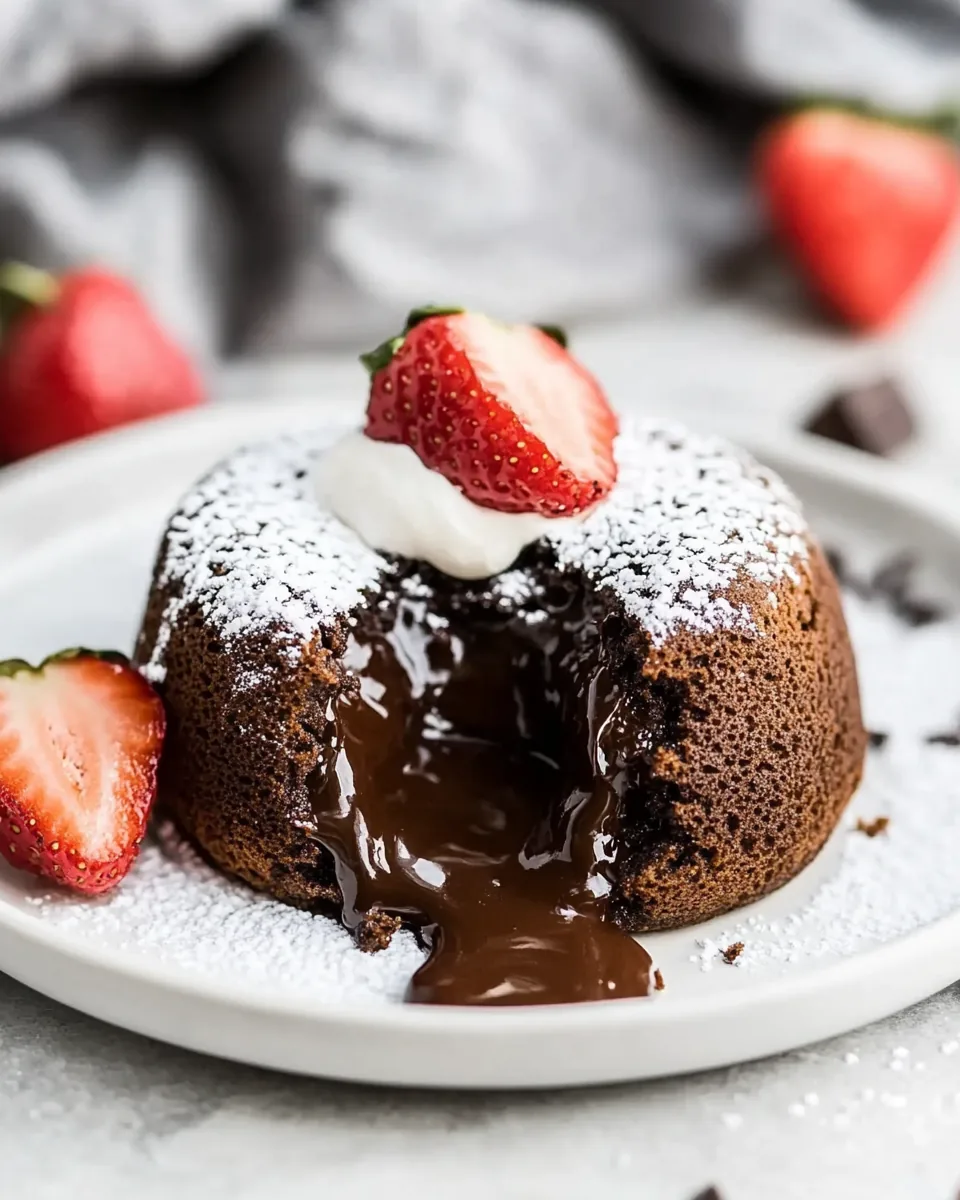
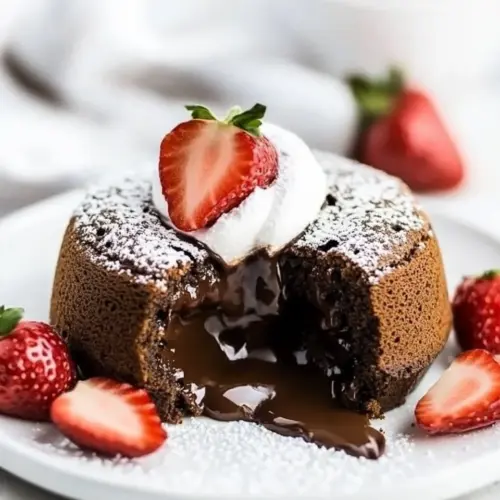
As you plate this dessert, the visual appeal is undeniable. The glossy chocolate exterior, the luscious flow of molten chocolate from the center, and a sprinkle of powdered sugar or fresh berries create a stunning dessert that looks like it took hours to prepare, but in reality, it’s quite simple.
Decadent Chocolate Flavor
The star of the show, of course, is the chocolate. Using high-quality, finely chopped bittersweet chocolate elevates this dessert to another level. The depth of flavor is rich and satisfying, making each bite an experience to savor.
Easy to Make Ahead
Another reason to love this recipe is the ability to prepare it ahead of time. You can make the batter a day or two in advance, store it in the fridge, and bake when you’re ready to serve. This makes entertaining so much easier, allowing you to enjoy your guests instead of being stuck in the kitchen.
Fun to Customize
With the Molten Chocolate Lava Cake, the options for customization are endless. You can add a hint of espresso for a mocha twist or a pinch of sea salt on top to enhance the chocolate flavor. Each variation brings a new dimension to this classic dessert, keeping it fresh and exciting.
Always a Crowd Pleaser
Lastly, it’s almost impossible to find someone who doesn’t love chocolate, especially in its molten form. This dessert never fails to please, making it the perfect choice for gatherings or even a simple weeknight treat.
Molten Chocolate Lava Cake Shopping List
Creating the perfect Molten Chocolate Lava Cake relies heavily on the quality of ingredients used. The combination of rich chocolate, eggs, and butter forms the base of this indulgent dessert, ensuring a luscious texture and deep flavor. Each component plays a vital role, harmonizing beautifully to create a show-stopping finish that everyone will love.
- 3 egg yolks – Provides richness and a smooth texture.
- 3 large eggs – Creates a stable structure for the cake.
- ½ cup sugar – Sweetens the batter and helps with browning.
- Pinch of sea salt – Enhances the sweetness and balances flavors.
- 8 ounces of finely chopped bittersweet chocolate – The key ingredient for that molten center.
- 10 tablespoons unsalted butter, cut up – Adds creaminess and richness.
- ¼ cup all-purpose flour – Gives structure while keeping it soft.
- Whipped cream (optional garnish) – Adds lightness and a creamy contrast.
- Chocolate sauce (optional garnish) – For an extra chocolatey touch.
Directions for Molten Chocolate Lava Cake
Making the Molten Chocolate Lava Cake is a delightful experience that fills your kitchen with the irresistible aroma of chocolate. Let’s dive into the steps that will lead you to your very own chocolate masterpiece. Follow these instructions carefully for a dessert that’s sure to impress!
- Preheat the oven to 450°. This high temperature is crucial for achieving that perfect molten center.
- In a stand mixer with the whisk attachment, whisk together the 3 large eggs, ½ cup sugar, a pinch of sea salt, and 1 teaspoon vanilla on high speed. You want the mixture to turn white and become light and fluffy, which takes about 3 to 4 minutes. Once this is achieved, set it aside.
- Next, prepare a double boiler. Bring a medium-size pot filled a third of the way with water to a low simmer over low-medium heat. In a metal bowl, combine the 10 tablespoons unsalted butter and 8 ounces of finely chopped bittersweet chocolate. Place this bowl over the simmering pot, stirring constantly with a rubber spatula until completely melted and smooth. This method prevents the chocolate from burning.
- Once melted, pour about half a cup of the chocolate mixture into the whisked egg and sugar mixture, folding gently with a rubber spatula for about 20 to 30 seconds to temper the eggs. This step is crucial for incorporating the chocolate without scrambling the eggs.
- Next, add the remaining melted chocolate to the egg mixture and fold until fully combined. Be gentle to maintain the airy texture.
- Now, it’s time to fold in the ¼ cup all-purpose flour. Gently mix until it’s just incorporated—don’t overmix, as you want the final product to be tender and soft.
- At this stage, you can either transfer the batter into buttered and floured ramekins or spread it across a 13×9 casserole dish. If using ramekins, butter and flour six 8-ounce ramekins or six 3-inch diameter by 4-inch tall baking cylinders, and place them on a cookie sheet lined with parchment paper.
- Scoop out the batter and evenly distribute it across the prepared ramekins or cylinders. Ensure that each is filled about three-quarters full to allow for rising while baking.
- Bake in the preheated oven for exactly 9 minutes. Timing is everything for achieving that gooey center!
- Once done, allow them to cool for a minute. If using ramekins, carefully invert each on a plate for about 10 seconds before lifting off. If using cylinders, gently pull them up using a spatula to transfer them to a plate.
- For serving, garnish with optional whipped cream, chocolate sauce, strawberries, or even ice cream. A light dusting of cocoa powder or powdered sugar adds a charming finish. Then, serve immediately and watch the smiles unfold!
Things Worth Knowing
- Egg Tempering: Always temper the eggs by adding warm chocolate gradually to avoid scrambling.
- Baking Time: Be precise with baking; even a minute too long can turn the molten center into a cake.
- Cooling Time: Allowing the cakes to cool slightly before inverting prevents them from breaking.
- Quality Ingredients: Using high-quality chocolate makes a significant difference in flavor and texture.
Expert Tips about Molten Chocolate Lava Cake
When it comes to perfecting your Molten Chocolate Lava Cake, there are a few expert tips that can help elevate your dish. I’ve gathered some essential advice that will ensure your cakes are a hit every time.
- Make-Ahead: The batter can be covered and stored in the refrigerator for up to 2 days before baking. This is especially helpful for entertaining.
- Storage: Cover and keep the cakes in the refrigerator for up to 3 days. Reheat them gently in an oven to restore their gooey center.
- Freezing: While you can freeze these cakes, the soft inside will harden once reheated. For best results, cover and freeze for up to 3 months.
- Doubling the Recipe: To make extra-large lava cakes, simply double the batter amount in each ramekin or cylinder, which could reduce the number of servings from 6 to 3.
- Flavor Enhancements: Consider adding a splash of espresso or a hint of chili powder for a unique twist on the classic flavor.
- Chocolate Quality: Always opt for good baking chocolate for melting instead of chocolate chips, which do not melt as well.
Serving This Molten Chocolate Lava Cake
Serving the Molten Chocolate Lava Cake is just as fun as making it. Here are some delightful ways to present and enjoy this decadent dessert.
- Ideal Pairings: Serve your cakes with a generous scoop of vanilla ice cream or rich whipped cream. This combination adds a refreshing contrast to the warm chocolate.
- Garnishes: Fresh berries, a drizzle of chocolate sauce, or a dusting of powdered sugar can enhance both presentation and flavor.
- Occasion Suitability: Whether it’s a birthday, anniversary, or a cozy family dinner, this dessert is perfect for any occasion.
- Seasonal Serving: In the winter months, consider serving with a spiced hot chocolate or a warm drink for added comfort.
- Storage Tips: If you have leftovers, store them covered in the fridge. To reheat, place on a cookie sheet lined with parchment paper and bake at 350° for a few minutes.
- Presentation: For a more fancy presentation, consider serving each lava cake on a dessert plate with a side of fresh mint.
FAQ
Conclusion
The Molten Chocolate Lava Cake is truly a showstopper that combines simplicity with elegance. With its rich, molten center and soft edges, it’s a dessert that never fails to impress. I encourage you to give it a try—you won’t regret it! This recipe is bound to become a favorite in your household, bringing joy and indulgence to your dinner table.
Molten Chocolate Lava Cake
Equipment
- Whisk
- Oven
- Saucepan
- Chef's Knife
- Mixing Bowl
- Wooden Spoon
- Baking Sheet
Ingredients
- 3 egg yolks Egg Yolks
- 3 large eggs Large Eggs
- ½ cup Sugar
- pinch Sea Salt
- 1 teaspoon Vanilla Extract
- 8 ounces Bittersweet Chocolate
- 10 tablespoons Unsalted Butter
- ¼ cup All-Purpose Flour
- Whipped Cream Optional garnish
- Chocolate Sauce Optional garnish
Instructions
- Preheat the oven to 450°.
- In a stand mixer with the whisk attachment on high speed, whisk together the 3 large eggs, ½ cup sugar, pinch of sea salt, and 1 teaspoon vanilla until it turns white and is light and fluffy, about 3 to 4 minutes. Set aside.
- Bring a medium-sized pot a third filled with water to a low simmer over low-medium heat. Add the 10 tablespoons unsalted butter and 8 ounces of finely chopped bittersweet chocolate in a metal bowl and place it over the pot. Stir constantly using a rubber spatula until completely melted and smooth.
- Pour about a ½ cup of the melted chocolate into the whisked egg and sugar mixture and fold together using a rubber spatula for 20 to 30 seconds to temper the eggs. Pour in the remaining chocolate and fold until completely mixed in.
- Fold in the ¼ cup all-purpose flour using a rubber spatula until mixed in.
- Transfer the batter into buttered and floured ramekins or spread it out on a 13×9 casserole dish. Place in the refrigerator until completely cool, about 30 to 45 minutes.
- Butter and flour 6 8-ounce ramekins or 6 cylinders, and place on a cookie sheet tray lined with parchment paper.
- Scoop out the batter and evenly distribute it across the ramekins or cylinders.
- Bake in the oven at 450° for 9 minutes on the dot.
- If using a ramekin, invert on a plate for 10 seconds and remove, or pull the cylinder up and use a spatula to transfer it to a plate.
- Garnish with optional whipped cream, chocolate sauce, strawberries, or ice cream, and serve.
Notes
- Make-Ahead: The batter can stay covered in the refrigerator for up to 2 days before being transferred to the buttered and floured ramekin and baked.
- How to Store: Cover and keep in the refrigerator for up to 3 days. You can freeze this, but the soft inside will harden once reheated. Cover and freeze for up to 3 months. Thaw in the refrigerator before reheating.
- How to Reheat: Place on a cookie sheet tray lined with parchment paper and bake it in the oven at 350° for 3 to 4 minutes.
- Doubling the Recipe: For extra-large lava cakes, simply double the amount of batter into the cylinders or ramekins.
- Flavor Enhancements: Consider adding a splash of espresso to enhance the chocolate flavor.
- Chocolate Quality: It is best to use good baking chocolate for melting instead of chocolate chips.